Category: Editor Tips

  • How To Get Your Cookbook Ready To Print

    How To Get Your Cookbook Ready To Print

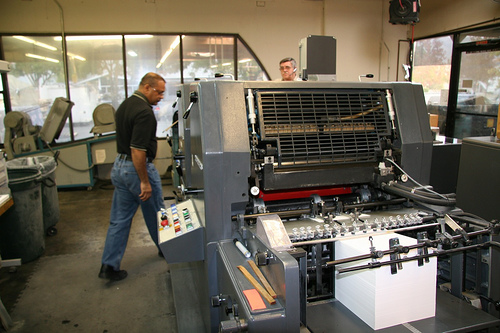
    So you’ve collected your recipes, entered them in the cookbook, written your introduction and made all of you are design selections. Now you’re ready to print your cookbook.

    Lock Your Cookbook

    The first step in getting ready to publish a cookbook is to go to the publishing center in your editors account and lock your cookbook. There are three levels of luck in your cookbook:

    • Level one locks contributors for making changes. Once you start editing, you don’t want people adding new recipes or changing things that you’ve already edited. Checking this box prevents this.
    • Level two stops all changes by contributors.
    • Level three locks the cookbook completely and now you’re ready to submit to print.

    Once you locked your cookbook from contributor changes now is the time to read everything and check for typos

    Proofread your introduction

    Print out your narrative and give it to someone else to read. Often it is difficult to proofread your own work and allowing someone else to do it will find things that you would mess.

    Review all of the recipes

    Look for ingredients that are listed but not included in the directions or ingredients in the indirect and directions that are not included in the ingredients list.

    Make sure the directions seem complete.

    Check the layout

    Go to the box that says preview your cookbook in the black navigation bar in your editors account. Here you can either download a PDF of your cookbook or use our 3-D preview tool.

    Here you are checking for how pages break. If you find a page with only a word or two, maybe you can shorten version directions to make that recipe just a little shorter.

    The changes you make here will determine how your cookbook will be printed. However it looks in your final PDF preview, is how it will look when your cookbook is printed.

    Place your order
    Now that your cookbook looks exactly the way you want it, it’s time to order.

    On the ordering page you’ll see the number of recipes you’ve entered, and the number of pages in your cookbook. This is what will determine the cost of your cookbook along with the number of color photos.

    Remember that the more copies of your cookbook you are order, the less the price per book will be. This is because the set up charges are spread out over more copies of the cookbook.

    Once you’ve calculated your price, you need to enter your shipping address and click submit. This places your order with our publishing system. You then will be directed to a link that will allow you to pay online or you can send a check drawn on a US bank for payment.

    One frequent question is can cookbooks be sent to more than one address. Currently you would need to place an order for each delivery address.

    Once you’ve placed your order you can expect your cookbooks to arrive in 2 to 3 weeks. However during our busiest times of the year, it could take longer. if you want your cookbooks in time for Christmas, the deadline for ordering is November 30, however do not wait until the last minute if you can.


    Bill Rice is founder and Co-Publisher of the Great Family Cookbook Project, a website that helps families and individuals collect and share food memories through customized printed cookbooks filled with treasured recipes. Follow us on Facebook and Pinterest!

     

  • Co-Editors Now Available on Family Cookbook Project

    Co-Editors Now Available on Family Cookbook Project

    Face it, sometimes we all need a little help.

    As a cookbook editor, you always had the ability to invite other family members to contribute recipes, so you did not need to personally enter all those recipes into the system (this is also a great family project). However, contributors could only edit their own recipes and nothing else.

    Until now.

    In the editor’s Communication Center, any contributor can now be upgraded to a co-admin for the cookbook. This gives them the ability to edit all of the recipes within the cookbook, not just their own. This can be a huge time saver when getting a cookbook ready to print. Having co-editors make the first edits to a recipe will allow the editor to focus on the design elements of the cookbook and the overall project.

    It is also important to note that the primary editor still has ultimate responsibility for the design and content of the cookbook so while family members can help, ultimately it is the editor that needs to sign-off that the cookbook is correct and ready for printing.

    One thing to remember, “Too many cooks spoil the soup.”  So be very careful when promoting someone to co-editor.  They can adjust settings and recipes just like the main Editor.  So keep communicating!  And once the editing work is done, you can easily change a co-editor back to normal contributor.


    Bill Rice is founder and Co-Publisher of the Great Family Cookbook Project, a website that helps families and individuals collect and share food memories through customized printed cookbooks filled with treasured recipes. Follow us on Facebook and Pinterest!
  • How Many Recipes Should My Cookbook Have?

    How Many Recipes Should My Cookbook Have?

    One question every cookbook editor wants to know is how many recipes should my cookbook have? Too many and printing costs are higher, not enough and the cookbook is not as valuable. What’s a family cookbook editor to do?

    Looking at the thousands of cookbooks we have printed over the past decade, there is no real number of recipes that make up a good cookbook – you have what you have. We have printed cookbooks with just 15 great recipes and as many as 1200! However, that 1200 recipe book was 750 pages – HUGE!

    The average size seems to be around 150 recipes and that is why we use that number in our cost calculator.

    When a great cookbook has less recipes, often the editor includes other content to augment the food offerings. Photos of each dish, a section of family photos, a family tree or family stories about people remembered can really add value to a smaller cookbook.

    Larger cookbooks can be impressive simply by the number of recipes it contains. However, since printing cost is directly related to the number of pages that need to be printed, it is important to be mindful of your design choices when choosing your layout options.

    At the end of the day, your cookbook is exactly that – your cookbook. You need to balance the number and quality of the recipes included with the needs of your family.


    Bill Rice is founder and Co-Publisher of the Great Family Cookbook Project, a website that helps families and individuals collect and share food memories through customized printed cookbooks filled with treasured recipes. Follow us on Facebook and Pinterest!
     

  • New Recipe Symbols Available

    New Recipe Symbols Available

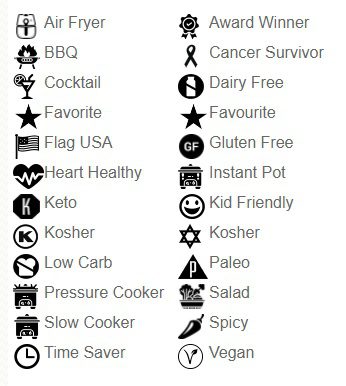
    Back in 2019, Family Cookbook Project introduced add special icons to recipe titles to call special attention to them in a cookbook table of contents. Recipe symbols were a big success and many contributors started using them. Many people also asked us to include additional symbols and that is what we have done. We have added 9 new symbols that are now available:

    • Paleo
    • Vegan
    • Keto
    • Dairy-Free
    • Pressure Cooker
    • Air Fryer
    • Updated Kosher
    • Instant Pot
    • Low Carb

    As the editor you can add these recipe symbols to any recipe right after you have entered the recipe title on the “Add a recipe” page. There is a drop-down menu to select the symbol to be included in that recipe.

    For recipes already added to your cookbook, you can edit that recipe and add a symbol of your choice.

    A key of icons and their meanings used in your cookbook will also appear on the bottom of your table of contents page. If you don’t include a specific symbol, it will not be included in your icon key list.

    This new feature will be available on both the FamilyCookbookProject.com site as well as the CookbookFundraiser.com site.

    Please let us know how you like the new recipe symbols.


    Bill Rice is the Co-Publisher at Family Cookbook Project which helps individuals and fundraising groups create cherished personalized cookbooks using the power of the Internet. Follow us on Facebook and Pinterest.

  • How to Take Great Food Photos for Your Recipes

    How to Take Great Food Photos for Your Recipes

    They say a picture is worth a thousand words and with recipes that is especially true.

    It’s wonderful to read a list of ingredients and see the potential in a recipe, but to look at the finished product can make your mouth water!

    Family Cookbook Project highly recommends adding a photo to every recipe you can in your online cookbook. It helps people to see what to expect when they follow your recipe and gives them a standard to meet when comparing their finished dish to the original.

    With the advent of digital camera built into cell phones, you don’t have to be a professional photographer to take good food photos.

    Here are some pointers to help improve your recipe photos:

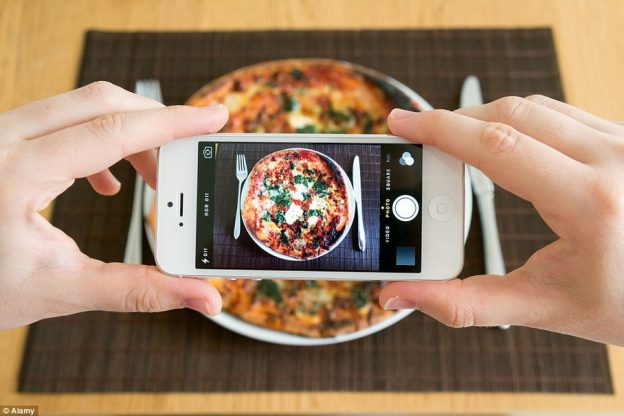
    Use Natural Light – Make sure that the light is right – shoot the food either next to a bright window or under a pendant light in the restaurant. Don’t use your camera’s flash! Set your dish near a window and turn off any artificial lights that might be on nearby. Try to photograph with the light at your back or to the side of a dish, so that the shadows are to the side or behind it. 

    Hold Still – Taking photos inside, even with ample natural light, often means you have to hold the camera very still to keep it from registering hand shake. If you have a tripod, that’s ideal. If you don’t, you can duplicate the tripod effect by resting your elbows on the table or counter and using them to stabilize the camera. Moving the camera when taking a photo will only lead to blurry unusable photos. 

    Get close to the food! – Don’t stand back three feet and get the food with the stove, the dirty dishes, and all the condiments around it. Move in and get up close and personal, and let the pan…or the plate…or the cutting board fill the frame.  

    Stage the shot – The food isn’t the only thing in the photo. Using plates, silverware and linens in complementary colors can help your dish come alive. Shoot food on a beautiful plate or on a table with texture and character. The more appetizing the ingredients, the better your photo will be. Plates that contain colored vegetables and/or meat, preferably in light-colored sauces, are often the most appealing to the eye in photos. Also Don’t be Afraid of a mess. A few crumbs or a smear of dressing can be beautiful, if you let them. 

    Focus on the food –  If you are using a DSLR, stop down your lens to f/1.8 or f/2.0 that limits your depth of field to one part of the image only, blurring out everything around the subject, simulating a shot taken with a macro lens. If you are using an iPhone, there are apps, such as Camera+ or VSCO Cam, that will create the same effect. Remember, you want the food to be the main focus, not the background. 

    Try different angles –  Get up over the food and shoot straight down on it. When shooting overheads, if appropriate, try filling up the frame with what’s already on the table such as cups, wine glasses, utensils and moving hands. You can also  think in three dimensions, You might not usually serve brownies piled in a vertical column, but stacking any flat food, like pancakes, cookies, or even onion rings, is a great way to show off texture and make the photo more appealing. You can also add dimension to your food photos by showing the dish right after the that first bite is taken, or the second and third. These are little details that make a viewer feel like they’ve sat down and are enjoying the meal. 

    Get Close to Ugly Foods  – Some foods, no matter how good they taste, just don’t make good photos. But the closer you get to your subject, the more the visual story becomes about texture and color, rather than pure mouth-watering beauty.Avoid foods that are white and gloppy, such as congealed gravy on white pasty mashed potatoes. 

    Size Matters –  Make sure your camera settings are set for a good sized photo. Small photos look blurry when they are enlarged on line. A photo viewed online only has to be 72 dpi (dots per inch, the measure for quality), but if you are going to print your photo, you want it to be at least 300 dpi. 600 pixels wide (a measurement for size) is a good target for minimum photo size.

    Using other’s photos – It is important to note that the Internet makes it easy to find photos of recipes already taken. While this might be much easier, the photo still is the property of whomever holds the rights. Don’t always assume that because a photo is on the Internet you can simply use it for your recipe. Make sure you ask permission from the owner before you use it.


    Bill Rice takes more than 20,000 photos a year and is Co-Publisher of the Great Family Cookbook Project Project, a website that helps families and individuals collect and share food memories. Follow us on Facebook and Pinterest!

  • A fun Idea For Your Family Reunion Cookbook

    A fun Idea For Your Family Reunion Cookbook


    Family reunions are a great opportunity to create a family cookbook and get lots of people to participate. A family reunion cookbook motivates family members to communicate before the event and helps get everyone excited!

    We have hundred’s of family reunion cookbooks under our belts and we’d love to work on yours. Our site is perfect for communicating with larger groups of family members via email and keeping everyone motivated.

    Here is a fun idea for your Family Reunion Cookbook – a family directory section!

    Here’s how to do it:

    • Start by creating a custom recipe category entitled “Family Members”.
    • Next, add your family member’s names and email addresses into the invitation tool so you can invite them to participate and directly add recipes and bios to your cookbook account.
    • Next ask everyone to use the add a recipe tool and have them enter their name as the title of the recipe, Their photo as the recipe photo and their bio as the personal notes. They can leave everything else blank and all of the bios will be together in one section in the back of the book.

    You might want to also include a family tree so everyone knows how each other is related.

    The other way to create a family directory would be to have everyone email you their info and photo and you create custom pages for each one.

    Family members can even pick up the cookbooks at the reunion!


    Bill Rice is founder and Co-Publisher of the Great Family Cookbook Project, a website that helps families and individuals collect and share food memories through customized printed cookbooks filled with treasured recipes. Follow us on Facebook and Pinterest!
  • Recipe Layout Tool Upgrade on FamilyCookbookProject.com

    Recipe Layout Tool Upgrade on FamilyCookbookProject.com

    Family Cookbook Project is pleased to announce a major upgrade to the Recipe Layout Tool within FamilyCookbookProject.com

    The recipe layout is what formats the design of the recipes within the cookbook. When you add a recipe, you are only adding the data. It is the recipe format tool that takes that data and organizes it into a well-designed recipe consistent throughout the cookbook.

    The recipe layout controls the size and font of the recipe title, ingredients, directions and comments. It can also allow for one or two columns of text in the ingredients to save space.

    Finally, it determines where any photo will be displayed if there is one attached to the recipe.

    Here are some of the major changes:

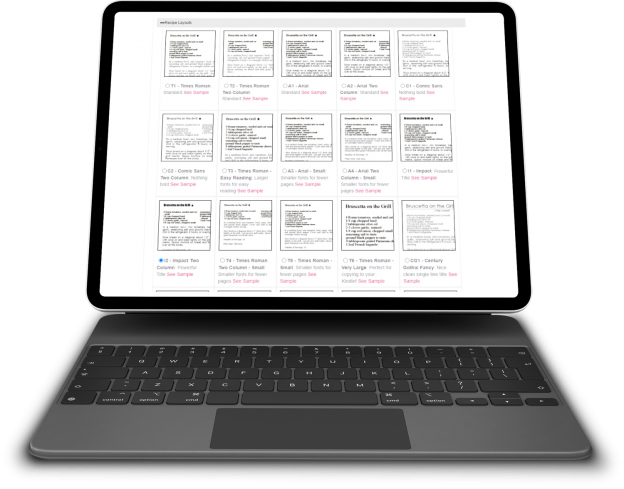
    Side by side viewing – The first thing you will notice when you select the Recipe Layout tool is the ability to see all of the options as thumbnails without having to click a pop-up link for each. The options are now laid out like the covers and dividers allowing you to see them all side by side. You can click on the thumbnail for a pop-up window full-sized view.

    Recipe Level Layout – We have always forced all of the recipes to be in the same layout for consistency within the cookbook. However sometimes you need the text just a little smaller so it will fit on a page. Or a recipe is very special and you want to highlight it. Now you can. Each recipe edit page now contains an option to change the layout for that one recipe. We recommend using this sparingly. We also offer a global reset button to get all of the recipes reset back to the original layout if needed. You can also choose the recipe photo position uniquely for any recipe – which also has a reset option incase things get to “messy”.

    Custom Layout Import – Custom Recipe Layout can import settings from any static layout we offer as a starting point and then you can change as aspect of that layout to fit your needs.

    Photo Positions – We have increased the number of places a photo can appear on a recipe than just above the title and at the end of the recipe. There are four new positions for photos:  After Title/before Ingredients; Top of recipe fade out (1 pic only); Left or Right side of Ingredients. The Recipe Layout Tool also shows you these options side-by-side. You can select your recipe photo position like the layouts above. You’ll see them listed with thumbnail views. Simply click the button to use one and save.


    Bill Rice is founder and Co-Publisher of the Great Family Cookbook Project, a website that helps families and individuals collect and share food memories through customized printed cookbooks filled with treasured recipes. Follow us on Facebook and Pinterest!
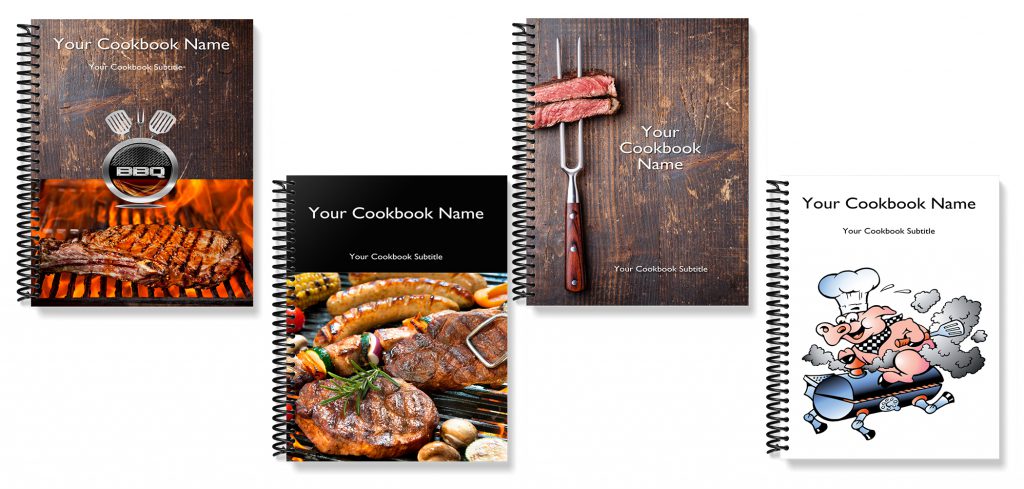
  • Introducing New BBQ Cookbook Covers

    Introducing New BBQ Cookbook Covers

    Both Chip and I, the two founders of Family CookbookProject.com, love to grill, smoke and BBQ. Cooking meat, seafood and veggies outside is kind of a guy thing (even though I know women that are excellent pitmasters!).

    I was working on a new cookbook for my family featuring my favorite BBQ recipes and I did not find a cover that I really liked ever though we have a great library of cookbook covers to choose from.

    So I had our professional designer come up with a series of cookbook covers that I loved so much that we are making them available to all of our cookbook editors to use.

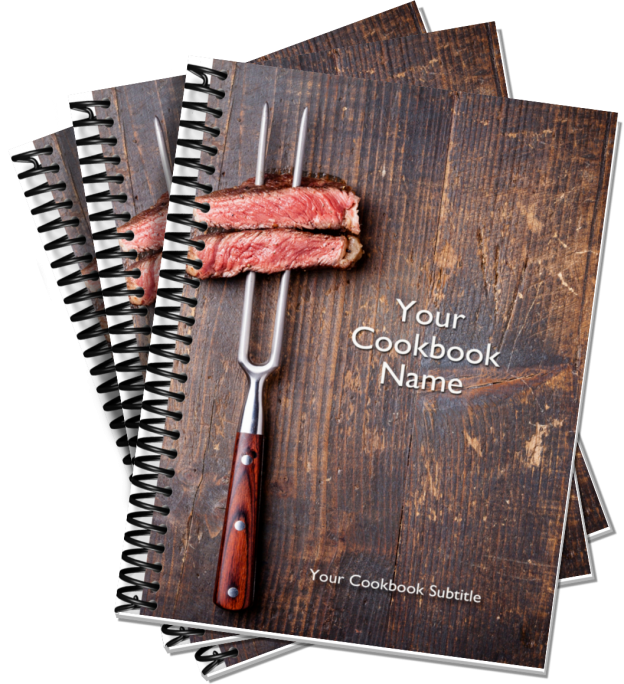
    Here are the new BBQ Cookbook covers:

    If you are interested in BBQ and great BBQ recipes, be sure to join our Facebook BBQ Recipe group.

    On Pinterest, we have two boards Food Guys Love and Family BBQ and Grilling Recipes to check out and follow.

    Finally, here is a fun video we created for the BBQ community.


    Bill Rice is founder and Co-Publisher of the Great Family Cookbook Project, a website that helps families and individuals collect and share food memories through customized printed cookbooks filled with treasured recipes. Follow us on Facebook and Pinterest!


  • 6 Way to Enter Your Recipes into a Family Cookbook

    6 Way to Enter Your Recipes into a Family Cookbook

    It’s true, the hardest thing about working with FamilyCookbokProject.com is getting all of our beloved recipes entered into the system so we can create a one of a kind cookbook for family and friends.

    You have several options when you want to enter a recipe into your own recipe book.

    Here are some of my favorite:

    Typing – This is straight forward. You open the Add A Recipe form and use your keyboard to type in the recipe and click on the save button (don’t forget the last part!).

    Other People Typing – One of the features that makes FamilyCookbookProject.com unique is that we make it easy to invite others to contribute recipes to your cookbook so you don’t have to do all of the work. Use the invitation tool and have others submit recipes that you can then edit. It’s a great way to build a family cookbook and brings everyone together.

    Cut and Paste – If you already have many of your recipes in a text format, like in a Word document, you can cut and paste the recipes into the form. This also works when you find a recipe on a website and you’d like to include it in your cookbook.

    Here’s how: Simply highlight all the ingredients in your source document and hold down the Ctrl key while pressing the “C” key on your keyboard. Next go to “add a new recipe” in your family cookbook site. Click in the ingredients box and now hold the Ctrl key while pressing the “v” key. This pastes what you have copied into the field. Repeat for title, directions and notes and you are done!

    Import a recipe from a website – We have created a tool to import recipes from some websites. However, it does not always work because every website is different in the way it lays out its recipes.

    From your quick start editors menu, click on the Recipe Center button. There you will find a link to “Import Recipes from another website”. This will allow you to take the URL from the recipe page and try to import it into your cookbook. If that does not work, you can cut and past the ingredients and directions into a new recipe page which is very easy to do.

    Dictate recipes – If you don’t like to type, you can also talk your recipes into text form that can be cut and pasted into the Add A Recipe form. To see how to do this, see the recent blog post How to Dictate a Recipe Into Your Family Cookbook Project.

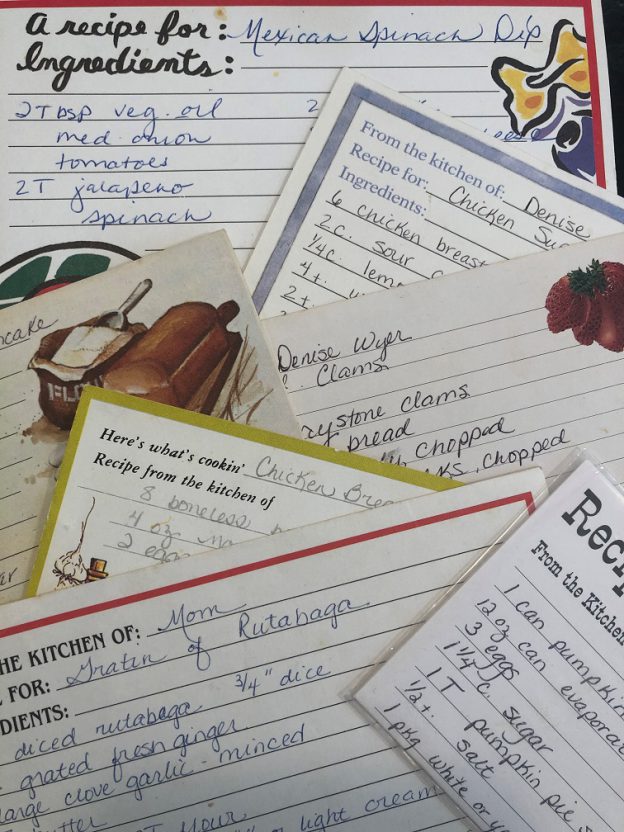
    Use a photo – One of the most asked questions we get is “How can I scan a recipe and use it in my cookbook?”

    If you have a recipe box or collection of recipes that you would like to scan and use as your recipes in a family cookbook, it can be done. However, a problem with scanned or photographed recipes is that the system can not read the text to create titles and indexes and other parts of the cookbook. The computer just sees them as photos.

    So you have two options:

    You can include the scanned images as photos attached to recipes that you have typed into the system. This preserved the original form of  the recipe card and makes the recipe highly readable.

    Second, you can upload the recipe card image on the Add A Recipe form as the recipe itself and just type the recipe title and contributor name. This saves typing and you get to use the image as the entire recipe. You can add personal notes if you want.

    So however you get your recipes enter your recipes into FamilyCookbookProject.com, it is the first step to creating what will certainly be a treasured family heirloom to be passed down to future generations.


    Bill Rice is founder and Co-Publisher of the Great Family Cookbook Project, a website that helps families and individuals collect and share food memories through customized printed cookbooks filled with treasured recipes. Follow us on Facebook and Pinterest!
     

  • How to Make a One-Of-A-Kind Wedding Cookbook

    How to Make a One-Of-A-Kind Wedding Cookbook

    Here’s an idea for a truly unique wedding gift for a special couple – a printed cookbook filled with the bride and groom’s favorite family recipes and photos. It’s a great way to bring both families together before the wedding, makes a wonderful bridal shower theme, can be used as a wedding favor and gets the new couple cooking with family favorite recipes.

    Here’s how to create your own wedding cookbook:

    It starts with a bridal shower.

    One thing every new bride to be needs is great recipes to feed her family, especially with everyone needing to stay at home so much more these days. Both families as well as friends can help get this started by contributing recipes as part of a bridal shower!

    When you send out your bridal shower invitations, include a link to your FamilyCookbookProject.com cookbook, use the Invitation Tool and add everyone’s email. This will send everyone a link that will allow them to contribute their recipes. Set a deadline for entering recipes about three weeks from when the invitations are sent. Remember people will always wait until the deadline!

    Get both of the mother’s to contribute the most recipes if possible. This way both the bride and groom with have lots of recipes that they grew up with in their cookbook. Using Family Cookbook Project’s Custom Categories Tool, you can even create a special category for each mom’s recipes.

    As the recipes are being entered, start planning how the cookbook will look.

    Select a cover – Family Cookbook Project offers several cookbook covers specifically for bridal cookbooks or wedding cookbooks. You also can create a custom cover with the name of the cookbook and a photo of the couple.

    Write an introduction – The best bridal cookbooks will have an introduction written by the individuals giving the bridal shower. An introduction can be used wish the couple well wishes and to talk about the importance of family.

    Add Photos – Photos can help bring your cookbook to life. You can add photos of the lucky couple on top of recipes, or create custom pages to highlight photos of the bride and groom as they were growing up and while they were dating.

    Print your cookbook – Make sure you give yourself enough time to order your cookbooks and have them printed, at least 3-4 weeks if possible. Be sure to order enough copies for each attendee as well as several extra copies for family members that can not attend the event.

    For the event, make some of the dishes from bridal cookbook and serve them at the event. Include a place card with the dish name and include the page number from the cookbook.

    Finally, if you are looking for a great wedding favor, you can print additional cookbooks and give them to everyone attending the wedding!


    Bill Rice is founder and Co-Publisher of the Great Family Cookbook Project, a website that helps families and individuals collect and share food memories through customized printed cookbooks filled with treasured recipes. Follow us on Facebook and Pinterest!