Category: Cooking Tips

  • The Ultimate Guide to Perfecting Your Cookie Baking Skills

    The Ultimate Guide to Perfecting Your Cookie Baking Skills

    Baking cookies is a beloved pastime for many, often bringing back memories of childhood, family gatherings, and festive celebrations. However, achieving that perfect batch of cookies every time can be challenging. Whether you’re an experienced baker or a novice, there’s always room to improve your skills and expand your repertoire. This ultimate guide from FamilyCookbookProject.com will provide expert tips and techniques to help you perfect your cookie baking skills, with an emphasis on the joy of sharing your perfected recipes in a personalized cookbook.

    Understanding the Basics

    1. Quality Ingredients Matter
      • Butter: Use high-quality, unsalted butter for the best flavor. Make sure it’s at the right temperature—softened for creaming with sugar, or melted and cooled if the recipe requires it.
      • Sugar: Different types of sugar (white, brown, powdered) impact the texture and flavor of your cookies. For example, brown sugar adds moisture and a chewy texture.
      • Flour: Use the correct type of flour as specified in the recipe. Measuring accurately is crucial; too much or too little flour can drastically alter the outcome.
      • Eggs: Use large eggs unless otherwise specified. Room temperature eggs incorporate better into the dough, resulting in a smoother texture.
    2. Mastering Measurements
      • Accuracy: Baking is a science, and accurate measurements are essential. Use a kitchen scale for precise ingredient measurements.
      • Measuring Cups and Spoons: Dry ingredients should be measured with dry measuring cups, and liquids with liquid measuring cups. Level off dry ingredients with a straight edge for accuracy.
    3. Mixing Techniques
      • Creaming Butter and Sugar: Creaming butter and sugar properly creates a light, airy texture in cookies. Beat until the mixture is pale and fluffy.
      • Adding Dry Ingredients: Mix dry ingredients separately before incorporating them into the wet ingredients to ensure even distribution.
      • Don’t Overmix: Overmixing can lead to tough cookies. Mix until just combined to maintain a tender texture.

    Enhancing Flavor and Texture

    1. Chill the Dough
      • Why Chill?: Chilling the dough helps prevent spreading and enhances the flavor by allowing the ingredients to meld together.
      • How Long?: Depending on the recipe, chilling for at least 30 minutes to overnight can make a significant difference.
    2. Experiment with Extracts and Spices
      • Vanilla Extract: Use pure vanilla extract for the best flavor. You can also experiment with other extracts like almond, lemon, or peppermint.
      • Spices: Add depth to your cookies with spices such as cinnamon, nutmeg, ginger, or cardamom. Freshly ground spices offer the most intense flavors.
    3. Texture Add-ins
      • Chocolate Chips and Chunks: Use high-quality chocolate for the best results. Mixing different types (milk, dark, white) can add complexity.
      • Nuts and Dried Fruits: Toast nuts before adding them to enhance their flavor. Dried fruits should be plump and can be rehydrated in warm water or alcohol for extra moisture.

    Perfecting Baking Techniques

    1. Baking Sheets and Parchment Paper
      • Baking Sheets: Use heavy-duty, light-colored baking sheets. Dark sheets can cause cookies to brown too quickly.
      • Parchment Paper: Line your baking sheets with parchment paper to prevent sticking and ensure even baking.
    2. Oven Temperature and Timing
      • Preheating: Always preheat your oven fully before baking. An oven thermometer can help ensure accurate temperature.
      • Baking Time: Follow the recipe’s suggested baking time, but start checking your cookies a few minutes early. Rotate the baking sheet halfway through for even baking.
    3. Cooling and Storage
      • Cooling Rack: Transfer cookies to a cooling rack immediately after baking to prevent over-baking on the hot sheet.
      • Storage: Store cookies in an airtight container to maintain freshness. Separate layers with parchment paper to prevent sticking.

    Troubleshooting Common Issues

    1. Flat Cookies
      • Causes: Too much butter, not enough flour, or dough that’s too warm.
      • Solutions: Chill the dough, add a bit more flour, or reduce the butter slightly.
    2. Dry or Crumbly Cookies
      • Causes: Overmixing, overbaking, or too much flour.
      • Solutions: Mix until just combined, check oven temperature, and measure flour accurately.
    3. Burnt Edges
      • Causes: Baking sheets are too dark, oven temperature is too high, or baking time is too long.
      • Solutions: Use light-colored baking sheets, verify oven temperature, and monitor baking time closely.

    Sharing Perfected Recipes in a Cookbook Made Using FamilyCookbookProject.com

    1. Compile Your Favorite Recipes
      • Gather your favorite cookie recipes, including those you’ve perfected with these tips. Organize them into categories like “Holiday Favorites,” “Chocolate Delights,” and “Healthy Options.”
    2. Test and Refine
      • Ensure each recipe is thoroughly tested. Make any necessary adjustments to ingredient quantities or baking times based on your results.
    3. Document Techniques and Tips
      • Include detailed instructions and tips for each recipe. Share any personal touches or modifications that make the recipe special.
    4. Add Personal Stories
      • Include anecdotes or memories associated with each recipe. This adds a personal touch and makes the cookbook a cherished keepsake.
    5. Design and Layout
      • Choose a user-friendly layout with clear headings, readable fonts, and appealing visuals. Consider adding photos of the cookies and the baking process.
    6. Publish and Share
      • Decide whether to create a digital or physical cookbook. Many online platforms offer tools for designing and printing professional-quality cookbooks.
      • Share your cookbook with family and friends. It makes a wonderful gift and a way to celebrate your love of baking.

    Perfecting your cookie baking skills is a rewarding journey that combines science, creativity, and a love for sharing delicious treats. By mastering the basics, enhancing flavors and textures, and fine-tuning your baking techniques, you can create cookies that are not only delicious but also consistently perfect. Sharing these perfected recipes in a personalized cookbook adds an extra layer of joy, allowing you to preserve and celebrate your baking successes with loved ones. So, roll up your sleeves, preheat your oven, and embark on the delightful adventure of baking the perfect cookie. Happy baking!

    Bill Rice is Founder and Co-Publisher of the Family Cookbook Project, a website that helps families and individuals collect, preserve and share food memories by creating their own printed personal cookbooks. He is the author of The Wellfleet Oyster Cookbook and the Cape Cod Cocktail Cookbook (Available on Amazon), both created using FamilyCookbookProject.com. He is also editor of the Donovan Family Cookbook, now it’s third printing and is an avid genealogist tracing his family back to the 1600’s.

    Follow Family Cookbook Project on Facebook, Instagram, Twitter and Pinterest!

     

  • Rating Your Favorite Recipes

    Rating Your Favorite Recipes

    Creating a printed personal cookbook on FamilyCookbookProject.com is a rewarding experience, but your journey with the website doesn’t have to end there.

    Many people continue to use the site as an online resource, either from their desktop or our “award-winning” mobile app. One fun feature is rating the recipes you use from your cookbook.

    Rating recipes is simple. Go to “view recipes by contributor” and find your favorite recipe. Click on the title to view it, and right under the title, you’ll see “Rate this recipe” with five gray stars. Click on the star that represents your rating: the fifth star for a “5 star” recipe, the fourth star for a “4 star” recipe, and so on. You can even click between stars for a 4.5-star rating!

    Your rating will be visible to the next person who views the recipe (anonymously), and they can leave their own rating. Over time, you’ll see how many people rated your recipes and their feedback. This interaction helps build a dialogue around your recipes.

    Try it out today and invite others in your cookbook to join in!


    Bill Rice is Founder and Co-Publisher of the Great Family Cookbook Project, a website that helps families and individuals collect, preserve and share food memories by creating their own printed personal cookbooks. He is the author of The Wellfleet Oyster Cookbook and the Cape Cod Cocktail Cookbook (Available on Amazon), both created using FamilyCookbookProject.com. He is also editor of the Donovan Family Cookbook, now it’s third printing.

    Follow Family Cookbook Project on Facebook, Instagram, Twitter and Pinterest!

  • Understanding Egg Carton Dates

    Understanding Egg Carton Dates

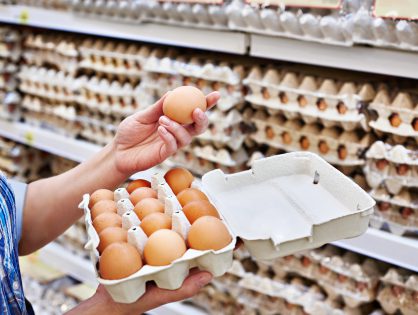
    Egg carton dates can be confusing, but understanding them is essential for ensuring quality and safety. Surprisingly, these dates—whether “use by,” “sell by,” or “expiration”—aren’t about safety but about quality.

    Key Dates on Egg Cartons:

    • Expiration or Sell By Date: Helps stores manage inventory and indicates peak freshness. These dates can be up to 30 days after packing.
    • Julian Date: Found on the side of cartons, this three-digit number represents the packing date (e.g., 001 for January 1 to 365 for December 31).
    • Use By Date: Occasionally printed on the eggshell, advising the best quality date.

    Storing and Using Eggs:

    • Refrigeration: Properly stored eggs last four to five weeks after the Julian or packing date.
    • Quality Changes: As eggs age, whites thin, and yolks flatten. Older eggs are best used in fully cooked recipes like quiches or baked goods to minimize foodborne illness risks.

    Handling and Safety:

    • Proper Storage: Always refrigerate eggs and other perishable items promptly to maintain quality and safety.
    • Cooking Tips: Older eggs should be used in recipes where shape isn’t crucial, like scrambled eggs or baked goods.

    By following these guidelines, you can ensure that your eggs are both safe and of the highest quality.

    Love cooking? Consider creating a personalized family cookbook at Family Cookbook Project. It’s a fun way to preserve and share cherished recipes!


    Bill Rice is Founder and Co-Publisher of the Family Cookbook Project, a website that helps families and individuals collect, preserve and share food memories by creating their own printed personal cookbooks. He is the author of The Wellfleet Oyster Cookbook and the Cape Cod Cocktail Cookbook (Available on Amazon), both created using FamilyCookbookProject.com. He is also editor of the Donovan Family Cookbook, now it’s third printing.

    Follow Family Cookbook Project on Facebook, Instagram, Twitter and Pinterest!

  • The Ultimate Cheese Lovers Guide: Types, Flavors, and How to Cook with Them

    The Ultimate Cheese Lovers Guide: Types, Flavors, and How to Cook with Them

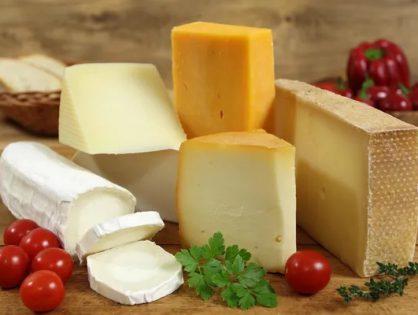
    Cheese is a versatile, flavorful ingredient used in countless dishes around the world. From the creamy richness of brie to the sharp bite of cheddar, cheese can enhance a variety of meals, adding depth, texture, and complex flavors. Each type of cheese has unique characteristics, a distinct place of origin, and a flavor profile that makes it perfect for specific dishes.

    In this article, we’ll explore some of the most common types of cheese, how they’re used in cooking, their key characteristics, where they come from, and what their flavor profiles are.

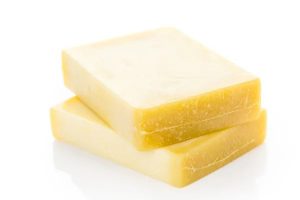
    Cheddar

    Origin: England

    Key Characteristics:

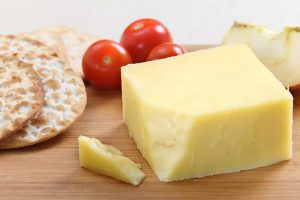
    Cheddar is a firm, cow’s milk cheese that ranges in flavor from mild to sharp, depending on its aging process. It’s typically pale yellow or white, though in some cases, it’s colored with annatto to give it a deeper orange hue. Cheddar can be aged anywhere from a few months to several years, with longer aging periods resulting in a sharper flavor and a crumblier texture.

    Flavor Profile:

    Mild cheddar has a creamy, buttery flavor, while sharp cheddar has a stronger, more pungent taste with hints of nuttiness.

    Uses in Cooking:

    •Grated over baked dishes like mac and cheese or casseroles

    •Sliced for sandwiches and burgers

    •Melted into soups and sauces

    •Paired with fruit or crackers on a cheese board

    Brie

    Origin: France

    Key Characteristics:

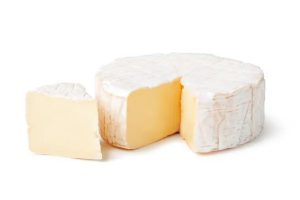
    Brie is a soft, creamy cheese made from cow’s milk, characterized by its edible white rind. The interior of brie is smooth and buttery, while the rind has a slightly earthy flavor. It’s typically enjoyed at room temperature for maximum creaminess.

    Flavor Profile:

    Brie has a mild, buttery taste with subtle earthy and mushroom-like undertones. As it ages, the flavor becomes more robust and pungent.

    Uses in Cooking:

    •Baked in puff pastry for baked brie appetizers

    •Served with fruit, nuts, and honey on a cheese platter

    •Spread on bread or crackers

    •Added to sandwiches and grilled cheese

    Mozzarella

    Origin: Italy

    Key Characteristics:

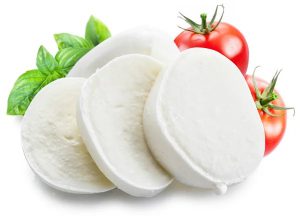
    Mozzarella is a soft, fresh cheese traditionally made from water buffalo milk, though cow’s milk is commonly used today. It has a high moisture content and is typically sold as fresh mozzarella in balls or blocks. It’s known for its mild flavor and stringy texture when melted.

    Flavor Profile:

    Mozzarella has a delicate, milky flavor that’s fresh and slightly tangy. It’s prized for its stretchy, gooey texture when melted.

    Uses in Cooking:

    •Topping for pizzas

    •Layered in lasagna and baked pasta dishes

    •Sliced for caprese salad (paired with tomatoes and basil)

    •Melted in sandwiches like paninis or grilled cheese

    Parmesan (Parmigiano-Reggiano)

    Origin: Italy

    Key Characteristics:

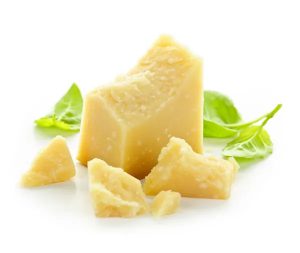
    Parmesan is a hard, aged cheese made from cow’s milk. Authentic Parmigiano-Reggiano is produced in specific regions of Italy under strict regulations. It’s aged for at least 12 months, resulting in a hard, granular texture and a deep, umami flavor. It’s often sold in wedges or grated.

    Flavor Profile:

    Parmesan has a nutty, savory flavor with a salty tang and a rich umami taste. The longer it ages, the more complex and intense the flavor becomes.

    Uses in Cooking:

    •Grated over pasta, risotto, and soups

    •Shaved onto salads

    •Added to breading for chicken or eggplant parmesan

    •Used in sauces like Alfredo for a rich, savory flavor

    Blue Cheese (Roquefort, Gorgonzola, Stilton)

    Origin: Various (Roquefort from France, Gorgonzola from Italy, Stilton from England)

    Key Characteristics:

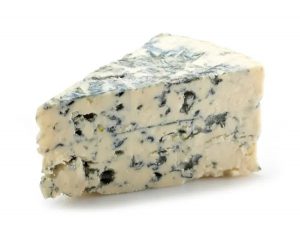
    Blue cheeses are characterized by their blue or green veins, which are created by the introduction of mold cultures during the aging process. These cheeses have a strong aroma and crumbly texture. Roquefort, Gorgonzola, and Stilton are some of the most well-known varieties of blue cheese, each with distinct characteristics depending on the region they’re from.

    Flavor Profile:

    Blue cheeses have a sharp, tangy flavor with a rich, creamy texture. They can range from mildly earthy to intensely pungent and salty.

    Uses in Cooking:

    •Crumbled over salads (especially with pears, walnuts, or apples)

    •Melted into dressings or dips

    •Served on cheese boards with fruits like figs and grapes

    •Used in sauces for steaks and burgers

    Feta

    rigin: Greece

    Key Characteristics:

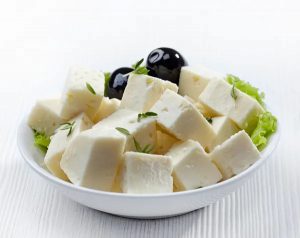
    Feta is a brined, crumbly cheese made from sheep’s milk or a combination of sheep’s and goat’s milk. It has a soft, grainy texture and is sold in blocks or crumbled. Feta is stored in a salty brine, which helps preserve its fresh, tangy flavor.

    Flavor Profile:

    Feta has a tangy, salty flavor with a creamy yet crumbly texture. Its sharpness varies depending on the length of aging.

    Uses in Cooking:

    •Crumbled over salads, especially Greek salad

    •Used as a filling in pastries like spanakopita

    •Added to omelets or scrambled eggs

    •Served with olives, tomatoes, and olive oil as part of a mezze platter

    Gouda

    Origin: Netherlands

    Key Characteristics:

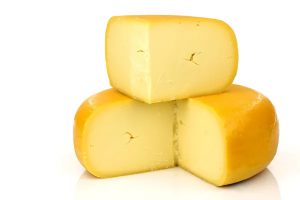
    Gouda is a semi-hard cheese made from cow’s milk. It has a smooth, creamy texture and a yellow rind. Gouda can be aged from a few months to over a year, with older varieties becoming firmer and more intense in flavor. Young Gouda is soft and mild, while aged Gouda is firm and has a deeper, caramel-like taste.

    Flavor Profile:

    Young Gouda is mild, creamy, and slightly sweet. Aged Gouda develops a nutty, caramel flavor with a firmer, crumbly texture.

    Uses in Cooking:

    •Sliced for sandwiches or burgers

    •Melted in casseroles or grilled cheese

    •Grated over vegetables or potatoes

    •Paired with fruits like apples or pears on a cheese platter

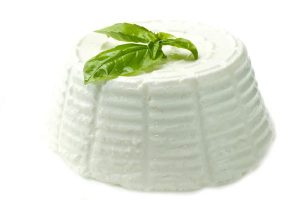
    Ricotta

    Origin: Italy

    Key Characteristics:

    Ricotta is a fresh, soft cheese made from the whey leftover after making other cheeses like mozzarella or provolone. It has a light, fluffy texture and is often used in both savory and sweet dishes. It’s typically made from cow’s milk, though sheep and goat milk ricotta are also available.

    Flavor Profile:

    Ricotta has a mild, slightly sweet flavor with a creamy, grainy texture.

    Uses in Cooking:

    •Filling for lasagna, ravioli, or cannoli

    •Spread on toast with honey or fruit

    •Mixed into pancake or cake batter for added moisture

    •Used in dips or spreads for vegetables or crackers

    Gruyère

    Origin: Switzerland

    Key Characteristics:

    Gruyère is a hard, cow’s milk cheese with a smooth texture and a golden-brown rind. It’s aged for several months, which gives it a dense, firm texture and a slightly nutty flavor. Gruyère is known for its excellent melting properties, making it a popular choice for fondues and gratins.

    Flavor Profile:

    Gruyère has a rich, nutty, and slightly sweet flavor, with hints of fruitiness that develop as it ages. It’s smooth and creamy when melted.

    Uses in Cooking:

    •Melted in fondues or croque monsieur sandwiches

    •Grated over gratins and casseroles

    •Used in quiches and French onion soup

    •Sliced for cheese boards and sandwiches

    Pecorino Romano

    Origin: Italy

    Key Characteristics:

    Pecorino Romano is a hard, salty cheese made from sheep’s milk. It has a crumbly texture and is typically aged for 8–12 months, giving it a sharp, tangy flavor. It’s often used as a finishing cheese, grated over pasta or vegetables.

    Flavor Profile:

    Pecorino Romano has a salty, tangy flavor with a sharp bite. It’s slightly more intense than Parmesan and has a crumbly texture.

    Uses in Cooking:

    •Grated over pasta dishes like cacio e pepe or carbonara

    •Sprinkled on roasted vegetables or salads

    •Shaved onto soups or risottos

    •Used in meatballs or meatloaf for added flavor

    Cooking with Cheese

    Cheese is one of the most versatile ingredients in the culinary world, offering a wide range of textures, flavors, and uses. Whether you’re melting mozzarella on a pizza, crumbling feta over a salad, or grating Parmesan into a sauce, cheese can elevate any dish with its unique flavor profile. By understanding the characteristics and origins of different cheeses, you can experiment with new ways to incorporate them into your cooking and create delicious, flavorful meals.


    Bill Rice is Founder and Co-Publisher of the Family Cookbook Project, the leading online cookbook publisher with a website that helps families and individuals collect, preserve and share food memories by creating their own printed custom cookbooks. He is the author of The Wellfleet Oyster Cookbook and the Cape Cod Cocktail Cookbook (Available on Amazon), both created using FamilyCookbookProject.com. He is also editor of the Donovan Family Cookbook, now it’s third printing and is an avid genealogist tracing his family back to the 1600’s.

    Follow Family Cookbook Project on Facebook, Instagram, Twitter TikTok, YouTube and Pinterest!

    and their uses in cooking!

  • Rice 101: Discover the Best Types of Rice for Every Dish

    Rice 101: Discover the Best Types of Rice for Every Dish

    Rice is a pantry staple in many households around the world, and in the United States, it’s no different. However, rice is far from being a one-size-fits-all ingredient. With numerous varieties available, each type of rice offers different textures, flavors, and best cooking methods. Whether you’re making a comforting risotto, serving up a flavorful stir-fry, or simply preparing a side dish, choosing the right type of rice can make all the difference.

    In this article, we’ll explore the most common types of rice found in the United States, how to cook them, and the dishes they are best suited for.

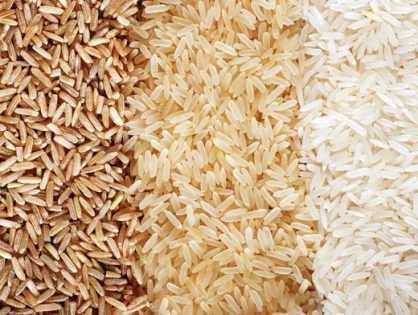
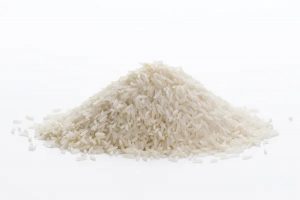
    Long-Grain White Rice

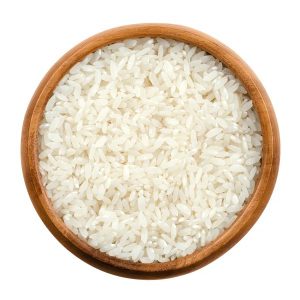
    Long-grain white rice is one of the most popular and versatile varieties in the U.S. It has long, slender grains that remain separate and fluffy when cooked, making it ideal for a wide range of dishes.

    Best Uses : Long-grain white rice is perfect for everyday meals. It’s commonly used as a side dish for stir-fries, roasted meats, or curries. It’s also the go-to rice for dishes like  pilaf ,  fried rice , and  stuffed peppers  because it maintains its shape without becoming sticky or clumpy.

    Cooking Tip : Use a 2:1 water-to-rice ratio. Bring to a boil, then cover and simmer on low heat for 15-20 minutes until the water is absorbed.

    Basmati Rice

    Basmati rice, an aromatic long-grain rice, is known for its fragrant aroma and slightly nutty flavor. It’s commonly used in Indian, Middle Eastern, and South Asian cooking.

    Best Uses : Basmati rice is a must for dishes like  biryani ,  pulao , and  Indian curries . Its light, fluffy texture makes it the perfect accompaniment to saucy dishes, and its subtle fragrance enhances the flavors of spiced meals.

    Cooking Tip : Rinse basmati rice thoroughly before cooking to remove excess starch and help the grains remain separate. For extra flavor, cook it in a mix of water and broth, and consider adding whole spices like cardamom or cinnamon to the pot.

    Jasmine Rice

    Jasmine rice, native to Thailand, is another aromatic long-grain rice. When cooked, it has a slightly sticky texture, and its delicate floral scent makes it a popular choice in Southeast Asian cuisine.

    Best Uses : Jasmine rice pairs beautifully with Thai curries, stir-fries, and grilled meats. It’s also great for dishes like  fried rice  or as a simple side dish for  teriyaki chicken .

    Cooking Tip : Rinse jasmine rice before cooking to prevent it from becoming overly sticky. Use a 1.5:1 water-to-rice ratio for the perfect texture.

    Short-Grain White Rice (Sushi Rice)

    Short-grain white rice is sticky and plump, making it ideal for dishes that require the rice to hold together. It’s often referred to as “sushi rice” due to its primary use in making sushi, though it’s also used in other Asian dishes.

    Best Uses : Aside from  sushi , this rice is great for making  onigiri  (Japanese rice balls),  kimbap  (Korean seaweed rice rolls), and even  Japanese rice bowls . Its sticky nature makes it a good base for dishes where the rice needs to hold its shape.

    Cooking Tip : Use a 1:1.25 water-to-rice ratio. After cooking, season the rice with a mixture of rice vinegar, sugar, and salt if using it for sushi.

    Brown Rice

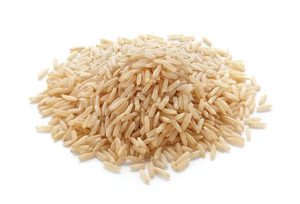
    Brown rice is the whole grain version of white rice, meaning it retains the bran layer, giving it a nuttier flavor and a chewier texture. It’s considered more nutritious than white rice because it contains more fiber, vitamins, and minerals.

    Best Uses : Brown rice works well as a healthy side dish for  salads ,  grain bowls , and  stir-fries . Its heartier texture makes it a great choice for stuffing vegetables like  bell peppers  or as a base for  buddha bowls .

    Cooking Tip : Brown rice takes longer to cook than white rice—around 40-50 minutes. Use a 2.5:1 water-to-rice ratio, bring to a boil, then cover and simmer until the water is absorbed.

    Wild Rice

    Wild rice is not technically rice, but a type of aquatic grass seed native to North America. It has a nutty, earthy flavor and a slightly chewy texture that makes it stand out from traditional rice varieties.

    Best Uses : Wild rice is great in  salads,  stuffings, and  soups, and it can also be mixed with other rice varieties to add texture and flavor to your dish. It’s commonly used in  pilafs  and as a base for grain bowls.

    Cooking Tip : Wild rice takes longer to cook, about 40-50 minutes. Use a 3:1 water-to-rice ratio and simmer until the grains are tender and some have burst open.

    Arborio Rice

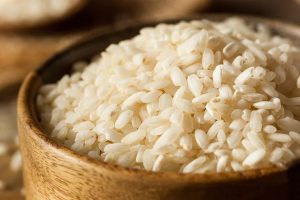
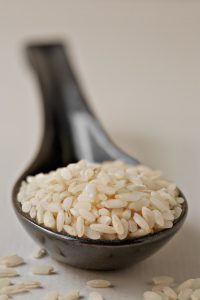
    Arborio rice is a short-grain, starchy rice that’s essential in Italian cooking, particularly for making risotto. When cooked, the high starch content of arborio rice creates a creamy texture.

    Best Uses : Arborio rice is most commonly used for  risotto . The creamy consistency is perfect for soaking up broth and flavors. Arborio is also great for making  rice pudding  or other creamy dishes where a rich texture is desired.

    Cooking Tip : Arborio rice requires constant stirring and gradual addition of liquid when making risotto. Add broth one ladle at a time, stirring continuously, to release the starch and achieve a creamy consistency.

    Carolina Gold Rice

    Carolina Gold is a variety of long-grain rice with a rich history in the southern United States. It’s slightly more aromatic than traditional long-grain white rice, with a subtle nutty flavor.

    Best Uses : This rice is perfect for  pilafs ,  gumbos , and  low-country Southern dishes  like  Hoppin’ John  or  red beans and rice . Its versatility and historical significance make it a beloved choice in Southern cuisine.

    Cooking Tip : Rinse Carolina Gold rice to remove excess starch, then use a 1.5:1 water-to-rice ratio for cooking.

    Parboiled Rice

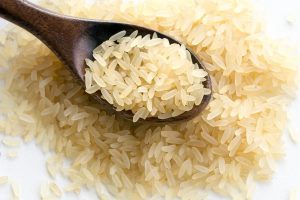
    Parboiled rice, also known as converted rice, is partially boiled in the husk before processing, giving it a firmer texture and helping it retain more nutrients than white rice.

    Best Uses : Parboiled rice is great for making  rice salads ,  pilafs , or serving alongside grilled meats, as it stays firm and separate when cooked. It’s also less likely to become sticky, making it a good option for batch cooking.

    Cooking Tip : Use a 2:1 water-to-rice ratio and simmer for about 20 minutes until the rice is tender and the water is absorbed.

    Choosing the Right Rice for Your Dishes

    With so many varieties of rice available, there’s a perfect type for every dish and cooking style. Whether you’re preparing a hearty risotto, a light and fluffy side dish, or a creamy bowl of rice pudding, knowing the differences between these rice varieties will help you achieve the best results.

    When experimenting with new recipes or creating a collection of go-to rice dishes, consider using FamilyCookbookProject.com to store and organize your favorite rice recipes. By creating a personal cookbook, you can easily revisit your favorites and share them with family and friends.

    No matter what dish you’re cooking, the right type of rice will enhance your meal and elevate your cooking to the next level.


    Bill Rice is Founder and Co-Publisher of the Great Family Cookbook Project, a website that helps families and individuals collect, preserve and share food memories by creating their own printed personal cookbooks. He is the author of The Wellfleet Oyster Cookbook and the Cape Cod Cocktail Cookbook (Available on Amazon), both created using FamilyCookbookProject.com. He is also editor of the Donovan Family Cookbook, now it’s third printing and is an avid genealogist tracing his family back to the 1600’s.

    Follow Family Cookbook Project on Facebook, Instagram, Twitter TikTok, YouTube and Pinterest!


  • How to Grow Your Own Mushrooms: What Is Needed and Which Varieties Are the Easiest to Grow

    How to Grow Your Own Mushrooms: What Is Needed and Which Varieties Are the Easiest to Grow

    Mushrooms have become increasingly popular for their unique flavors, health benefits, and versatility in cooking. Growing your own mushrooms at home is not only a rewarding experience but also ensures that you have a fresh supply of these culinary delights right at your fingertips. The process is easier than you might think, and with the right setup, you can grow mushrooms in your own home or garden. This guide will walk you through what you need to get started and highlight the easiest mushroom varieties to grow.

    Why Grow Your Own Mushrooms?

    Before diving into the process, it’s worth considering the many benefits of growing your own mushrooms:

    •Freshness: Homegrown mushrooms are fresher and more flavorful than store-bought varieties.

    •Cost-Effective: While purchasing specialty mushrooms can be expensive, growing your own is a more economical option in the long run.

    •Nutritional Benefits: Mushrooms are packed with nutrients, including protein, vitamins, and antioxidants.

    •Sustainability: Growing mushrooms at home reduces the need for packaging and transportation, making it an environmentally friendly choice.

    What You Need to Get Started

    Growing mushrooms requires a few basic supplies and an understanding of the conditions they need to thrive. Here’s what you’ll need to set up your mushroom-growing operation:

    Spores or Spawn

    The first step in growing mushrooms is obtaining mushroom spores or spawn. Spores are the mushroom equivalent of seeds, while spawn is a young fungal network that can be planted. Spawn is typically easier for beginners, as it skips the spore germination stage and ensures faster growth.

    You can purchase mushroom spawn or spore kits online or at specialty garden centers. Make sure to select the spawn of the mushroom variety you want to grow (more on that later).

    Growing Medium (Substrate)

    Mushrooms grow on specific materials called substrates. Different varieties of mushrooms thrive on different substrates, so choosing the right one is key to successful growth. Common substrates include:

    •Straw: Ideal for growing oyster mushrooms.

    •Hardwood Sawdust or Chips: Great for shiitake and other wood-loving mushrooms.

    •Compost or Manure: Perfect for button mushrooms and portobellos.

    •Coffee Grounds: A sustainable option for growing oyster mushrooms.

    You can either prepare your own substrate or buy pre-sterilized substrate from a supplier to make the process easier.

    Growing Containers

    You’ll need a container to hold the substrate and spawn. Containers can range from plastic bags to specialized mushroom-growing boxes. Some mushrooms, like oyster varieties, do well in large plastic buckets or even repurposed plastic bottles. If you’re growing mushrooms indoors, you may need trays or bags to house the growing medium.

    Humidity and Temperature Control

    Mushrooms thrive in humid environments with specific temperature ranges. Depending on the variety, you’ll need to monitor and adjust both humidity and temperature to provide the best growing conditions:

    •Humidity: Mushrooms require high humidity, typically between 80-90%. You can increase humidity by misting your growing area with water or using a humidifier if growing indoors.

    •Temperature: Different varieties of mushrooms have different temperature needs. Most prefer a range between 55°F and 75°F, though some, like shiitakes, may require cooler conditions for fruiting.

    Lighting

    While mushrooms don’t need sunlight to grow, they do benefit from indirect light or minimal artificial lighting. Avoid direct sunlight, as it can dry out the substrate and harm the mycelium (the network of fungal threads that produce mushrooms).

    Sterile Environment

    Mushrooms are sensitive to contamination from bacteria and mold. It’s crucial to maintain a clean and sterile growing environment. When handling spawn or substrate, always wash your hands and use clean equipment to minimize the risk of contamination.

    Step-by-Step Process for Growing Mushrooms

    Once you have your supplies ready, follow these steps to grow your mushrooms:

    1.Prepare the Substrate: Sterilize the substrate (if necessary) to kill off any competing organisms. This can be done by heating the substrate in a pressure cooker or steaming it in a large pot. If you’re using a pre-sterilized substrate, skip this step.

    2.Inoculate the Substrate: Mix the mushroom spawn into the prepared substrate. Ensure that the spawn is evenly distributed throughout the substrate for optimal growth.

    3.Incubate the Spawn: Place the inoculated substrate in your growing container and store it in a dark, warm environment. The mycelium will begin to colonize the substrate during this incubation phase, which can take anywhere from a few weeks to a couple of months, depending on the mushroom variety.

    4.Fruiting Stage: Once the mycelium has fully colonized the substrate, move the container to a location with indirect light and increased humidity. Lower the temperature slightly (depending on the variety) to encourage fruiting. Continue misting the substrate regularly to maintain humidity.

    5.Harvest Your Mushrooms: Mushrooms will begin to form and grow over the course of several days or weeks. Harvest them when they reach the desired size, usually when the caps open up. Gently twist or cut them off at the base.

    Easiest Mushroom Varieties to Grow

    If you’re new to mushroom cultivation, it’s best to start with easy-to-grow varieties. Here are some popular options for beginners:

    Oyster Mushrooms

    Oyster mushrooms are one of the easiest and most forgiving varieties for beginners. They grow quickly and can thrive on a wide range of substrates, including straw, coffee grounds, and sawdust. Oyster mushrooms are known for their delicate flavor and meaty texture, making them a favorite in many dishes.

    •Growing Conditions: Oyster mushrooms prefer temperatures between 55°F and 65°F with high humidity.

    •Substrate: Straw, coffee grounds, or hardwood sawdust.

    •Time to Harvest: Typically 3 to 4 weeks after inoculation.

    Button Mushrooms (Agaricus bisporus)

    Button mushrooms, along with their mature forms, cremini and portobello mushrooms, are widely consumed and relatively easy to grow. They thrive in composted manure and are well-suited for indoor growing.

    •Growing Conditions: Button mushrooms prefer cooler temperatures, around 55°F to 65°F.

    •Substrate: Composted manure or enriched soil.

    •Time to Harvest: Around 3 to 4 weeks.

    Shiitake Mushrooms

    Shiitake mushrooms are a bit more challenging but can be highly rewarding to grow. They typically grow on hardwood logs or sawdust blocks. Shiitakes have a robust, earthy flavor and are packed with health benefits.

    •Growing Conditions: Shiitake mushrooms prefer temperatures between 50°F and 70°F. They can tolerate slightly lower humidity levels than other varieties.

    •Substrate: Hardwood logs or sawdust.

    •Time to Harvest: It can take several months for shiitakes to fruit, but once established, they can continue producing for years.

    Lion’s Mane Mushrooms

    Lion’s Mane mushrooms are known for their unique appearance and lobster-like flavor. They grow well indoors and require little maintenance, making them a great choice for beginners.

    •Growing Conditions: Lion’s Mane thrives in temperatures around 65°F to 75°F and requires high humidity.

    •Substrate: Hardwood sawdust or a blend of hardwood and other organic materials.

    •Time to Harvest: Around 3 to 4 weeks.


    Growing your own mushrooms is a rewarding project that provides fresh, flavorful produce while allowing you to learn about the fascinating world of fungi. Whether you’re growing oyster mushrooms in coffee grounds or shiitakes on logs, the process is relatively simple once you understand the basic requirements of each variety. With the right conditions, you can enjoy fresh mushrooms year-round and add a delicious homegrown touch to your favorite recipes.

    Bill Rice is Founder and Co-Publisher of the Family Cookbook Project, the leading online cookbook publisher with a website that helps families and individuals collect, preserve and share food memories by creating their own printed custom cookbooks. He is the author of The Wellfleet Oyster Cookbook and the Cape Cod Cocktail Cookbook (Available on Amazon), both created using FamilyCookbookProject.com. He is also editor of the Donovan Family Cookbook, now it’s third printing and is an avid genealogist tracing his family back to the 1600’s.

    Follow Family Cookbook Project on Facebook, Instagram, Twitter TikTok, YouTube and Pinterest!


  • How to Create a World-Class Charcuterie: Tips for an Impressive Spread

    How to Create a World-Class Charcuterie: Tips for an Impressive Spread

    Charcuterie boards have quickly become one of the most popular and stylish ways to entertain guests, offering a blend of visual appeal and delicious flavors. Originally a French tradition focused on cured meats, modern charcuterie boards often include a variety of meats, cheeses, fruits, nuts, spreads, and other accompaniments. Whether you’re hosting a dinner party, gathering for a casual wine night, or celebrating a special occasion, creating a world-class charcuterie board will impress your guests and elevate any gathering.

    In this article from FamilyCookbookProject.com, we’ll explore how to build a perfectly balanced charcuterie board, from selecting the right meats and cheeses to choosing complementary flavors and arranging everything for an eye-catching presentation.

    Step 1: Choosing the Right Meats

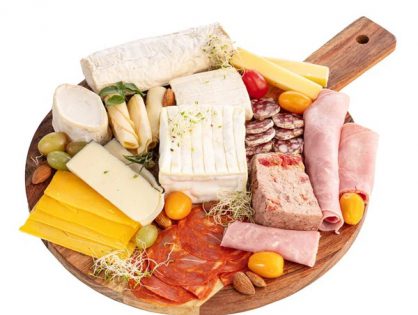
    The key component of any charcuterie board is, of course, the selection of meats. When crafting a world-class charcuterie, variety is essential. Choose a mix of textures and flavors, from cured meats to rich, savory sausages. Here are some classic options to consider:

    Prosciutto

    A thinly sliced, dry-cured ham, prosciutto is salty and rich with a melt-in-your-mouth texture. It’s an essential element of any charcuterie board.

    Salami

    Salami offers a bolder, slightly spiced flavor. You can opt for classic Italian salami or experiment with different varieties such as spicy soppressata or peppered salami.

    Capicola

    Capicola is a traditional Italian cold cut made from dry-cured pork shoulder or neck. Its tender texture and rich flavor make it a perfect charcuterie choice.

    Chorizo

    For a bit of spice, include Spanish chorizo. Made from smoked pork and seasoned with paprika, chorizo adds a flavorful kick to the board.

    Pâté or Terrine

    Add a spreadable meat like pâté or terrine for a luxurious touch. These are made from finely ground meat mixed with fat, wine, or brandy for a rich, creamy texture.

     Step 2: Selecting the Cheeses

    Just as important as the meats are the cheeses. Aim to provide a variety of textures and flavors, ranging from mild and creamy to bold and aged. Here’s a guideline to help you choose:

    Soft Cheeses

    Soft cheeses like brie or camembert add a creamy, rich element to the board. For extra flavor, you can offer a cheese with added herbs or truffles.

    Semi-Soft Cheeses

    A cheese like Havarti, Muenster, or Gouda offers a buttery texture and a mild, slightly sweet flavor. This category can help balance out stronger tastes on the board.

    Hard Cheeses

    Include hard cheeses like sharp cheddar, aged Manchego, or Parmigiano-Reggiano. These cheeses have bold, nutty flavors and are easy to slice or crumble.

    Blue Cheese

    For an extra layer of flavor, add a blue cheese like Roquefort, Stilton, or Gorgonzola. While these cheeses are strong, their tangy, creamy qualities are beloved by many.

     Step 3: Add Fresh and Dried Fruits

    To balance the richness of the meats and cheeses, include a selection of fresh and dried fruits. The sweetness and acidity of fruit enhance the flavors on your board and offer a delightful contrast to the savory elements.

    – Fresh Fruits: Grapes, figs, and berries (like raspberries or blackberries) add freshness, color, and a burst of sweetness. Sliced apples or pears also pair beautifully with sharp cheeses.

    – Dried Fruits: Apricots, dates, or raisins add chewiness and concentrated sweetness, especially when paired with creamy cheeses or prosciutto.

     Step 4: Include Nuts and Crunchy Elements

    Add texture to your charcuterie board by incorporating nuts and crunchy accompaniments. These items not only add variety but also provide a palate cleanser between bites of meat and cheese.

    – Nuts: Almonds, walnuts, or pistachios are perfect options. Toasted or spiced nuts can add an extra flavor dimension.

    – Crunchy Additions: Include crackers, breadsticks, or slices of toasted baguette. These provide the perfect vehicle for spreading soft cheeses and pâté.

     Step 5: Add Jams, Honey, and Spreads

    To elevate your charcuterie board even further, add condiments like jams, honey, and spreads. These extras bring different flavor profiles and complement both sweet and savory elements.

    – Fruit Preserves or Jams: Fig jam or apricot preserves pair beautifully with both blue cheese and prosciutto.

    – Honey: A drizzle of honey over blue cheese or brie is a classic pairing that brings sweetness to bold flavors.

    – Mustards or Tapenades: Include a whole-grain mustard or olive tapenade to add a savory touch and balance the richness of the meats.

     Step 6: Presentation Matters

    Finally, to create a world-class charcuterie board, presentation is key. Use a wooden or marble board as the base, and arrange the items thoughtfully:

    1. Start with the Meats and Cheeses: Place the largest items first, spacing out the meats and cheeses around the board.
    2. Add Fruits and Nuts: Fill in the gaps with fruits, nuts, and other small accompaniments. Use small bowls or ramekins for spreads, jams, and honey.
    3. Layer and Garnish: Create height by stacking some items, like slices of bread or rolled meats, and garnish with fresh herbs like rosemary for an added touch of elegance.

     Final Thoughts: Crafting the Perfect Charcuterie Board

    Creating a world-class charcuterie board is all about balancing flavors, textures, and colors. By thoughtfully selecting your meats, cheeses, fruits, and spreads, you can impress your guests with a visually stunning and delicious spread that suits any occasion. Whether it’s a casual gathering or a formal event, charcuterie offers a perfect blend of simplicity and elegance, making it the ultimate entertaining option.

    Now that you have the tools to create a world-class charcuterie, all that’s left is to gather your ingredients, arrange them beautifully, and enjoy!


    Bill Rice is Founder and Co-Publisher of the Family Cookbook Project, the leading online cookbook publisher with a website that helps families and individuals collect, preserve and share food memories by creating their own printed custom cookbooks. He is the author of The Wellfleet Oyster Cookbook and the Cape Cod Cocktail Cookbook (Available on Amazon), both created using FamilyCookbookProject.com. He is also editor of the Donovan Family Cookbook, now it’s third printing and is an avid genealogist tracing his family back to the 1600’s.

    Follow Family Cookbook Project on Facebook, Instagram, Twitter TikTok, YouTube and Pinterest!


  • Frozen in Time: How Long Can Meat Really Last in Your Freezer?

    Frozen in Time: How Long Can Meat Really Last in Your Freezer?

    Did you find yourself with extra meat after your last grocery trip, and decided to freeze some for later? If you’ve ever rediscovered that stash of chicken, turkey burgers, or steaks months later, you might wonder, “How long does meat really last in the freezer? Can I still eat it?” Here’s some comforting news: according to the United States Department of Agriculture (USDA), frozen meat can be kept indefinitely and still be safe to eat.

    However, there’s a slight catch. Even though frozen meat doesn’t spoil, its taste and texture might degrade over time. The USDA points out that while frozen meats remain safe, their quality can diminish the longer they’re stored.

    Don’t worry, though—we’ve got you covered! We’ll guide you through the best practices for storing various types of meat in your freezer, following guidelines from the Food and Drug Administration (FDA) and food safety experts. Plus, we’ll share some tips on how to store your meats to maintain maximum freshness and avoid any disappointing, rubbery chicken or tough steaks.

    How Long Does Meat Last in the Freezer?

    • Poultry: Prepping for Thanksgiving early? You can freeze whole chickens and turkeys for up to a year, and chicken or turkey parts for up to nine months.
    • Beef, Veal, and Lamb: Those special occasion New York strips or veal chops can be frozen from four to twelve months.
    • Pork: Similar to beef and lamb, pork chops and roasts can also be kept from four to twelve months. However, processed pork items like hot dogs and bacon should only stay frozen for one to two months.
    • Venison: Deer meat can last in the freezer for nine to twelve months if properly wrapped.
    • Ground Meat: Ground meats stay fresh for three to four months, perfect for those upcoming barbecues or Taco Tuesdays.
    • Fish: Storage times vary by type—fatty fish like salmon should be used within two to three months, while lean fish like cod can last six to eight months.
    • Shellfish: Fresh shellfish like crab or lobster can be frozen for two to four months; shrimp and squid maintain quality for up to eighteen months.

    The Right Way To Store Frozen Meat

    1. Set your freezer temperature: Keep your freezer at 0 degrees Fahrenheit or lower to ensure safety. This temperature kills harmful bacteria and prevents spoilage.
    2. Wrap your meat properly: Instead of using the original packaging, wrap your meat in foil, plastic wrap, or freezer paper for better freshness. Vacuum-sealed meats can be frozen as is.
    3. Freeze quickly: Wrap and freeze your meat as soon as possible to capture its best quality. Fast freezing prevents ice crystals that can affect the texture.
    4. Arrange wisely in the freezer: Don’t stack your meats initially. Spread them out in a single layer until fully frozen to allow quicker freezing.

    Remember, while you can freeze meat for extended periods, fresher is always better when it comes to taste and texture!


    Bill Rice is Co-Publisher of the Great Family Cookbook Project, a website that helps families and individuals collect, preserve and share food memories by creating their own printed personal cookbooks. He is the author of The Wellfleet Oyster Cookbook (Available on Amazon) and the Cape Cod Cocktail Cookbook, both created using FamilyCookbookProject.com. He is also editor of the Donovan Family Cookbook, now it’s third printing and is an avid genealogist tracing his family back to the 1600’s.

    Follow Family Cookbook Project on Facebook, Instagram, Twitter and Pinterest!
  • Kitchen Gadgets: Which Ones Are Worth It and What to Use Instead

    Kitchen Gadgets: Which Ones Are Worth It and What to Use Instead

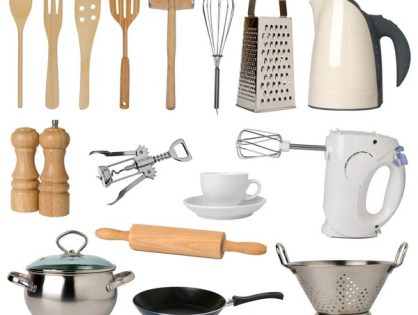
    Kitchen gadgets are designed to make cooking easier, but with so many products on the market, it’s easy to end up with a cluttered kitchen full of tools you rarely use. While some gadgets can genuinely save time and effort, others might just take up valuable drawer space. FamilyCookbookProject.com explores some common kitchen gadgets, evaluate whether they’re worth the investment, and provide practical alternatives that you likely already have in your kitchen.

    Garlic Press

    The Gadget : A garlic press is designed to crush garlic cloves quickly without the need to mince them by hand.
    Is It Worth It? : If you cook with garlic often and want to avoid the time and mess of chopping, a garlic press can be useful. However, many argue that it can leave behind some garlic in the press, wasting part of the clove. Plus, cleaning the gadget can be tricky.

    Alternative :  Chef’s Knife . Simply mince garlic with a sharp knife, pressing the clove with the flat side first to crush it slightly before chopping. With practice, you can chop garlic just as quickly as using a press, and a knife is much easier to clean.

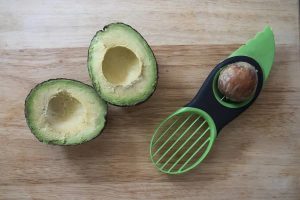
    Avocado Slicer

    The Gadget : An avocado slicer is a multi-functional tool designed to split, pit, and slice an avocado with ease.

    Is It Worth It? : While it can be helpful for frequent avocado eaters, it’s somewhat of a one-trick pony and takes up space in your drawer for something that a knife can accomplish.

    Alternative :  Chef’s Knife and Spoon . Cut the avocado in half with a sharp knife, remove the pit with the edge of the knife, and scoop out the flesh using a spoon. This method works just as well without the need for a single-use gadget.

     Egg Separator

    The Gadget : An egg separator is designed to separate egg yolks from egg whites with minimal mess.
    Is It Worth It? : Egg separators can be helpful if you separate eggs often or want a mess-free process. However, they can be bulky, and cleaning them can be a hassle.

    Alternative :  Your Hands or the Eggshell . Simply crack the egg and gently pass the yolk back and forth between the two halves of the eggshell, allowing the whites to fall into a bowl. Or, crack the egg into your hand and let the whites run through your fingers while holding onto the yolk.

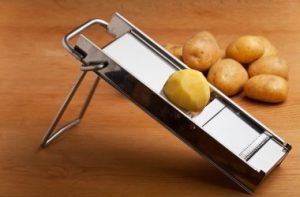
     Mandoline Slicer

    The Gadget : A mandoline slicer provides uniform, thin slices of vegetables, making it popular for dishes like gratins, salads, or chips.
    Is It Worth It? : If you prepare a lot of salads, potato dishes, or recipes requiring precise slices, a mandoline can be a great investment. However, it’s a bit dangerous to use without proper safety precautions, and it can be a hassle to clean.

    Alternative :  Sharp Knife and Cutting Board . While a knife won’t give you as precise slices as quickly as a mandoline, with a little practice, you can achieve nearly the same results using a good quality chef’s knife. Plus, it’s safer and easier to clean.

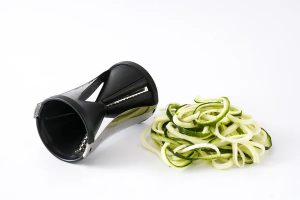
    Spiralizer

    The Gadget : A spiralizer creates long, curly ribbons or “noodles” from vegetables like zucchini, carrots, or sweet potatoes, often used for low-carb meals.

    Is It Worth It? : If you’re committed to making veggie noodles frequently, a spiralizer can be a great tool. However, if it’s something you’ll only use occasionally, it’s probably not worth the space it takes up.

    Alternative :  Vegetable Peeler . While you won’t get the same exact noodle shape, you can use a vegetable peeler to create thin, ribbon-like strips of zucchini or other vegetables for a similar effect in salads or stir-fries.

     Citrus Juicer

    The Gadget : A citrus juicer is designed to extract juice from lemons, limes, and oranges with ease, minimizing pulp and seeds.
    Is It Worth It? : If you use a lot of citrus juice in your cooking or cocktails, a juicer can save time and ensure you get the most juice out of each fruit. However, for occasional use, it might not be necessary.

    Alternative :  Your Hands . Simply cut the citrus fruit in half and squeeze the juice out with your hands. You can also use a fork to help extract more juice by inserting it into the fruit and twisting as you squeeze.

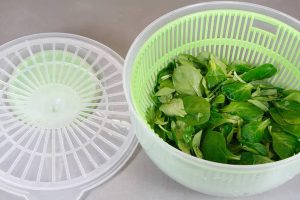
     Salad Spinner

    The Gadget : A salad spinner dries leafy greens after washing, making them crisp and ready for use in salads.

    Is It Worth It? : If you eat a lot of salads and prefer your greens crisp, a salad spinner can be useful. However, it takes up a lot of space and might not be worth it for small kitchens.

    Alternative :  Clean Kitchen Towel . After washing your greens, lay them out on a clean towel and gently pat them dry. You can also wrap the towel around the greens and give it a shake to remove excess moisture.

    Milk Frother

    The Gadget : A milk frother is designed to create foamed milk for lattes, cappuccinos, or other coffee drinks at home.

    Is It Worth It? : For coffee enthusiasts who love a homemade latte, a frother can be a fun and useful tool. However, it’s not necessary if you don’t make specialty coffee drinks often.

    Alternative :  Whisk or Jar with Lid . To froth milk without a gadget, heat the milk slightly and use a whisk to vigorously whip it until foamy. Alternatively, pour the heated milk into a jar with a lid and shake it vigorously to create foam.

    Cherry Pitter

    The Gadget : A cherry pitter removes the pits from cherries without damaging the fruit.

    Is It Worth It? : If you frequently bake pies or make jams with fresh cherries, this gadget can save a lot of time. However, it’s a single-purpose tool that might not see much use in your kitchen otherwise.

    Alternative :  Paperclip or Chopstick . You can use a sturdy paperclip or chopstick to push the pit out of the cherry. It takes a bit more time but eliminates the need for a dedicated pitting tool.

    Electric Can Opener

    The Gadget : An electric can opener automatically opens cans with little effort.

    Is It Worth It? : For those with arthritis or limited hand strength, an electric can opener can be a lifesaver. However, it’s a bulky gadget that takes up counter space and may not be necessary for most people.

    Alternative :  Manual Can Opener . A manual can opener takes up minimal space, works reliably, and can easily open cans with just a bit of effort.

    Are Kitchen Gadgets Worth It?

    When it comes to kitchen gadgets, the key is evaluating how often you’ll use them and whether they offer real value in your daily cooking routine. Many gadgets are convenient but come with the trade-off of taking up space in your kitchen. Often, the tools you already have—like a sharp knife, whisk, or spoon—can perform the same tasks as specialized gadgets.

    Before investing in a new kitchen tool, consider whether you already have an alternative that can do the job just as well. If you find yourself reaching for a gadget regularly and it simplifies your life in the kitchen, it’s probably worth the investment. Otherwise, stick to the basics and save your kitchen space for the essentials.


    Bill Rice is Founder and Co-Publisher of the Family Cookbook Project, a website that helps families and individuals collect, preserve and share food memories by creating their own printed personal cookbooks. He is the author of The Wellfleet Oyster Cookbook and the Cape Cod Cocktail Cookbook (Available on Amazon), both created using FamilyCookbookProject.com. He is also editor of the Donovan Family Cookbook, now it’s third printing and is an avid genealogist tracing his family back to the 1600’s.

    Follow Family Cookbook Project on Facebook, Instagram, Twitter TikTok, YouTube and Pinterest!

  • Grandma’s Secret Cookie Recipes: Preserving Family Traditions

    Grandma’s Secret Cookie Recipes: Preserving Family Traditions

    Family traditions are the threads that weave us together, binding generations through shared experiences and cherished memories. Among these traditions, few are as universally beloved as baking cookies. For many, the scent of freshly baked cookies wafting through the house evokes a flood of childhood memories, particularly those spent with a grandmother who seemed to have a magical touch in the kitchen. These recipes, often handed down through generations, are more than just a list of ingredients and instructions—they are a testament to our heritage, a connection to our past, and a gift to our future. Preserving these treasured recipes by compiling them into a personalized cookie cookbook is a meaningful way to honor family traditions and ensure they are passed down to future generations. FamilyCookbookProject.com makes creating a printed family cookbook easy and fun.

    The Importance of Preserving Family Recipes

    1. Cultural Heritage: Family recipes are a crucial part of our cultural heritage. They reflect the culinary traditions, techniques, and ingredients that were prevalent in our ancestors’ lives. By preserving these recipes, we maintain a tangible link to our cultural roots.
    2. Family History: Each recipe tells a story. It might be a tale of how great-grandma made cookies during the Great Depression with limited ingredients, or how a special recipe was created to celebrate a significant family event. These stories add depth and context to our family history, making it richer and more engaging.
    3. Emotional Connection: Food has a unique way of evoking emotions and memories. The taste of a familiar cookie can transport us back to our childhood, bringing back memories of family gatherings, holiday celebrations, and moments of love and laughter shared in the kitchen.
    4. Legacy: By preserving and passing down family recipes, we create a legacy for future generations. It’s a way of ensuring that our children and grandchildren can enjoy the same flavors and experiences that we cherished, and it gives them a sense of continuity and belonging.

    Starting the Journey: Collecting Recipes

    The first step in preserving your family’s cookie recipes is to gather them. This can be a delightful and nostalgic process, involving family members and rekindling old memories. Here’s how to get started:

    1. Reach Out to Family Members: Talk to your parents, grandparents, aunts, uncles, and cousins. Ask them to share their favorite cookie recipes, along with any stories or memories associated with them. This can be done using FamilyCookbookProject.com invitation tool. Family members can add their own recipes directly into the system so you don’t have to do it all.
    2. Dig Through Old Recipe Boxes: Many families have old recipe boxes or cookbooks stashed away. These can be treasure troves of forgotten recipes. Don’t hesitate to look for handwritten notes, old cookbooks, and recipe cards that might have been passed down.
    3. Document Oral Recipes: Some of the best recipes are never written down. If your grandma or another family member has a recipe they know by heart, spend some time with them in the kitchen. Watch them make the recipe, take notes, and record the process.
    4. Photograph and Scan: To preserve the original recipe cards, consider photographing or scanning them. This also allows you to keep a digital copy, which can be be used as an image in your cookbook.

    Organizing the Recipes

    Once you’ve collected the recipes, the next step is to organize them. This is where FamilyCookbookProject.com makes things very easy. Here are some tips:

    1. Categorize: Group the recipes into categories such as “Holiday Cookies,” “Everyday Favorites,” “Special Occasion Cookies,” and “Healthy Options.” This makes it easier to find specific types of recipes.
    2. Standardize Measurements: Ensure that all recipes use standard measurements. This is particularly important if you’re combining recipes from different sources, as measurement conventions can vary.
    3. Test the Recipes: Before finalizing your cookbook, test each recipe to ensure accuracy. This is a great excuse to bake (and eat) lots of cookies, and it also ensures that the recipes will work for future generations.
    4. Include Stories and Photos: Adding personal stories and photos makes the cookbook more than just a collection of recipes—it becomes a family heirloom. Include anecdotes about the origin of the recipe, who it came from, and any special memories associated with it.

    Creating the Personalized Cookie Cookbook

    With your recipes organized and ready, it’s time to create your personalized cookie cookbook. Here’s how to do it with FamilyCookbookProject.com:

    1. Select a Recipe Layout: Pay attention to the layout and design of your cookbook. This includes choosing fonts, colors, and images that reflect your family’s style. FamilyCookbookProject.com offers many online tools and templates that can help you create a professional-looking cookbook.
    2. Write an Introduction: Start your cookbook with an introduction that explains the significance of these recipes and the process of collecting them. Share your motivation for preserving these family treasures and what they mean to you.
    3. Add Personal Touches: Include family photos, handwritten notes, and other personal touches that make the cookbook unique. This could be pictures of family gatherings, old family photos, or even scans of the original recipe cards.
    4. Get It Printed: Once your cookbook is complete, FamilyCookbookProject.com will print it and have it shipped directly to your door.
    5. Share with Family: Once your cookbook is complete, share it with your family members. Consider giving it as a gift during holidays, family reunions, or other special occasions. It’s a wonderful way to celebrate your family’s heritage and keep the tradition alive.

    Preserving and Celebrating Family Traditions

    Creating a personalized cookie cookbook is not just about preserving recipes; it’s about celebrating family traditions and keeping them alive for future generations. Here are some additional ways to celebrate and preserve your family’s cookie-baking heritage:

    1. Host a Family Baking Day: Organize a family baking day where everyone gathers to bake cookies together. This is a fun way to spend time with loved ones, share baking tips, and create new memories. Use this opportunity to test and refine the recipes for your cookbook.
    2. Create a Cookie Exchange Tradition: Start a new family tradition of hosting a yearly cookie exchange. Each family member brings a batch of their favorite cookies, and everyone swaps and shares. This not only introduces new recipes to the family but also strengthens bonds and creates lasting memories.
    3. Teach the Next Generation: Involve children and grandchildren in the baking process. Teaching them how to bake family recipes instills a sense of pride and ownership in their heritage. It also ensures that these traditions are passed down and cherished by future generations.
    4. Document New Recipes: As your family grows and evolves, new cookie recipes will be created. Encourage family members to document and share these new recipes. This keeps the tradition dynamic and allows it to grow with each generation.
    5. Celebrate Milestones with Cookies: Use cookies to celebrate family milestones such as birthdays, anniversaries, and holidays. Bake a batch of grandma’s special cookies to mark these occasions, creating a delicious link between the past and the present.

    Preserving family cookie recipes is a beautiful way to honor and celebrate your heritage. These recipes are more than just instructions for baking—they are a testament to the love, care, and creativity of generations past. By compiling these cherished recipes into a personalized cookie cookbook, you create a lasting legacy that can be enjoyed and cherished by future generations. This cookbook becomes a tangible connection to your family’s history, a source of pride, and a way to keep beloved traditions alive. So gather those recipes, test them, and start creating your family’s cookie cookbook today. It’s a sweet way to celebrate your family’s past, present, and future.

    Bill Rice is Founder and Co-Publisher of the Family Cookbook Project, a website that helps families and individuals collect, preserve and share food memories by creating their own printed personal cookbooks. He is the author of The Wellfleet Oyster Cookbook and the Cape Cod Cocktail Cookbook (Available on Amazon), both created using FamilyCookbookProject.com. He is also editor of the Donovan Family Cookbook, now it’s third printing and is an avid genealogist tracing his family back to the 1600’s.

    Follow Family Cookbook Project on Facebook, Instagram, Twitter and Pinterest!