Author: Bill Rice

  • How to Purge Sand from Clams

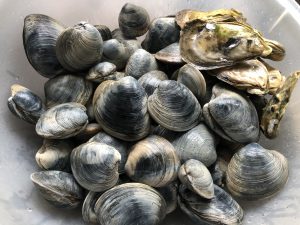
    Living on Cape Cod, I get the opportunity to enjoy a lot of seafood year round. And there is nothing better than to grow or catch your own food – you know it’s fresh.

    Clams are one food we enjoy collecting and cooking whenever we can. I enjoy making  Cape Cod Clam Chowder, Clams with Lemon and Basil and especially my mom’s Denise’s Stuffed Clams. The challenge is to enjoy the clams without the sand they live in.

    Here’s what you need to know to get the grit out of your clams.

    The vast majority of clams, mussels and oysters you buy in the market have been purged already. You will almost never need to purge your clams if you bought them at a supermarket. If you are not sure, just ask.

    If you catch your own clams or buy them directly from a shellfisherman, it might be worth your while to purge the sand out before you cook them.

    There is a lot of bad information out there about how to purge sand from clams and it can be difficult to separate the knowledge from the folklore. For example adding corn meal to the purging water does nothing for the clams. The reason they have sand and grit in them is because they live buried in sand or mud.

    So here is how you Purge sand from your clams:

    Next time you go clamming, bring a 5-gallon bucket and fill it with seawater. The clams will be use  to the salinity  and temperature of that water. It’s perfect for your needs.

    • At home, wash the clams under cold tap water to remove mud or grit on the outside of the shell. Put the clams into a large non-reactive container. I use a big plastic bowl.
    • Either let the seawater you brought home settle for 20 minutes or so, or filter it through a paper towel. You want it as grit-free as possible. Pour the water over the clams, covering by 1 to 3 inches. If you are purging especially muddy clams, hold back any remaining seawater — you’ll need to change it in a day. Clams need oxygen in the water and if you are going to purge for more than a few hours you’ll want new saltwater for the bowl.
    • Set the clams in the fridge or in a cool place — somewhere where the temperature is reasonably close to the water they were in — and leave for at least an hour, and up to overnight hours. Change the water if you can.
    • When you are ready, rinse the clams again. Hard-shelled clams can go into the fridge. Open-shelled clams need to be eaten or thrown out.

    You cannot purge a clam in fresh water. Fresh water kills clams. And dead clams are, with few exceptions, no good to eat.


    Bill Rice is founder and Co-Publisher of the Great Family Cookbook Project, a website that helps families and individuals collect and share food memories through customized printed cookbooks filled with treasured recipes. He clams every chance he gets and loves many clam dishes. Follow us on Facebook and Pinterest!
  • 5 New Typefaces Available for Recipe Layouts

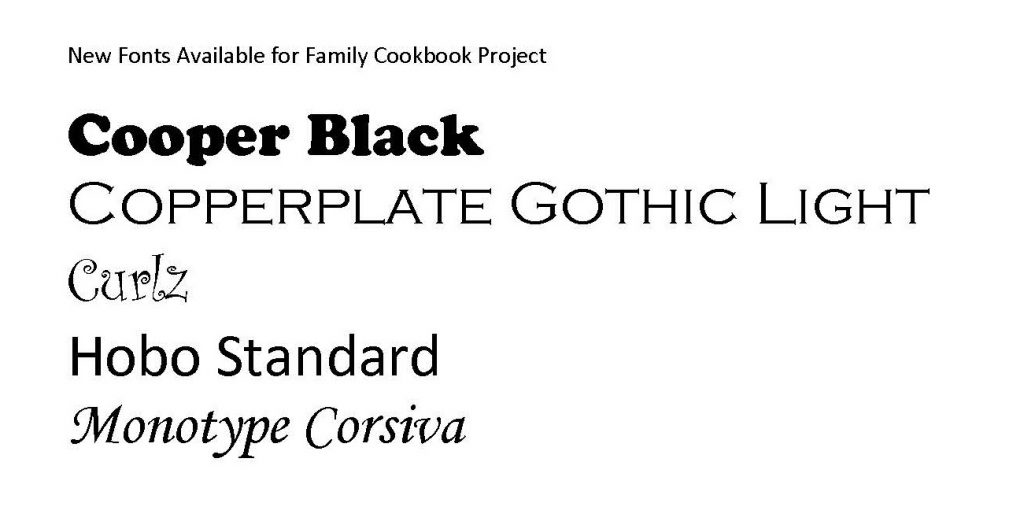
    Family Cookbook Project has added five new typefaces to the custom recipe layout options for cookbooks created using the Family Cookbook Project system.


    Cooper Black is an ultra-bold serif typeface intended for display use that was designed by Oswald Bruce Cooper in 1922. Its use in pop culture increased worldwide since 1966, when the Beach Boys used it for the cover artwork of their album Pet Sounds. It was then featured in the Doors’ L.A. Woman (1971) and David Bowie’s Ziggy Stardust (1972), and in the opening credits of The Bob Newhart Show, Garfield, and M*A*S*H. As a result, Cooper Black has become emblematic of late-’60s/early-’70s style.

    Copperplate Gothic is a typeface designed by Frederic W. Goudy in 1901. While termed a “Gothic” (another term for sans-serif), the face has small glyphic serifs that act to emphasize the blunt terminus of vertical and horizontal strokes. It was designed in capitals only, since the design was intended to be used for headings and key words rather than for body text.The typeface is often used in stationery, for social printing and business cards. It is also classically seen acid-etched into glass on the doors of law offices, banks and restaurants.

    Curlz is a whimsical OpenType Font display typeface designed by Carl Crossgrove and Steve Matteson in 1995. While decorative and without a historical model, the face bears comparison with the Emigre foundry’s 1991 typeface Remedy.

    Hobo Standard is a sans-serif typeface. It is unusual in having virtually no straight lines and no descenders. It was created by Morris Fuller Benton in 1910. There are several theories regarding the font’s name, and in fact it is widely recognized as one of the more interesting mysteries in typographic history. The most complete and most plausible theory demonstrates how Benton, who lived and worked near a large Russian community, must have seen a particular cigar poster spelling what appears to read like “HOBO!” (“ново”, Russian for “New!”). The poster’s hand-lettering of the word bears striking and unique resemblances to the font; the shape of the O at the extreme right of the poster was probably traced by Benton to match his own Capital O precisely, and those shapes helped define the design of the font.

    Monotype Corsiva  is an italic typeface made in the style of the early Italian cursives, as exemplified by the work of the writing master Ludovico degli Arrighi in the sixteenth century. The capitals are of swash design, with characteristic flourishes, designed primarily for use as initial letters. Corsiva can be used for short text passages in advertising but is best used to add sparkle to invitations, greeting cards and menus, and to give a sense of occasion to certificates and awards. This is also used on the Family Cookbook Project Recipe Tree cover option.

    Monotype Corsiva joins seven original typefaces in the Family Cookbook Project Standard Recipe Layout Options: Times Roman, Arial, Comic Sans, Impact, Century Gothic Fancy, Script, and Palatino Centered. The other new type faces are available in the custom layout option for now.

    Visit the Custom Recipe Layout option in the Layout and Design Center to see all of the typeface options.

  • Using Custom Recipe Layouts in a Family Cookbook Project

    One of the things that we are most proud of at FamilyCookbookProject.com is the ability to give complete control of every aspect of making a cookbook to the project’s editor. We provide professionally designed options that are perfect for most people, but some have visions of something different.

    We have already covered creating custom categories and custom cookbook cover or recipe category dividers. This article will cover creating a custom cookbook recipe layouts.

    FamilyCookbookProject.com currently offers 19 pre-set recipe layouts that set three aspects of your recipes that are perfect for most editors:

    • Font type
    • Font size
    • Number of columns for ingredients

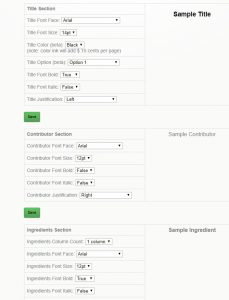
    However if you want something different, that is where custom Layouts come in. You can control each section independently – title, contributor name, ingredients, directions and personal notes.

    In addition to the font type, size and columns above, you also can control:

    • Bold text
    • Italic text
    • Justification of text
    • Label of the Comments Field

    This option is not for someone who does not have strong computer skills, but it can be very effective in displaying your recipes exactly how you wish them displayed.


    Bill Rice is founder and Co-Publisher of the Great Family Cookbook Project, a website that helps families and individuals collect and share food memories through customized printed cookbooks filled with treasured recipes. Follow us on Facebook and Pinterest!
  • Customizing your Family Cookbook Cover

    One of the things that we are most proud of at FamilyCookbookProject.com is the ability to give complete control of every aspect of making a cookbook to the project’s editor. We provide professionally designed options that are perfect for most people, but some have visions of something different.

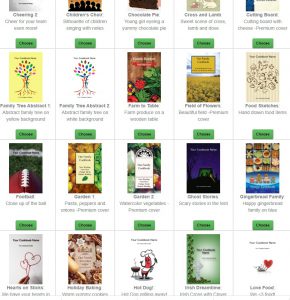
    Our last article was about creating custom categories. This article will cover creating a custom cookbook cover or recipe category dividers.

    A custom cookbook cover was the third most popular cover option last year. Some people simply have a white cover with a photo, others with graphic design skills create beautiful designs to personalize  their cookbook. Creativity knows no limit with Family Cookbook Project.

    • When creating a custom cover or divider, here are the specifications to use:
    • Images MUST be in JPG format to be used in your cookbook. GIFs and BMPs will not import correctly.
    • Your images should be 150-300dpi resolution – or they may seem pixilated in printing.
    • Full page with Bleed Custom Covers and Dividers must be sized at 6″x9″ with 4.75″x7.75″ active content or 1800 x 2700 pixels.
    • Full page non-bleed Dividers and other images must be sized at 5.5″x8.5″ with 4.75″x7.75″ active content or 1650 x 2550 pixels.
    • Also, do NOT upload files of the following type — they will not work: .doc, .pps, .ppt, .txt, .htm

    If you wanted to have a special photo on your cover, we suggest to use a page layout program or even a word processing program like Microsoft Word and design the page exactly the way you want it and save it as an image using the guidelines above. Then you can simply upload the image to the FamilyCookbookProject.com site and your custom cover is complete.


    ill Rice is founder and Co-Publisher of the Great Family Cookbook Project, a website that helps families and individuals collect and share food memories through customized printed cookbooks filled with treasured recipes. Follow us on Facebook and Pinterest!
  • Customizing Your Family Cookbook Recipe Categories

    One of the things that we are most proud of at FamilyCookbookProject.com is the ability to give complete control of every aspect of making a cookbook to the project’s editor. We provide professionally designed options that are perfect for most people, but some have visions of something different.

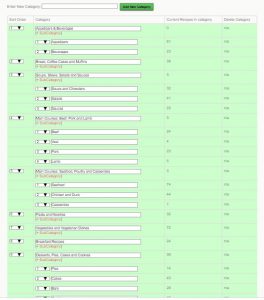
    One of the things that you can customize went creating your family cookbook project is your recipe categories.  We provide 8 basic recipe categories that organize your recipes into types of meal.

    • Appetizers & Beverages
    • Bread and Muffins
    • Soups, Stews, Salads and Sauces
    • Main Courses: Beef, Pork and Lamb
    • Main Courses: Seafood, Poultry, Pasta and Casseroles
    • Vegetables and Vegetarian Dishes
    • Desserts, Pies, Cakes and Cookies
    • Miscellaneous

    By using our custom category tool, you can add different categories or change them altogether. For example, if you wanted to create a dessert cookbook, the categories would all be dessert related. We’ve also seen people organize their recipe sections by family member.

    You can also create sub-categories or categories within categories. In my personal cookbook I have a category for Seafood and then I have added subcategories for Clams, Fish, Oysters, Crab and Shrimp. This way, if I need a shrimp recipe, they are all grouped together.

    You can create your own Custom Categories and sub-Categories by going to the Recipe Center on your Editor’s Homepage.  Then click on Category Add/edit.   Once you add your new categories, you’ll see a sort field – simply number them as you’d like them arranged and Save.

    One note, if you use both our default categories and your own custom categories, ours will come first, then yours in the order you set.  If you want full control, create all your own categories and set the selection to “Use ONLY your own custom categories” .

    If you need to move recipes, there is a bulk move tool at the bottom of the Category Section Editor.


    Bill Rice is founder and Co-Publisher of the Great Family Cookbook Project, a website that helps families and individuals collect and share food memories through customized printed cookbooks filled with treasured recipes. Follow us on Facebook and Pinterest!l

  • Customizing Your Family Cookbook Project

    One of the things that we are most proud of at FamilyCookbookProject.com is the ability to give complete control of every aspect of making a cookbook to the project’s editor. We provide professionally designed options that are perfect for most people, but some have visions of something different.

    Here are some of the things that you can customize went creating your family cookbook project:

    1. Recipe Categories – We provide 8 basic recipe categories that organize your recipes into types of meal. By using our custom category tool, you can add different categories or change them altogether. For example, if you wanted to create a dessert cookbook, the categories would all be dessert related. We’ve also seen people organize their recipe sections by family member.
    2. Recipe Dividers – Dividers are the pages that separate the recipe categories. We proved several simple black and white divider options but if you want to create your own, or add photos, you can. However remember to leave space for the name of the category to be displayed.
    3. Cookbook Cover – a custom cover was the third most popular cover option last year. Some people simply have a white cover with a photo, others with graphic design skills create beautiful designs to personalize  their cookbook. Creativity knows no limit with Family Cookbook Project.
    4. Recipe Layout – The recipe layout controls the font and size of the recipe text. You can control each section independently – title, contributor name, ingredients, directions and personal notes.

    Over the next few weeks, we will go into each of these customization options in more detail.


    Bill Rice is founder and Co-Publisher of the Great Family Cookbook Project, a website that helps families and individuals collect and share food memories through customized printed cookbooks filled with treasured recipes. Follow us on Facebook and Pinterest!

  • Assisted Living Cookbook To Honor Our Moms

    We received an email from Kori, an activity director in an assisted living home. She had an idea that we thought we’d share.

    She wrote “Mother’s Day is coming up and with isolation precautions in effect, I was thinking of a way to honor our moms.  My idea is a cookbook of the children of the moms in our community favorite recipes.”

    We at FamilyCookbookProject.com think this is a wonderful idea and our online program is uniquely suited to create this kind of a lasting tribute to those who made so many meals for us.

    Here is how to create an Assisted Living Cookbook

    1. Invite Recipe Contributors – The first step after establishing your FamilyCookbookProject.com account is to let those in your community know about the project and asking them to share a favorite recipe or two from their loved one. Use your facilities email lists or newsletter to generate interest and then when the responses come in, use the Invitation Tool to add those individuals into the cookbook. This will send them an email with their own username and password and they can add the recipes directly into the system.
    2. Design Your Assisted Living Cookbook – Select a cover from our professionally designed covers or create your own, write an introduction and select a recipe layout (I recommend the Easy Reading format (T3) which is good for older eyes). Our system will automatically create a table of contents and recipe index for your cookbook.
    3. Publish Your Cookbook – While it is too late to get any printed copies for this Mother’s Day, You could make available a PDF copy of the cookbook to everyone. Families could also access the cookbook online using our app. Printed copies of the cookbook would make great holiday gifts for families and staff members.

    When families enter the recipes directly into the cookbook. there is a field for personal notes that they can use to talk about their special person and why the dish reminds them of the person.

    If you have a loved one in an assisted living facility, suggest a community cookbook to the activity director or maybe volunteer to be the coordinator as a great way to bring your community together.


    Bill Rice is founder and Co-Publisher of the Great Family Cookbook Project, a website that helps families and individuals collect and share food memories through customized printed cookbooks filled with treasured recipes. Follow us on Facebook and Pinterest!

  • Target Temperatures for Grilling Meats and Chicken

    For a long time, judging if meat was cooked to our liking was judged by look and feel, an uncertain art at best, it is actually pretty easy to get great results all the time when you use an instant-read thermometer. A thermometer is the only reliable way to measure internal temperature.

    When grilling or baking meat and chicken, it is important to let the meat rest before cutting into it and serving.  If given the time to rest the meat will lose less juice when you cut it and when you eat it the meat will be juicier and tastier. Steaks or chops should stand for 5 minutes before serving while other thicker cuts should be longer. Remember that the meat with continue to cook even after being taken off the grill or out of the oven. Include that fact in your calculation of when to take the food from the heat.

    Rely on the thermometer for doneness, and save your creativity for seasoning and presentation.

    USDA Safe Minimum Family Cookbook Project Sugests
    Chicken & Turkey
    Whole or parts 165 165 breast 165-175 thigh
    Beef & Lamb
    Rare 125 + 3 minute rest
    Medium rare 130-135
    Medium 135-140
    Medium well 145 + 3 minute rest 140-150
    Well done 155+
    Ground 160 160
    Pork
    Medium rare 145 + 3 minute rest 145 + 3 minute rest
    Medium 150
    Well done 160
    Ground 160 160


    Bill Rice is founder and Co-Publisher of the Great Family Cookbook Project, a website that helps families and individuals collect and share food memories through customized printed cookbooks filled with treasured recipes. Follow us on Facebook and Pinterest! Also check out our BBQ Recipes Facebook Group and Family BBQ and Grilling Recipes Pinterest board.


  • How To Share Your Family Cookbook Recipes

    One of the real benefits of collecting all of your recipes in your online cookbook on FamilyCookbookProject.com is to be able to share them very easily with friends and family.

    Say you have friends over and they really like your split pea soup and want the recipe. All you need to do is go to your cookbook account either on your desktop computer or even on your mobile Mobile phone or tablet and pull up the recipe.  Now all you have to do is choose how you want to give it to him.

    Email – In the upper right hand corner, you’ll see a box marked email a recipe. Enter your friends email here and send them your recipe. It’s that easy!

    Posted on Facebook – Wow your friend might like your recipe, so will other friends. You can select the Facebook icon and post your recipe to your Facebook page to be seen by call your friends. Especially if you’ve been adding photos to your recipes, your posts will really stand out and be appreciated by lots of your friends and family.

    Posted on Pinterest – Here’s another way to share your recipes if they have photos attached. Pinterest was built around sharing photos and when you share one of your recipes on this social media platform, the photo becomes the pin and people who click on it will see your recipe.

    Print your recipe – If your friend simply wants a printed copy of your recipe, it is easy to select the print icon and simply print them a copy and give it to them.

    You also might want to suggest to your friends that they create their own family cookbook account so they can share their recipes as well!


    Bill Rice is founder and Co-Publisher of the Great Family Cookbook Project, a website that helps families and individuals collect and share food memories through customized printed cookbooks filled with treasured recipes. Follow us on Facebook and Pinterest!

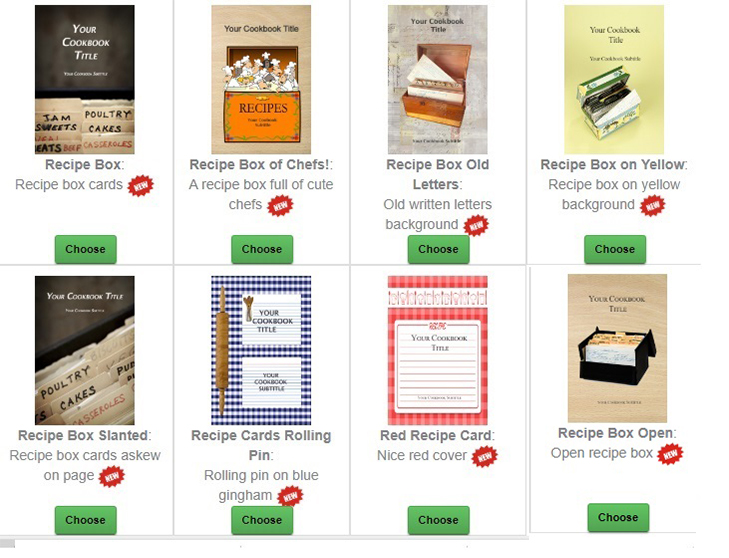
  • 8 New Recipe Card Themed Covers Added to Family Cookbook Project Design Center

    At Family Cookbook Project, we are always trying to improve our offerings to our members. We have a lot of requests about using recipe cards in cookbooks and that got us thinking about recipe card themed cookbook covers. So we are please to announce eight new pre-designed cookbook covers that you can choose when designing your own personal cookbook.


    All of these new cookbook covers options are now available and can be found in the new Recipe Card Covers section of the Cookbook Cover Design Center.


    Bill Rice is founder and Co-Publisher of the Great Family Cookbook Project, a website that helps families and individuals collect and share food memories through customized printed cookbooks filled with treasured recipes. Follow us on Facebook and Pinterest!