Author: Bill Rice

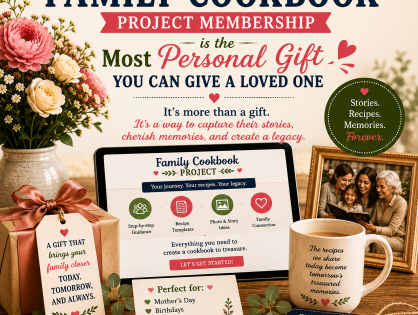
  • Why a Family Cookbook Project Membership Is the Most Personal Gift You Can Give a Loved One

    Why a Family Cookbook Project Membership Is the Most Personal Gift You Can Give a Loved One

    The best gifts say something about the person giving them — and even more about the one receiving them. They tell a story, carry meaning, and last far longer than anything bought off a shelf. A Family Cookbook Project membership is exactly that kind of gift. It’s not just a present — it’s an experience that turns memories, recipes, and family traditions into something tangible and lasting.

    When you give someone a Family Cookbook Project membership, you’re not just offering access to a website. You’re giving them a creative space to collect, preserve, and celebrate the recipes that define their family. It’s a gift that grows over time — one that inspires laughter, nostalgia, and connection.

    Here’s why this unique membership may be the most personal gift you can give a loved one — and how it creates meaning far beyond the day it’s opened.

    1. It’s a Gift That Celebrates Who They Are

    Everyone has recipes that tell their story — favorite dishes, passed-down traditions, or meals shared with friends. A Family Cookbook Project membership gives your loved one a way to capture those parts of their life and share them with others.

    For someone who loves cooking, family history, or creativity, it’s a perfect match. It allows them to express themselves in a way that feels authentic and personal — gathering the flavors and stories that make them who they are.

    Instead of a gift that fades or gets tucked away, this one highlights what matters most: family, love, and memory.

    1. It’s More Than a Cookbook — It’s a Legacy

    A Family Cookbook Project membership helps people build something that lasts. Each recipe added, each story written, and each photo uploaded becomes part of their legacy.

    When the project is complete, it’s not just a printed book. It’s a record of a life filled with family gatherings, traditions, and shared meals. It’s a time capsule that future generations will open and instantly feel connected to.

    Giving this membership means you’re giving someone the chance to preserve a part of themselves — and their family — in a form that will be cherished long after they’re gone.

    1. It’s Personal Without Being Predictable

    Most “personalized gifts” stop at engraving a name or printing a photo. A Family Cookbook Project membership goes much deeper. It’s not pre-made or generic. The recipient builds something that truly reflects them.

    They decide which recipes to include, which stories to tell, and how to design their cookbook. They can even invite others — family members, friends, or children — to contribute their own recipes and memories.

    What begins as one person’s project often turns into a family-wide celebration. And no two cookbooks ever look the same.

    1. It Brings People Together

    Food has always been a reason for connection. A family cookbook turns that connection into a lasting project.

    When someone receives a Family Cookbook Project membership, they can invite others to join and submit recipes online. That means cousins, grandparents, and siblings can all contribute — even if they live far apart.

    The process sparks conversation and nostalgia. People reminisce, share stories, and rediscover forgotten meals. It reminds families what they share, and that togetherness is the real heart of cooking.

    That’s why this membership is so much more than a tool — it’s an opportunity to bring people closer.

    1. It Fits Any Occasion

    A Family Cookbook Project membership is as flexible as it is meaningful. It makes sense for almost any event where you’d want to give something heartfelt and lasting.

    Here are a few perfect times to give one:

    • Mother’s Day or Father’s Day: Help parents or grandparents preserve their culinary legacy.
    • Weddings: Encourage newlyweds to blend family recipes into their new life together.
    • Birthdays: A creative project for someone who loves cooking or storytelling.
    • Anniversaries: A celebration of shared meals and memories through the years.
    • Holidays: A family-centered gift that inspires connection and gratitude.
    • Retirement or memorials: A reflective way to honor life’s most meaningful recipes.

    It’s a gift that’s as appropriate for a grandmother as it is for a young couple starting their own traditions.

    1. It’s Easy to Give, But Feels Deeply Thoughtful

    A Family Cookbook Project membership is simple to purchase — but it doesn’t feel simple when it’s received.

    You can order a gift membership directly from FamilyCookbookProject.com. Choose whether to send it by email or print a certificate to include with a card or gift box.

    In minutes, you’ve given a loved one the ability to start something truly special — a creative project that turns their memories into a beautiful printed book.

    And because it’s so personal, it feels like you’ve given far more than a product. You’ve given someone a purpose, a story, and a way to share love through food.

    1. It’s Creative and Collaborative

    Cookbooks are not just collections of recipes — they’re creative works. When someone builds their own cookbook through Family Cookbook Project, they become a designer, editor, and storyteller all at once.

    They can:

    • Write introductions or family stories.
    • Add quotes or sayings that capture their family’s humor.
    • Include photos of loved ones and meals.
    • Choose fonts, covers, and layouts that match their taste.

    Each decision adds to the uniqueness of the finished book. It’s a gift that encourages imagination and reflection — something that engages both heart and mind.

    1. It’s the Gift That Keeps Growing

    Unlike most presents, a Family Cookbook Project membership doesn’t end when it’s opened. It grows with time.

    The recipient can add recipes whenever they want, invite new contributors, or print updated editions as their collection expands. It’s flexible, adaptable, and always evolving — just like family itself.

    Every year, new dishes can be added. Every generation can contribute. The cookbook becomes a living document of family life — and that makes it priceless.

    1. It’s Ideal for People Who “Don’t Need Anything”

    We all know someone who insists they don’t want gifts or already have everything. For them, a Family Cookbook Project membership is perfect.

    It’s not another item to clutter their home. It’s a meaningful project they can enjoy at their own pace — one that results in something beautiful and lasting.

    It’s a gift that says: You’ve given so much to others. Now here’s a way to capture what matters most to you.

    1. It Turns Love Into Something Visible

    Cooking has always been a way to show love without words. A family cookbook does the same — but in print.

    Giving someone a Family Cookbook Project membership is like giving them the opportunity to turn their love, stories, and flavors into a form that others can see, touch, and use.

    Every time a loved one flips through their finished book, they’ll remember the person who gave them the chance to create it.

    It’s a gift that says, I see you, I value you, and your story deserves to be told.

    How to Give a Family Cookbook Project Membership

    Giving this gift is simple:

    1. Visit FamilyCookbookProject.com.
    2. Select the Gift Membership option.
    3. Choose delivery — email or printable gift certificate.
    4. Add your personal message.
    5. Give the joy of creation.

    The recipient can start immediately — adding recipes, photos, and stories to build their own cookbook. Within weeks, they’ll have something meaningful to share and keep forever.

    Why It’s the Most Personal Gift You Can Give

    Because it’s not about the giver or the price tag — it’s about the person receiving it.

    It celebrates who they are, what they’ve shared, and how they’ve shaped others through food and love. It’s a gift that doesn’t fade, break, or go out of style. It deepens with every memory added and every meal made from its pages.

    In the end, a Family Cookbook Project membership isn’t just a way to make a cookbook. It’s a way to preserve a life.

    Get Started Today

    Give a gift that means more than words. Purchase a Family Cookbook Project membership today at FamilyCookbookProject.com and let your loved one create a cookbook that reflects their family, their story, and their heart.

    It’s more than a present — it’s the most personal gift you can give.


    Bill Rice is Founder and Co-Publisher of the Family Cookbook Project, the leading online cookbook publisher with a website that helps families and individuals collect, preserve and share food memories by creating their own printed custom cookbooks. He is the author of The Wellfleet Oyster Cookbook and the Cape Cod Cocktail Cookbook (Available on Amazon), both created using FamilyCookbookProject.com. He is also editor of the Donovan Family Cookbook, now it’s third printing and is an avid genealogist tracing his family back to the 1600’s.

    Follow Family Cookbook Project on Facebook, Instagram, Twitter TikTok, YouTube and Pinterest!
     

  • Onions, Explained: How to Choose the Best Onion for Every Dish

    Onions, Explained: How to Choose the Best Onion for Every Dish

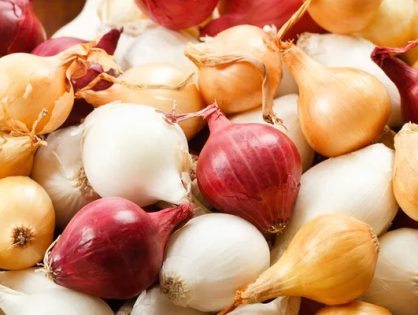
    Onions are a foundational ingredient in cuisines around the world. Their versatility and flavor-enhancing properties make them essential in a wide variety of dishes, from soups and stews to salads and sauces. However, not all onions are created equal—different varieties offer unique flavors, textures, and best uses in cooking.

    In this article, we’ll explore the most common types of onions, their differences, and how to best use each one in your cooking.

    Yellow Onions

    Flavor : Yellow onions are the most common type of onion and are known for their sharp, pungent flavor when raw, which mellows into a sweet, caramelized taste when cooked.

    Best Uses : Yellow onions are the go-to for cooking. They’re incredibly versatile and can be used in almost any savory dish. Whether you’re making soups, stews, sauces, or stir-fries, yellow onions add depth and sweetness. They’re also perfect for  caramelizing  due to their higher sugar content.

    Cooking Tip : If a recipe calls for “onion” without specifying a type, yellow onions are usually the best choice.

    White Onions

    Flavor : White onions have a slightly sharper, more intense flavor compared to yellow onions. They are a bit less sweet and have a crisper texture when raw.

    Best Uses : White onions are commonly used in  Mexican cuisine , where their sharpness balances well with spicy dishes like  salsas ,  guacamole , and  tacos . They’re also great in  pico de gallo  and can be used in stir-fries and soups. They tend to have a milder aftertaste than yellow onions.

    Cooking Tip : Use white onions when you want a stronger onion flavor that won’t be too overpowering when raw, especially in fresh dishes.

    Red Onions

    Flavor : Red onions have a mild, slightly sweet flavor with a crisp texture. When raw, they are less pungent than yellow or white onions, and their flavor becomes more subtle when cooked.

    Best Uses : Red onions are most often used raw due to their vibrant color and milder taste. They’re perfect for  salads ,  sandwiches ,  burgers , and as a topping for dishes like  bruschetta . When grilled or roasted, their sweetness intensifies, making them a delicious addition to BBQ dishes, kabobs, or roasted vegetable medleys.

    Cooking Tip : Soak sliced red onions in cold water for about 10 minutes to reduce their sharpness when using them raw in salads.

    Sweet Onions (Vidalia, Walla Walla, Maui)

    Flavor : Sweet onions, as their name suggests, have a much milder, sweeter flavor compared to other onions. They have a higher sugar content, which makes them ideal for caramelizing.

    Best Uses : Sweet onions are ideal for  onion rings ,  caramelizing , and  grilling . Their sweetness makes them great for dishes where you want a less pungent onion taste, like  salads ,  salsas , and  sandwiches . Vidalia onions, in particular, are known for their use in  Southern cuisine , such as in  onion relishes  or  coleslaws .

    Cooking Tip : Due to their higher water content, sweet onions don’t store as long as other varieties. Store them in a cool, dry place and use them within a few weeks of purchase.

    Shallots

    Flavor : Shallots have a delicate, sweet flavor that is a cross between garlic and onions. They are more subtle than most onions and offer a touch of sweetness with a hint of sharpness.

    Best Uses : Shallots are perfect for  vinaigrettes ,  salad dressings , and  sauces , where a mild onion flavor is desired without overpowering other ingredients. They’re also great for  roasting  or  braising , and are frequently used in  French cooking  to add depth to sauces like  béarnaise  or  vinaigrette .

    Cooking Tip : Due to their mild flavor, shallots are best when used in dishes where the onions won’t be cooked for long periods, allowing their nuanced flavor to shine through.

    Green Onions (Scallions)

    Flavor : Green onions, also known as scallions, have a mild, fresh onion flavor. The white part of the scallion is more pungent, while the green tops are milder and more herb-like.

    Best Uses : Green onions are commonly used as a garnish in  soups ,  stir-fries ,  salads , and  Asian dishes  like  ramen  and  dumplings . They can be eaten raw or lightly cooked and add a fresh, crisp bite to dishes.

    Cooking Tip : Use both the white and green parts for different purposes—white for cooking in dishes like stir-fries and soups, and the green tops for garnish or raw applications like salads.

    Leeks

    Flavor : Leeks have a mild, onion-like flavor but with a hint of sweetness. They’re more delicate than yellow onions and can add a subtle depth to dishes without being overpowering.

    Best Uses : Leeks are commonly used in  soups  (like the classic  potato leek soup ),  stews , and  braises . They’re also great for  sautéing  and make a wonderful addition to  egg dishes ,  quiches , and  frittatas .

    Cooking Tip : Leeks tend to have dirt trapped between their layers, so it’s important to clean them thoroughly. Slice the leeks, then soak them in water to remove any grit.

    Pearl Onions

    Flavor : Pearl onions are small and sweet with a mild flavor. They are available in white, red, and yellow varieties.

    Best Uses : Pearl onions are often used whole in  stews ,  braises , and  roasts . They are perfect for  pickling  or serving in cocktails like martinis. Pearl onions are also delicious when  glazed  or roasted alongside meats or vegetables.

    Cooking Tip : To easily peel pearl onions, blanch them in boiling water for a few seconds, then transfer them to ice water. The skins will slip off easily.

    Choosing the Right Onion for Your Dish

    Each type of onion brings its own unique flavor and texture to a dish. Here’s a quick guide to help you choose the right onion for your recipe:

    –  For Raw Dishes : Red onions, sweet onions, and green onions are best for raw applications like salads, sandwiches, and garnishes.

    –  For Cooking : Yellow onions are the most versatile for cooked dishes, while white onions work well in spicier cuisines like Mexican food. Shallots and leeks are perfect for delicate sauces and soups.

    –  For Caramelizing or Grilling : Sweet onions (like Vidalia) and yellow onions are ideal due to their high sugar content.

    Mastering Onion Variety in Your Cooking

    Onions are one of the most important ingredients in the kitchen, providing a foundation of flavor in so many dishes. By understanding the differences between the various types of onions and how they impact flavor and texture, you can elevate your cooking and ensure each dish shines. Whether you’re caramelizing yellow onions for a savory soup, adding raw red onions to a salad, or grilling sweet onions for burgers, knowing which onion to use will help you achieve the best results.

    And don’t forget—if you’ve found a family recipe that uses onions to perfection, you can store and share it with  FamilyCookbookProject.com . Keep your favorite recipes organized and ready for any occasion!


    Bill Rice is Founder and Co-Publisher of the Great Family Cookbook Project, a website that helps families and individuals collect, preserve and share food memories by creating their own printed personal cookbooks. He is the author of The Wellfleet Oyster Cookbook and the Cape Cod Cocktail Cookbook (Available on Amazon), both created using FamilyCookbookProject.com. He is also editor of the Donovan Family Cookbook, now it’s third printing and is an avid genealogist tracing his family back to the 1600’s.

    Follow Family Cookbook Project on Facebook, Instagram, Twitter TikTok, YouTube and Pinterest!


  • Giving the Gift of Legacy: Helping Parents and Grandparents Preserve and Share Recipes

    Giving the Gift of Legacy: Helping Parents and Grandparents Preserve and Share Recipes

    Every family has a keeper of recipes — the parent or grandparent whose cooking defines home. Their dishes fill kitchens with warmth, their recipes mark every holiday, and their meals hold stories that no one else could tell quite the same way.

    But memories fade, papers get misplaced, and sometimes the people who hold those recipes pass on before they can write them down. When that happens, something precious is lost.

    Giving the gift of helping your parents or grandparents preserve and share their recipes is one of the most meaningful gestures you can make. Through Family Cookbook Project, you can help them collect those recipes, stories, and traditions in a printed cookbook that will last for generations.

    This isn’t just a project — it’s a legacy. Here’s how and why it matters.

    1. Why Preserving Family Recipes Matters

    Family recipes are more than lists of ingredients — they’re living memories.

    Your grandmother’s pie might remind you of Sunday dinners. Your father’s grilled chicken might bring back summer cookouts. Those dishes carry the taste of moments that shaped your life.

    When parents and grandparents preserve their recipes, they’re not only saving food traditions. They’re passing down love, culture, and identity.

    A printed cookbook becomes a piece of family history — a record that keeps those stories alive long after the last meal is served.

    1. The Gift of Legacy Is the Gift of Connection

    Helping your loved ones preserve their recipes isn’t just about the finished book. It’s about what happens along the way.

    You’ll spend time together reminiscing about old meals, learning the stories behind them, and hearing details you may have never known.

    These conversations strengthen bonds. They connect generations through shared experiences and give everyone a sense of belonging.

    In a world that moves quickly, this project slows things down — reminding families where they came from and what truly matters.

    1. How to Introduce the Idea

    Approaching parents or grandparents about preserving their recipes should come from a place of appreciation, not urgency.

    Start simply:

    “Your recipes have always meant so much to our family. I’d love to help you save them so we can all enjoy them for years to come.”

    Make it about honoring them, not assigning work. Let them know you’ll handle the technical parts — entering recipes, adding photos, and organizing everything using FamilyCookbookProject.com.

    Once they see your enthusiasm and understand the purpose, they’ll likely feel honored and eager to participate.

    1. Start Small — and Build

    The idea of preserving every recipe might seem overwhelming, especially for older relatives. Start with a handful of favorites.

    Choose dishes that have meaning — the ones everyone asks for at family gatherings. Enter those first on FamilyCookbookProject.com to show how the platform works and what the finished product will look like.

    Once they see how easily their recipes can be preserved, the project often grows naturally.

    You’ll find that one story leads to another, one recipe sparks a memory, and before long, you’re building a complete family history.

    1. Make It a Collaborative Experience

    Family Cookbook Project makes it simple to involve everyone. You can invite siblings, cousins, and extended family members to contribute recipes or photos online.

    Parents and grandparents will enjoy seeing others get involved — especially when younger generations show interest in their cooking.

    Each contribution adds to the story, turning the cookbook into a collective celebration of the family’s food traditions.

    What starts as a project to capture Grandma’s recipes becomes a multigenerational collaboration that unites the whole family.

    1. Capture the Stories Behind the Food

    A family cookbook becomes more powerful when it includes the stories that bring recipes to life.

    Encourage your parents or grandparents to share memories tied to each dish. Ask simple questions like:

    • “Where did this recipe come from?”
    • “Was it passed down from someone else?”
    • “When did you usually make this meal?”

    Add those notes alongside the recipes on FamilyCookbookProject.com.

    The result is a cookbook filled with voices — not just instructions. When future generations read those notes, they’ll feel as if they’re right there in the kitchen, learning from the people who came before them.

    1. Include Photos and Handwritten Notes

    Photos add warmth and authenticity. Include pictures of your parents or grandparents cooking, serving, or enjoying meals with family.

    If they have old recipe cards or handwritten notes, scan and upload them. Even a smudged page or faded index card carries emotional weight — a tangible reminder of their hands at work.

    Those small details make the final printed cookbook deeply personal.

    Family Cookbook Project supports photo uploads throughout the book, letting you combine modern design with those nostalgic touches.

    1. Turn It Into a Family Keepsake

    Once all the recipes and stories are collected, you can choose from several sizes and binding options for the printed book:

    • 8½ x 11 inches for a full-size layout with plenty of space for photos.
    • 8 x 8 inches for a clean, modern look.
    • 5½ x 8½ inches for a classic, easy-to-hold kitchen edition.

    You can select spiral binding for a practical cooking version or hardcover for an heirloom keepsake.

    Print copies for every family member — especially the younger ones. Giving them their own book teaches them that these recipes are part of their heritage, too.

    1. Make It an Ongoing Tradition

    The beauty of Family Cookbook Project is that you can keep adding to it over time.

    Parents and grandparents can log in anytime to include new recipes or share notes. Each addition becomes another chapter in the family’s story.

    Consider printing a new edition every few years — adding more recipes from new generations.

    That way, the cookbook evolves as the family does, keeping the legacy alive and growing.

    1. Why This Gift Means So Much

    Helping parents and grandparents preserve their recipes isn’t just thoughtful — it’s deeply meaningful.

    You’re showing them that what they’ve created in the kitchen has value beyond words. You’re saying, The meals you made shaped us. We want to keep that part of you alive.

    For them, it’s affirming to know that their recipes — their love, effort, and tradition — will continue to be part of the family’s future.

    For you, it’s a way to give something that lasts longer than any material gift: the preservation of identity, love, and heritage.

    1. How to Get Started

    1. Visit FamilyCookbookProject.com.
    2. Create an account for your loved one or purchase a gift membership.
    3. Begin entering recipes and uploading photos.
    4. Invite family members to contribute stories or additional dishes.
    5. Choose a layout, cover design, and binding for the printed edition.
    6. Print copies to share — one for every family member who wants a piece of the legacy.

    It’s that simple. Within weeks, your parents or grandparents can see their recipes beautifully preserved in print.

    1. The Joy of Seeing Their Legacy in Print

    When your parents or grandparents hold their finished cookbook for the first time, the emotion is undeniable.

    They’ll see their name, their handwriting, and their food — the essence of their love — captured forever.

    It’s a powerful moment. And it’s one that you made possible by giving them the gift of legacy.

    Get started today

    Give your parents or grandparents the chance to preserve their recipes and share their story. Create or gift a Family Cookbook Project membership at FamilyCookbookProject.com.

    It’s more than a cookbook — it’s a way to keep their love alive, one recipe at a time.

    Bill Rice is Founder and Co-Publisher of the Family Cookbook Project, the leading online cookbook publisher with a website that helps families and individuals collect, preserve and share food memories by creating their own printed custom cookbooks. He is the author of The Wellfleet Oyster Cookbook and the Cape Cod Cocktail Cookbook (Available on Amazon), both created using FamilyCookbookProject.com. He is also editor of the Donovan Family Cookbook, now it’s third printing and is an avid genealogist tracing his family back to the 1600’s.

    Follow Family Cookbook Project on Facebook, Instagram, Twitter TikTok, YouTube and Pinterest!


  • How to Review, Polish, and Print Your Cookbook Without Feeling Overwhelmed

    How to Review, Polish, and Print Your Cookbook Without Feeling Overwhelmed

    You have entered recipes. You have gathered family favorites. You may even have added photos, notes, and stories.

    Now comes the part that makes many cookbook editors freeze like someone just asked them to make gravy without lumps.

    Reviewing the cookbook.

    Suddenly, the project feels bigger than it did before. What if there are typos? What if a recipe is missing a step? What if the categories are not perfect? What if Cousin Linda notices that her famous dip is listed under appetizers when she insists it is a “party essential”?

    Take a breath.

    You do not need to review your cookbook like you are editing a medical textbook. You are making a family cookbook. It should be clear, useful, warm, and ready to share. It does not need to be flawless to be loved.

    Let’s walk through how to review, polish, and print your cookbook without feeling overwhelmed.

    Start With One Simple Question

    Before you dive into the details, ask yourself this:

    “Can my family use and enjoy this cookbook?”

    That is the real goal.

    Not perfection. Not every comma in the right place. Not a cover that wins an art award and makes people whisper in bookstores.

    Your goal is a printed cookbook filled with recipes your family wants to save, cook, and pass down.

    If the recipes are there, the book is organized, and the pages are easy to read, you are already in good shape.

    It is easy to turn the review process into a giant mountain. But most of the time, it is more like clearing the kitchen counter. A little at a time, and suddenly you can see what you are working with.

    Review in Small Sections

    Do not sit down and try to review the whole cookbook at once.

    That is how people end up staring at page 42 and wondering why the word “casserole” no longer looks real.

    Instead, review one section at a time.

    Start with appetizers. Then move to soups and salads. Then main dishes. Then desserts. You get the idea.

    Give yourself a small goal, such as:

    “Tonight I will review ten recipes.”

    Or:

    “This weekend I will review the dessert section.”

    Small sections make the job feel manageable. They also help you catch more because your brain is not worn out from reading 200 recipes in one sitting.

    Let’s be real. After too many recipes, even “add butter” starts to feel suspicious.

    Check the Recipe Basics First

    When you review each recipe, look for the important parts.

    Does the recipe have a clear title?

    Are the ingredients listed?

    Are the directions included?

    Does it mention the oven temperature, if needed?

    Does it include a cooking or baking time, if known?

    Does it say how many servings it makes, if that matters?

    That is your first pass.

    Do not worry yet about making every recipe sound the same. Family recipes often come from different people, different times, and different writing styles. That is part of their charm.

    Some recipes may be neat and exact. Others may sound like your grandmother standing beside you saying, “You’ll know when it looks right.”

    Helpful? Maybe. Sweet? Absolutely.

    If a recipe is missing something important, add a note or make your best edit. If you are not sure, ask the person who submitted it.

    If no one knows, keep the recipe and add a practical note. For example:

    “Original recipe did not include a baking time. Start checking after 25 minutes.”

    That is useful, honest, and much better than leaving the next cook to guess while staring into the oven like it owes them money.

    Use the Smart Recipe Converter for Last-Minute Additions

    Sometimes the review process reminds you of recipes you still want to add.

    Maybe you find an old recipe card in a drawer. Maybe someone texts you a photo of Aunt Carol’s coffee cake. Maybe you suddenly remember the holiday punch recipe that made every family party feel fancy, even though it was mostly ginger ale and optimism.

    Good news: adding last-minute recipes does not have to mean typing them from scratch.

    With FamilyCookbookProject.com’s Smart Recipe Converter, you can upload a photo, scan, or screenshot of a recipe and turn it into editable text. That can save a lot of time, especially when you are trying to finish.

    You can use it for:

    Old handwritten recipe cards

    Printed recipes

    Recipe photos sent by family members

    Screenshots of saved recipes

    Typed pages from an old family collection

    After the tool converts the recipe, review the text, fix anything that needs attention, and save it to your cookbook.

    The Smart Recipe Converter is especially helpful for older projects because it removes one of the biggest roadblocks: typing.

    Because honestly, nobody started a family cookbook because they wanted to spend Saturday night typing “1 cup sugar” forty-seven times.

    Polish the Categories

    Once the recipes look good, check your categories.

    Clear categories make your cookbook easier to use. Your family should be able to find the cookies without launching a search party.

    Common categories include:

    • Appetizers
    • Soups and Salads
    • Main Dishes
    • Side Dishes
    • Breads
    • Desserts
    • Cookies
    • Holiday Favorites
    • Family Favorites

    You can also create custom sections that fit your family.

    Maybe you need “Grandma’s Kitchen,” “Summer Cookouts,” “Christmas Eve,” or “Recipes the Kids Actually Eat.” That last section may be short, but powerful.

    Do not stress if one recipe could fit in more than one place. Pick the category that makes the most sense and move on.

    No one is going to reject the cookbook because the corn pudding is under side dishes instead of holiday favorites. And if they do, hand them a spoon and let the corn pudding solve the problem.

    Add Personality With Short Notes

    A polished cookbook is not just clean and organized. It also feels personal.

    One of the easiest ways to add warmth is with short recipe notes.

    You do not need to write a family history for every recipe. One sentence can do the job.

    Try notes like:

    • “Mom made this every Sunday after church.”
    • “This was always the first dessert gone at Thanksgiving.”
    • “Grandpa liked this with extra black pepper.”
    • “Best served with coffee and gossip.”

    These notes make people smile. They also help future generations understand why a recipe mattered.

    A family cookbook should feel like your family. A little practical. A little sentimental. Maybe a little bossy about butter.

    Preview the Cookbook Like a Reader

    Now it is time to preview.

    This step matters because it lets you see the cookbook as a book, not just a list of recipes.

    Look at the cover. Flip through the pages. Check the table of contents and recipe order. Notice how the photos look. Read a few recipes from each section.

    Ask yourself:

    • Does the cookbook feel easy to use?
    • Does the layout look good?
    • Are the most important recipes included?
    • Does the title feel right?
    • Would I be proud to give this as a gift?

    If the answer is yes, you are close.

    If you see a few small things to fix, fix them. But do not let the preview turn into an endless loop.

    This is where many people get stuck. They preview, edit, preview, edit, preview, edit, and suddenly another holiday has passed.

    At some point, you have to say, “This is ready.”

    And it probably is.

    Ask One Helpful Person to Review It

    If you want a second opinion, ask one trusted person to look through the cookbook.

    Choose someone who will be helpful, not someone who treats a typo like a national emergency.

    Ask them to look for big things:

    • Missing ingredients
    • Confusing directions
    • Wrong recipe names
    • Photos that do not match
    • Obvious spelling errors

    Give them a deadline. A short one.

    Try saying:

    “I’m getting ready to print the cookbook. Could you look through it this week and tell me if you see anything major?”

    That keeps the review focused.

    You are not asking for a committee meeting. You are asking for one helpful set of eyes.

    Family committees can be lovely, but they can also turn “Should we print?” into a six-month debate about the spelling of “coleslaw.”

    Do Not Let Small Flaws Stop a Great Gift

    Here is the truth: almost every family cookbook has a few tiny imperfections.

    A missing period. A recipe note that could have been worded better. A photo that is not perfectly centered. A direction that sounds a little old-fashioned.

    That is okay.

    People will not treasure your cookbook because every detail is perfect. They will treasure it because it saves the recipes and memories that matter.

    They will see Grandma’s pie. Dad’s chili. Mom’s Christmas cookies. Aunt Sue’s potato salad. The recipes that taste like home.

    That matters more than a typo.

    A finished cookbook with love in it beats an unfinished cookbook every single time.

    Your Final Review Plan

    Here is a simple way to finish without getting overwhelmed:

    • Review one section at a time.
    • Check each recipe for the basics.
    • Use the Smart Recipe Converter for any last-minute recipe cards or photos.
    • Clean up your categories.
    • Add a few personal notes.
    • Preview the cookbook.
    • Ask one helpful person to review it.

    That is it.

    No panic. No perfection spiral. No need to reorganize every recipe like you are planning a moon landing.

    You are closer than you think.

    Your cookbook is not just a project to finish. It is a gift waiting to be printed. It holds recipes your family loves, memories worth saving, and stories that deserve more than a dusty drawer or forgotten email.

    So take the next step.

    Review it. Polish it. Print it.

    Then enjoy the best part: handing someone a real cookbook and saying, “Here it is. We saved them.”

    That moment is worth it.


    Bill Rice is Founder and Co-Publisher of the Family Cookbook Project, the leading online cookbook publisher with a website that helps families and individuals collect, preserve and share food memories by creating their own printed custom cookbooks. He is the author of The Wellfleet Oyster Cookbook and the Cape Cod Cocktail Cookbook (Available on Amazon), both created using FamilyCookbookProject.com. He is also editor of the Donovan Family Cookbook, now its third printing and is an avid genealogist tracing his family back to the 1600’s.

    Follow Family Cookbook Project on Facebook, Instagram, X (Twitter) TikTok, YouTube and Pinterest!


  • How to Organize Cookie Recipes by Type in Your Family Cookbook

    How to Organize Cookie Recipes by Type in Your Family Cookbook

    A great cookie recipe deserves to be easy to find. When you’re flipping through your family cookbook, searching for Grandma’s gingerbread or your aunt’s chocolate chip masterpiece, the last thing you want is to dig through pages of unrelated recipes. That’s where good organization comes in.

    The way you organize your cookie recipes can turn your cookbook from a cluttered list into a smooth, enjoyable baking experience — one that reflects your family’s traditions and makes it easy for future generations to follow in your footsteps.

    Here’s how to categorize, label, and organize your cookie recipes by type using Family Cookbook Project, so your collection feels as sweet and polished as the cookies themselves.

    1. Why Organization Matters in a Family Cookbook

    A well-organized cookbook doesn’t just look good — it makes baking simpler and more enjoyable.

    When recipes are grouped logically, you can:

    • Find what you need quickly.
    • Discover forgotten favorites more easily.
    • See at a glance what types of cookies you already have (and where you might want to add more).

    A clear structure also makes your cookbook more useful for others in the family — especially younger bakers who may not yet know every recipe by heart.

    Family Cookbook Project allows you to create custom categories, so you can sort your cookies in whatever way makes sense for your family.

    1. Start with Broad Cookie Categories

    The first step in organizing your cookie recipes is to divide them into clear, broad categories. These categories make the cookbook intuitive to use and easy to browse.

    Here are a few classic options that work well for most families:

    • Drop Cookies – Cookies made by dropping spoonfuls of dough onto a baking sheet. Examples: chocolate chip, oatmeal raisin, or peanut butter.
    • Rolled Cookies – Cookies made from dough rolled out and cut into shapes. Think sugar cookies, gingerbread men, or shortbread.
    • Bar Cookies – Baked in a pan and cut into squares or bars. Examples include brownies, blondies, and lemon bars.
    • Refrigerator or Slice-and-Bake Cookies – Dough rolled into logs, chilled, and sliced before baking. Great for pinwheels or butter cookies.
    • Pressed or Spritz Cookies – Shaped with a cookie press or piping bag, often delicate and buttery.
    • No-Bake Cookies – Quick treats made without using the oven. Perfect for kids to make.
    • Sandwich Cookies – Cookies with filling, such as whoopie pies or linzer cookies.
    • Specialty Cookies – Include anything unique to your family — like gluten-free, vegan, or heritage cookies passed down through generations.

    By starting with these foundational categories, you make the book intuitive for everyone — even someone new to baking.

    1. Add Subcategories for a Personal Touch

    Once you’ve built your broad categories, take it a step further by adding subcategories that reflect your family’s traditions or tastes.

    For example:

    • Under Holiday Cookies, you might include “Christmas Classics,” “Hanukkah Favorites,” or “New Year’s Treats.”
    • Within Chocolate Cookies, you could list “Brownie-Inspired,” “Double Chocolate,” or “Chocolate Chip Variations.”
    • Under Family Favorites, include cookies tied to a specific person — “Grandma’s Collection,” “Mom’s Best Bakes,” or “The Kids’ Creations.”

    Family Cookbook Project gives you flexibility to name and arrange your categories however you like — so your book can feel uniquely yours.

    1. Use Consistent Formatting for Each Recipe

    Good organization goes beyond categories — it also means keeping each recipe easy to read and consistent in format.

    A clean, predictable layout helps bakers focus on what matters: the cookies.

    When adding recipes, be sure to include:

    • A clear title (with descriptive keywords, like “Chewy Oatmeal Raisin Cookies”).
    • An ingredient list in the order they’re used.
    • Step-by-step directions.
    • Bake time, temperature, and yield.
    • Notes for tips, variations, or substitutions.

    Family Cookbook Project standardizes this automatically when you enter your recipes, so each one appears uniform across the book.

    1. Include an Index for Quick Searching

    An index may seem like a small detail, but it’s a powerful tool for navigating your cookbook.

    The built-in index feature in Family Cookbook Project automatically lists recipes by title and contributor, so you can quickly find any cookie by name or see who submitted it.

    This feature is especially helpful in a cookie cookbook where multiple family members contribute — you can easily find “Aunt Jean’s Coconut Macaroons” or “Dad’s Peanut Butter Blossoms” without flipping through every page.

    You can even include a thematic index, such as:

    • “Cookies with Nuts”
    • “Cookies for Gifting”
    • “Cookies for Kids to Make”

    Indexes make your cookbook feel more professional and easier to use.

    1. Create Visual Dividers for Each Cookie Type

    A family cookie cookbook should be both functional and beautiful.

    Add section dividers or full-page images that introduce each type of cookie. For example:

    • A festive photo of sugar cookies for the Rolled Cookies section.
    • A warm tray of brownies for the Bar Cookies section.
    • A whimsical image of cookie cutters for the Holiday Cookies section.

    Family Cookbook Project allows you to add photos anywhere in your layout, giving each section its own personality.

    If your family has a favorite baking photo — Grandma rolling dough or kids decorating cookies — those images can become the heart of the section dividers.

    1. Keep Heritage Recipes Front and Center

    Every family has those irreplaceable cookie recipes that have been passed down through generations. Give them their own section or highlight them with a special note, such as:

    “This recipe has been part of our family since 1948.”
    “Always use real butter — Grandma’s rule.”

    Adding a “Family Heritage Cookies” section gives your cookbook emotional weight, connecting bakers across generations.

    You might even include short family stories or handwritten recipe cards for authenticity.

    1. Don’t Forget the Modern Touches

    Family cookbooks grow with each generation. Include newer recipes, too — vegan cookies, air-fryer desserts, or gluten-free classics — so the book stays relevant and inclusive.

    Consider adding a “New Traditions” section, where kids and younger bakers can include their own favorites. Over time, this section will show how your family’s cookie traditions evolve.

    1. Keep It Manageable and Easy to Update

    It’s tempting to include every cookie recipe you’ve ever made, but a focused collection is easier to use and more enjoyable to read.

    Start with 30–50 of your family’s best recipes, organized clearly into categories. You can always add more later — Family Cookbook Project makes it simple to edit or expand your cookbook whenever new favorites emerge.

    That flexibility ensures your cookbook grows right alongside your family traditions.

    1. Make It a Legacy Piece

    When you organize cookie recipes by type — and by story — you’re doing more than creating a cookbook. You’re creating a piece of family history that can be passed from one kitchen to another.

    Each section, each page, each note reflects not just what your family bakes, but who your family is.

    Whether it’s Grandma’s perfectly pressed spritz cookies or your child’s first chocolate chip experiment, your organized cookbook keeps them all connected — easy to find, easy to bake, and impossible to forget.

    Get Started Today

    Ready to bring order (and sweetness) to your recipe collection? Start organizing your cookie recipes by type with FamilyCookbookProject.com.

    Create sections, upload photos, and print a beautiful cookbook that keeps your family’s baking traditions alive — and easy to find.

    Because great cookies deserve to be remembered and shared, one category at a time.

    Bill Rice is Founder and Co-Publisher of the Family Cookbook Project, the leading online cookbook publisher with a website that helps families and individuals collect, preserve and share food memories by creating their own printed custom cookbooks. He is the author of The Wellfleet Oyster Cookbook and the Cape Cod Cocktail Cookbook (Available on Amazon), both created using FamilyCookbookProject.com. He is also editor of the Donovan Family Cookbook, now it’s third printing and is an avid genealogist tracing his family back to the 1600’s.

    Follow Family Cookbook Project on Facebook, Instagram, Twitter TikTok, YouTube and Pinterest!

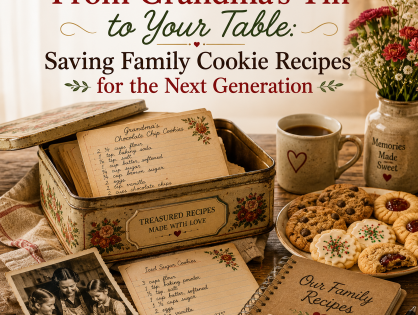
  • From Grandma’s Tin to Your Table: Saving Family Cookie Recipes for the Next Generation

    From Grandma’s Tin to Your Table: Saving Family Cookie Recipes for the Next Generation

    Open Grandma’s old cookie tin and you’ll find more than cookies — you’ll find stories. Faded recipe cards, handwritten notes, and scraps of paper with smudges of butter and sugar tell the history of countless holidays, Sunday afternoons, and late-night baking sessions. These recipes are part of who your family is, and if they aren’t preserved, they risk disappearing with time.

    A family cookie cookbook is a simple, meaningful way to make sure they don’t. With Family Cookbook Project, you can collect, organize, and print your family’s cherished cookie recipes into a beautiful cookbook that celebrates generations of love and baking.

    Here’s how to turn those heirloom recipes from Grandma’s tin into a lasting legacy for the next generation.

    1. Why Family Cookie Recipes Matter

    Cookies are small, but they carry big memories.

    They remind us of people, places, and moments that shaped our lives — a grandmother’s kitchen, a parent’s patient instructions, a child’s first attempt at baking.

    Family cookie recipes aren’t just about ingredients; they’re about connection. They reflect heritage, personality, and the shared joy of creating something sweet together.

    When you save those recipes in a printed cookbook, you’re doing more than preserving how to make cookies — you’re preserving what it felt like to be part of your family.

    1. Gather Recipes from Every Generation

    Start by tracking down every cookie recipe that’s been part of your family story.

    That might mean digging through old tins, shoeboxes, or handwritten notebooks. Ask your relatives what cookies they remember baking or eating when they were young. Each generation will have a few treasures to add:

    • Grandma’s sugar cookies that melt in your mouth.
    • Dad’s oatmeal chocolate chip cookies, slightly crisp at the edges.
    • Mom’s decorated gingerbread men from every Christmas.
    • The new vegan or gluten-free recipes your kids love.

    Each one tells part of your family’s story — together, they form a delicious timeline of taste and tradition.

    Family Cookbook Project makes collecting these recipes simple. Family members can log in online from anywhere to submit recipes, photos, and stories.

    1. Capture the Details Before They’re Lost

    Many older family recipes were never written down in detail. You’ll often find phrases like “a pinch of this” or “bake until done.”

    Before those details vanish, spend time with the people who still remember how it’s done. Bake the recipes together. Take notes on measurements, techniques, and small habits — like how long Grandma let the dough chill or what kind of sugar she used.

    Write everything down clearly. Those little details are what make the recipe truly yours.

    When you preserve them in a cookbook, you’re keeping those family techniques alive for the next generation of bakers.

    1. Record the Stories Behind the Cookies

    Recipes tell you what to make. Stories tell you why it matters.

    Each cookie in your family collection has a story worth remembering:

    • “Grandma always made these for church bake sales.”
    • “These butter cookies were the first thing Mom taught us to bake.”
    • “We used to sneak these from the cooling rack when no one was looking.”

    Include short memories or anecdotes with each recipe. They give life to the ingredients and turn your cookbook into a personal family history.

    When your children or grandchildren read those stories one day, they’ll feel connected to people they may never have met — all through a shared plate of cookies.

    1. Preserve Handwritten Recipes and Photos

    Handwritten recipe cards carry their own kind of magic. The curl of Grandma’s handwriting or a smudge of flour on the corner brings a sense of authenticity no typed recipe can match.

    Scan or photograph these old cards and include them in your cookbook alongside typed versions of the recipes. You can also add family photos — baking in the kitchen, decorating cookies, or sitting down to share them.

    Family Cookbook Project allows you to include photos anywhere in your layout — next to recipes, at the start of sections, or as full-page images. Those small, personal touches make your cookbook feel alive.

    1. Include the New Generation’s Creations

    Tradition matters, but so does evolution.

    Encourage younger family members to add their own recipes to the collection — whether it’s a new take on Grandma’s shortbread or their own favorite cookie they’ve perfected.

    Creating space for new recipes shows that your family’s story is still growing. It also invites the next generation to take ownership of those traditions and keep them going.

    You can even create a “Next Generation Cookies” section where kids can include their recipes — complete with photos or handwritten notes.

    1. Organize Recipes with Care

    A good family cookbook is easy to navigate and enjoyable to read. Organize your cookie recipes by theme or occasion, such as:

    • Classic Family Favorites – timeless recipes everyone remembers.
    • Holiday Cookies – Christmas, Hanukkah, or seasonal specialties.
    • Special Occasions – birthdays, weddings, or school bake sales.
    • Modern Favorites – new additions from younger bakers.

    Family Cookbook Project makes this easy with custom categories and automatic indexing by recipe name and contributor.

    This way, everyone can quickly find the recipe they’re craving — and the name of the person who made it famous.

    1. Choose a Design That Honors the Tradition

    Once your recipes are collected, choose a cookbook format that reflects your family’s personality.

    Family Cookbook Project offers three book sizes:

    • 8½ x 11 inches – perfect for large photos and longer stories.
    • 8 x 8 inches – modern, giftable, and easy to display.
    • 5½ x 8½ inches – compact and practical for the kitchen.

    Pick a binding that suits your purpose — spiral binding for functionality or hardcover for an heirloom edition.

    Then, customize the cover with a family photo or something simple like:
    “From Grandma’s Tin to Your Table: Our Family Cookie Collection.”

    It’s a beautiful way to turn your family’s history into something tangible.

    1. Share and Gift Your Cookbook

    When your cookbook is complete, print copies to share with family members.

    Give them as Christmas gifts, birthday presents, or keepsakes for newlyweds leaving home. Each book will remind its owner where they came from — and help them continue those traditions in their own kitchens.

    It’s a way to pass down love and identity in one delicious package.

    1. Keep the Tradition Going

    A family cookbook doesn’t have to be a one-time project. You can keep adding to it year after year — new recipes, updated photos, even notes on who’s carrying on which traditions.

    Over time, it becomes more than a cookbook — it’s a living document of your family’s story, told one cookie at a time.

    By saving your recipes now, you’re giving your children and grandchildren more than directions for baking. You’re giving them a taste of home that they’ll carry with them for life.

    Call to Action

    Turn Grandma’s handwritten recipes into a lasting family treasure. Create your family cookie cookbook with FamilyCookbookProject.com.

    Collect recipes, stories, and photos, and print a beautiful book that preserves your family’s sweetest traditions for the next generation.

    Because cookies don’t just feed us — they connect us.


    Bill Rice is Founder and Co-Publisher of the Family Cookbook Project, the leading online cookbook publisher with a website that helps families and individuals collect, preserve and share food memories by creating their own printed custom cookbooks. He is the author of The Wellfleet Oyster Cookbook and the Cape Cod Cocktail Cookbook (Available on Amazon), both created using FamilyCookbookProject.com. He is also editor of the Donovan Family Cookbook, now it’s third printing and is an avid genealogist tracing his family back to the 1600’s.

    Follow Family Cookbook Project on Facebook, Instagram, Twitter TikTok, YouTube and Pinterest!

  • Write A Review: Share Your Love for Family Cookbook Project!

    Write A Review: Share Your Love for Family Cookbook Project!

    At Family Cookbook Project, we’ve been dedicated to helping families like yours preserve cherished recipes, traditions, and memories for years. But to continue spreading the joy of custom cookbooks, we need your help—and it will only take a moment of your time.

    Your voice has power. In today’s online world, reviews from real customers make all the difference when people are deciding if Family Cookbook Project is right for them. If you’ve enjoyed creating a family cookbook with us, we’d be incredibly grateful if you could take a few moments to leave a positive review.

    Here’s why it matters:

    • You’re helping others. Many potential users trust the opinions of real customers before starting their own cookbook project. Your review could inspire someone to take the leap and start preserving their family’s legacy.
    • You’re supporting our growth. Your feedback not only helps others, but it also helps us grow and continue offering the tools, features, and support you love. Every review means we can invest more in improving your experience!
    • It’s quick and easy. Your review doesn’t have to be long—just share what you’ve loved about using Family Cookbook Project and how it’s helped you. Even a few sentences can make a huge difference.

    We’d be so thankful if you could leave a review at one (or all!) of the following places:

    Thank you for being a part of our Family Cookbook Project community and helping us reach more people who want to preserve their family’s treasured recipes. Your support means the world to us!

    With gratitude,
    Bill Rice & Chip Lowell
    Publishers, Family Cookbook Project

  • How to Cook Polish Food at Home: Essential Ingredients, Simple Dishes, and Must-Have Spices

    How to Cook Polish Food at Home: Essential Ingredients, Simple Dishes, and Must-Have Spices

    Polish cuisine is deeply rooted in tradition, offering hearty, comforting dishes that are perfect for family meals. Known for its use of meats, potatoes, cabbage, and grains, Polish food is full of flavor and often accompanied by pickles, sour cream, and a variety of sauces. While some dishes may seem complex, many Polish meals are simple to make at home with the right ingredients and spices.

    In this article, FamilyCookbookProject.com explores the essential ingredients you should have on hand, the spices you’ll need, and some simple Polish dishes to help you get started cooking authentic Polish food at home.

    Essential Ingredients for Polish Cooking

    Polish cuisine is built around hearty ingredients that are easy to find and store, making it a practical and satisfying way to cook. Here are the essential ingredients to stock your kitchen with:

    Potatoes

    Potatoes are a staple in Polish cooking, used in a variety of dishes from soups and stews to pierogi (dumplings). They’re also often served as a side dish in many forms—boiled, mashed, or roasted.

    Cabbage

    Cabbage is another key ingredient, especially for making classic dishes like bigos (hunter’s stew) and golabki (stuffed cabbage rolls). Both fresh and fermented cabbage (sauerkraut) are used in Polish cooking.

    Sour Cream

    Sour cream is a frequent addition to Polish soups, stews, and sauces. It adds creaminess and a bit of tang to dishes like pierogi, borscht, and placki ziemniaczane (potato pancakes).

    Sausages (Kielbasa)

    Kielbasa, a traditional Polish sausage, is widely used in Polish cuisine. There are many varieties of kielbasa, from smoked to fresh, and it’s often included in stews, served grilled, or used in sandwiches.

    Dill Pickles

    Pickled cucumbers, or ogórki kiszone, are a common side dish in Polish cuisine and often used as a garnish for meals. The tangy crunch of dill pickles adds a refreshing contrast to heavier dishes.

    Beets

    Beets are a common ingredient in Polish food, especially in soups like barszcz czerwony (beet soup). They’re also served in salads or as a side dish.

    Mushrooms

    Polish cuisine uses a variety of wild mushrooms, especially in soups, sauces, and dumpling fillings. Dried mushrooms are often used when fresh varieties aren’t available, particularly for making traditional holiday dishes.

    Eggs

    Eggs are a key ingredient in many Polish dishes, from pierogi dough to desserts like babka and mazurek. They are also served boiled as part of salads and cold dishes.

    Must-Have Spices for Polish Cooking

    Polish cuisine tends to use simple but flavorful spices and herbs, focusing on fresh, savory flavors. Here are the essential spices and seasonings you’ll need for Polish cooking:

    Dill

    Dill is one of the most popular herbs in Polish cuisine, used to flavor everything from soups to salads and pickles. Fresh dill is often sprinkled over boiled potatoes or added to creamy sauces.

    Caraway Seeds

    Caraway seeds are used to flavor breads, soups, and stews. They have a slightly nutty, earthy flavor that pairs well with cabbage and meats, especially in dishes like sauerkraut or rye bread.

    Bay Leaves

    Bay leaves are often used in soups, stews, and sauces, adding a subtle herbal note to long-simmered dishes like bigos and kapuśniak (cabbage soup).

    Marjoram

    Marjoram is a key herb in many Polish soups and sausages, adding a slightly sweet and floral flavor to dishes. It’s especially common in dishes like żurek (sour rye soup) and kiełbasa recipes.

    Allspice

    Allspice, known as ziele angielskie in Poland, is often used in stews, marinades, and pickling brines. Its warm, peppery flavor is an essential component of many traditional Polish recipes.

    Garlic

    Garlic is a common seasoning in Polish cuisine, used to add depth of flavor to sausages, soups, and marinades. It’s often included in pickles, stews, and pierogi fillings.

    Paprika

    Paprika is frequently used to add a bit of color and mild heat to Polish dishes, particularly in meat stews and grilled sausages.

    Simple Polish Dishes to Start With

    Once you have your ingredients and spices on hand, here are a few simple Polish dishes to help you get started:

    Pierogi (Polish Dumplings)

    Pierogi are one of the most beloved Polish dishes, consisting of dough filled with various fillings, such as potatoes and cheese, mushrooms, or ground meat. They are boiled and often pan-fried for a crispy texture, then served with sour cream.

    Bigos (Hunter’s Stew)

    Bigos is a hearty stew made with sauerkraut, fresh cabbage, various meats, and kielbasa. It’s often simmered for hours to allow the flavors to meld together and is traditionally served with rye bread.

    Placki Ziemniaczane (Potato Pancakes)

    Potato pancakes are a simple yet delicious Polish dish made with grated potatoes, onions, and flour. They are fried until crispy and typically served with sour cream or applesauce.

    Barszcz Czerwony (Beet Soup)

    This vibrant red beet soup, often referred to as borscht, is a classic Polish dish served hot or cold. It’s made with beets, garlic, and a splash of vinegar for tang, often garnished with fresh dill and served with a dollop of sour cream.

    Golabki (Stuffed Cabbage Rolls)

    Golabki are cabbage leaves stuffed with a mixture of ground meat (usually pork and beef), rice, and onions, then baked in a tomato-based sauce. They are hearty and flavorful, making them a popular dish for special occasions.

    Cooking Polish Food at Home

    Cooking Polish food at home allows you to enjoy hearty, comforting meals that have been passed down through generations. By stocking up on key ingredients like potatoes, cabbage, and kielbasa, and keeping simple spices like dill, garlic, and caraway seeds in your pantry, you can create authentic Polish dishes with ease. Start with beginner-friendly recipes like pierogi, bigos, and potato pancakes, and as you become more familiar with the cuisine, you can explore more complex dishes.

    Polish cuisine is all about comfort, family, and tradition, so don’t be afraid to gather your loved ones around the table and share the delicious meals you’ve made. Smacznego!


    Bill Rice is Founder and Co-Publisher of the Family Cookbook Project, the leading online cookbook publisher with a website that helps families and individuals collect, preserve and share food memories by creating their own printed custom cookbooks. He is the author of The Wellfleet Oyster Cookbook and the Cape Cod Cocktail Cookbook (Available on Amazon), both created using FamilyCookbookProject.com. He is also editor of the Donovan Family Cookbook, now it’s third printing and is an avid genealogist tracing his family back to the 1600’s.

    Follow Family Cookbook Project on Facebook, Instagram, Twitter TikTok, YouTube and Pinterest!

  • Pro Tip: Delete A Photo From A Recipe

    Pro Tip: Delete A Photo From A Recipe

    Go to the edit recipe page with the photo and click on the “[Edit Photo]” link beneath the photo. Here you will find a delete button.

    If you upload a new photo, it will also automatically delete the old one.

    If you have more than one photo to edit or remove, you can also go to Editor Activities>Quick Start.  Click Photos under the Recipe box to do the same thing, but from the photo list instead of recipes.

    Bill Rice is Founder and Co-Publisher of the Family Cookbook Project, the leading online cookbook publisher with a website that helps families and individuals collect, preserve and share food memories by creating their own printed custom cookbooks. He is the author of The Wellfleet Oyster Cookbook and the Cape Cod Cocktail Cookbook (Available on Amazon), both created using FamilyCookbookProject.com. He is also editor of the Donovan Family Cookbook, now it’s third printing and is an avid genealogist tracing his family back to the 1600’s.

    Follow Family Cookbook Project on Facebook, Instagram, Twitter TikTok, YouTube and Pinterest!

  • How to Craft the Perfect Cookie: Tips for Building Your Own Recipe

    How to Craft the Perfect Cookie: Tips for Building Your Own Recipe

    Creating your own cookie recipe can be a fun and rewarding experience. Whether you’re inspired by a classic chocolate chip cookie or want to craft something entirely new, understanding the essential components of a cookie dough and how to balance them is the first step to creating a delicious, one-of-a-kind treat.

    In this article, we’ll break down the key ingredients required in every cookie, how they interact in the dough, and how to experiment with add-ins to create new flavor profiles. Plus, we’ll discuss how to learn from your mistakes and fine-tune your recipe for perfect results every time.

    The Essential Ingredients in Every Cookie

    Every cookie recipe relies on a few essential ingredients that serve as the foundation of the dough. While you can customize your flavors and add-ins, understanding the role of these core ingredients will help you create a balanced and successful cookie.

    Flour

    –  Proportion : Typically 1 ¾ to 2 ¼ cups per batch (about 24 cookies).

    –  What It Does : Flour is the structure of the cookie. It provides the protein (gluten) that gives cookies their shape and texture. Too much flour results in a dry, crumbly cookie, while too little leads to a flat, greasy one.

    –  Types of Flour : Most cookie recipes use all-purpose flour, but experimenting with whole wheat, almond, or oat flour can add different textures and flavors.

    Fat (Butter or Shortening)

    –  Proportion : Usually ½ to 1 cup.

    –  What It Does : Fat is responsible for the cookie’s tenderness and richness. Butter gives cookies a deep, rich flavor and can also contribute to a crispier texture, while shortening creates softer, puffier cookies. Margarine or coconut oil can also be used as substitutes, but each fat will affect the flavor and texture differently.

    –  Tips : Using melted butter tends to make cookies chewier, while creaming softened butter with sugar gives a lighter, more tender cookie.

    Sugar

    –  Proportion : Typically ½ to 1 cup white sugar and ½ to 1 cup brown sugar.

    –  What It Does : Sugar adds sweetness, but it also plays a role in the cookie’s texture. White sugar gives cookies a crispier texture, while brown sugar, which contains molasses, adds moisture and chewiness.

    –  Adjusting Sugar : Using more brown sugar will make your cookies soft and chewy, while more white sugar will give you a crispier result.

    Eggs

    –  Proportion : Usually 1 to 2 eggs per batch.

    –  What They Do : Eggs provide moisture, richness, and help bind the ingredients together. The egg yolks add fat, which contributes to the cookie’s texture, while the whites help provide structure. Too many eggs can make the dough too moist and cake-like, while too few can make the cookies dry and crumbly.

    –  Substitutes : For egg-free cookies, you can use alternatives like flax eggs, applesauce, or yogurt, though this will affect the texture.

    Leavening (Baking Soda or Baking Powder)

    –  Proportion : Typically 1 teaspoon.

    –  What It Does : Leavening agents cause the cookies to rise and spread. Baking soda produces a denser, chewier texture, while baking powder gives cookies more of a cake-like texture. Most recipes use baking soda, but a combination of both can be used for a balanced rise and texture.

    –  Tips : Too much leavening can cause cookies to spread too much and become flat, while too little may result in dense cookies.

    Salt

    –  Proportion : About ½ teaspoon.

    –  What It Does : Salt enhances the flavor of all the other ingredients and balances sweetness. It’s an essential ingredient, even in sweet recipes, to prevent the cookies from tasting overly sugary.

    Vanilla Extract

    –  Proportion : Usually 1 to 2 teaspoons.

    –  What It Does : Vanilla adds a subtle sweetness and depth of flavor to cookies. It’s a versatile flavor enhancer that complements almost any add-in.

    Add-Ins: Taking Your Cookies to the Next Level

    Once you’ve mastered the basic dough, it’s time to experiment with add-ins that will bring new flavor profiles and textures to your cookies. Here are some creative ideas for taking your cookies beyond the standard chocolate chips:

    Nuts

    –  Flavor Profile : Crunchy, slightly sweet or salty.

    –  Ideas : Add chopped pecans, walnuts, almonds, or macadamia nuts for a satisfying crunch and nutty flavor. Toasting the nuts before adding them will enhance their flavor even more.

    Dried Fruit

    –  Flavor Profile : Sweet and chewy with a hint of tartness.

    –  Ideas : Dried cranberries, cherries, apricots, or raisins add both texture and a sweet-tart flavor. Pair them with nuts or white chocolate for extra dimension.

    Spices

    –  Flavor Profile : Warm, aromatic, and sometimes spicy.

    –  Ideas : Cinnamon, nutmeg, ginger, cardamom, or cloves can transform a basic cookie dough into something warm and spicy. These are perfect for holiday cookies or when paired with chocolate.

    Coconut Flakes

    –  Flavor Profile : Sweet, tropical, and chewy.

    –  Ideas : Unsweetened or sweetened coconut flakes can give your cookies a tropical twist. Toasted coconut adds an extra layer of flavor and texture.

    Candy Pieces

    –  Flavor Profile : Sweet, colorful, and fun.

    –  Ideas : M&Ms, crushed candy bars, or caramel bits bring a playful sweetness to cookies and can add fun colors and textures. Try experimenting with different types of candy to find your favorite combination.

    Zest and Citrus

    –  Flavor Profile : Bright, tangy, and refreshing.

    –  Ideas : Lemon, lime, or orange zest can add a burst of brightness to your cookies. Pair citrus flavors with white chocolate or nuts for a refreshing twist.

    Savory Add-Ins

    –  Flavor Profile : Salty and umami-rich.

    –  Ideas : For a surprising twist, try adding savory ingredients like chopped bacon, pretzels, or a sprinkle of sea salt on top of your cookies. These elements bring a salty contrast to the sweetness and can create a more sophisticated flavor profile.

    Learning from Your Mistakes: Troubleshooting Common Cookie Issues

    Creating your own cookie recipe is a process of trial and error, and even experienced bakers run into challenges. Here are some common issues and how to fix them:

    –  Cookies Spread Too Much : This can happen if there’s too much butter or sugar, or if the dough is too warm when it goes into the oven. To fix this, chill the dough before baking, or add a little more flour to help the cookies hold their shape.

    –  Cookies Are Too Dry : If your cookies come out dry or crumbly, it could be due to over-baking or too much flour. Try reducing the baking time or adding more moisture with an extra egg yolk or a tablespoon of milk.

    –  Cookies Are Too Flat : Flat cookies can be caused by too little leavening or an excess of liquid ingredients. Add a bit more baking soda or powder and ensure your butter isn’t too melted when you mix the dough.

    –  Cookies Are Too Thick : If your cookies don’t spread enough, it may be because there’s too much flour or not enough sugar or butter. Make sure you’re measuring your flour correctly (spoon and level) and consider reducing the flour slightly.

    What to Look for in a Good Cookie Recipe

    When crafting your own cookie recipe or following someone else’s, here are some key qualities to look for:

    1. Balance of Ingredients : The proportions of fat, sugar, and flour should be balanced to achieve the right texture—whether you’re aiming for soft and chewy or crisp and crunchy.
    2. Clear Instructions : Good recipes provide clear, detailed instructions, including steps for mixing, baking, and cooling.
    3. Flexibility for Add-Ins : A great cookie recipe will allow room for customization. Whether you want to add nuts, candy, or dried fruit, the recipe should accommodate these variations without compromising the cookie’s texture.
    4. Flavor Profiles : A good cookie recipe has a well-developed flavor profile. Whether it’s the buttery richness of classic chocolate chip cookies or the warmth of spiced cookies, each ingredient should contribute to the overall taste.

    Final Thoughts: Get Creative and Have Fun!

    The beauty of baking cookies is the endless room for creativity. Whether you’re experimenting with new flavors, adjusting proportions, or adding fun mix-ins, creating your own cookie recipe is all about finding the right balance of ingredients that suit your taste. Don’t be afraid to make mistakes along the way—each batch gets you one step closer to the perfect cookie.

    So, grab your mixing bowl and start experimenting! Who knows? You might just invent the next great cookie recipe.


    Bill Rice is Founder and Co-Publisher of the Great Family Cookbook Project, a website that helps families and individuals collect, preserve and share food memories by creating their own printed personal cookbooks. He is the author of The Wellfleet Oyster Cookbook and the Cape Cod Cocktail Cookbook (Available on Amazon), both created using FamilyCookbookProject.com. He is also editor of the Donovan Family Cookbook, now it’s third printing and