Category: Cooking Tips

  • Cooking Oils What’s The Difference?

    Cooking Oils What’s The Difference?

    In the kitchen, cooks have plenty of options when it comes to choosing a cooking oil to sauté, bake and drizzle with. Some, like olive oil, are well known, and others, like avocado or sesame oil, are less familiar.

    Which oil is right for you? That depends largely on the type of cooking you’re doing. An oil’s smoke point, which is the point when oil starts burning and smoking, is one of the most important things to consider. If you heat oil past its smoke point, it not only harms the flavor, but it may lose any nutrients in the oil  as it degrades.

    Here is an overview of different oils used in the kitchen and how to use them:

    Olive oil

    One of the most versatile and healthy oils to cook with and eat is olive oil, as long as it’s extra virgin. Generally, you want an oil that is not refined and overly processed. An “extra virgin” label means that the olive oil is not refined, and therefore of high quality. Extra virgin olive oil contains a large amount of monounsaturated fats and some polyunsaturated fatty acids; many studies have linked it to better heart health. Olive oil has a relatively lower smoke point compared to other oils, so it’s best for low and medium-heat cooking.

    It’s also one of the healthiest oils to use when baking. As a dressing it’s great, too.

    Coconut oil

    Depending on who you ask, coconut oil should either be avoided or embraced in moderation because coconut oil is primarily a saturated fat. Not everyone agrees that such a concentrated source of saturated fat is a no-go for health, but the American Heart Association argues that replacing foods that are high in saturated fat with healthier options can lower blood cholesterol levels.

    That doesn’t mean it should not be used in the kitchen. Coconut oil can be a healthier oil to use when you’re cooking at a very high temperature or frying food, because they are more stable at high heat. This means that they are less likely to break down and smoke.

    Vegetable oil

    The term “vegetable oil” is used to refer to any oil that comes from plant sources. Most vegetable oils on the market are a blend of canola, corn, soybean, safflower, palm and sunflower oils.  They’re not necessarily bad for you, but you can get so much more health benefit from olive oil.

    Vegetable oil is guaranteed to be highly processed. It’s called ‘vegetable’ so that the manufacturers can substitute whatever commodity oil they want—soy, corn, cottonseed, canola—without having to print a new label.

    Canola oil

    Canola oil is derived from rapeseed, a flowering plant, and of all vegetable oils, canola oil tends to have the least amount of saturated fats. It has a high smoke point, which means it can be helpful for high-heat cooking. In the United States, canola oil tends to be highly processed, which means fewer nutrients overall. “Cold-pressed” or unprocessed canola oil is available, but it can be difficult to find.

    Avocado oil

    Avocado oil is a great choice. It’s unrefined like extra virgin olive oil, but it has a higher smoking point, which means it can be used to cook at higher heat and is great for stir-frys. It doesn’t have much flavor, which makes it a good option for cooking.  One downside is that it tends to be more expensive.

    Sunflower oil

    This oil  has a high smoke point and doesn’t have a strong flavor, which means it won’t overwhelm a dish. However, sunflower oil contains a lot of omega-6 fatty acids which are thought to be pro-inflammatory, so moderation is key.

    Peanut oil

    Nut oils, like peanut, can be very useful in the kitchen, especially since there are so many different types. Peanut oil has one of the highest monounsaturated fat contents among cooking oils. It’s usually flavorful with a nutty taste and smell, and cooks well at high heat. Many restaurants use peanut oil for their fried food.

    Walnut oil

    This oil has a low smoke point, so it’s not good for cooking, but it can be used in plenty of other ways to add the nutty flavor of walnuts to dishes.

    Flaxseed oil

    Flaxseed oil has a very low smoke point, which means it also shouldn’t be used for cooking. Flaxseed oil is better suited  for salad dressing than for cooking and make sure it’s stored  in the refrigerator.

    Sesame oil

    This oil is often used for its potent flavor, especially in Asian cooking and a little goes a long way. It contains both monounsaturated and polyunsaturated fatty acids, though it’s not especially high in other nutrients. It has a higher smoke point and can be used for high-heat recipes.


    Bill Rice is Founder and Co-Publisher of the Great Family Cookbook Project, a website that helps families and individuals collect, preserve and share food memories by creating their own printed personal cookbooks. He is the author of The Wellfleet Oyster Cookbook and the Cape Cod Cocktail Cookbook (Available on Amazon), both created using FamilyCookbookProject.com. He is also editor of the Donovan Family Cookbook, now it’s third printing and is an avid genealogist tracing his family back to the 1600’s.

    Follow Family Cookbook Project on Facebook, Instagram, Twitter and Pinterest!


  • How to Build a Cocktail: Using flavor science and the laws of mixology to make a memorable drink every time

    How to Build a Cocktail: Using flavor science and the laws of mixology to make a memorable drink every time

    Balancing the Elements of a Cocktail

    Whether you make your own cocktails at home or order them at a bar, the ingredients are the same. The most basic definition of a cocktail is an alcoholic beverage that has been doctored. Cocktails consist of the spirit, the balancing agents like sugar or citrus juice, the modifiers, and water, regardless of how they are ‘doctored.’ Combined in the right proportions, these elements make a balanced, flavorful drink.

    The concept of balance can be compared to the concept of taste – sweetness, sourness, saltyness, bitterness, and umami – as opposed to flavor. We experience taste primarily through our tongue, whereas we experience flavor primarily through our nose.

    A drink’s base spirit can attract us to a cocktail, but since we aren’t necessarily hard-wired to enjoy harsh alcohols in their pure form (their bitterness can actually signal poison to our survival-oriented brains), cocktails use additional ingredients to help us enjoy those spirits. One way to trick your brain into not having that initial jolt when you taste something strong is to mix it with sugar. A successful cocktail balances its base spirit with high-concentrated ingredients like sugar syrups or citrus juices. In the right amounts, sugar and acid will taper the intensity of the base spirit and heighten its flavor while not dominating the drink.

    A cocktail’s balance is not always affected by modifiers, but they do contribute a wider variety of flavors and tastes. They can introduce floral, herbaceous, and umami notes. In Bloody Marys, Worcestershire adds a savory kick, while cranberry juice gives cosmopolitans a bitter, fruity taste. Bitters, liqueurs, citrus juices, and fortified wines (such as vermouth) are some of the most common modifiers.

    The opposite of modifiers is water, which dilutes flavors and makes high-proof alcohol taste milder. A drink is most likely to contain water when it is shaken or stirred with ice.

    The Cocktail Family Blueprint

    To create recipes, bartenders use templates called cocktail families. As per the Cocktail Codex, one of the bibles of cocktail making, the six families are the old fashioned, martini, daiquiri, sidecar, whiskey highball, and flip. They work because they strike a balance between our basic tastes. Balance varies from family to family and from drink to drink. Cocktails made in a shaker, such as a Tom Collins, have higher acidity than drinks made in glasses, such as a mint julep.

    When developing your own drink, you’ll save time and money if you use the tried-and-true cocktail families. It’s helpful to understand the underlying cocktail structure so you don’t waste booze before finding a drink you like. Making bad drinks is a valuable part of the process, because you learn what doesn’t work.

    A cocktail with an unbalanced acidity or sweetness is a sure sign that it needs to be adjusted. There are times when the sum of your ingredients will be less than the sum of their parts. If your mango margarita tastes like the traditional recipe, lime juice probably drowns out the mango flavor. There might be a need to introduce a new ingredient to tie the disjointed ingredients together, such as elderflower liqueur, chartreuse, or Aperol. The addition of a pinch of salt can also enhance flavor and mellow out harsher parts of a drink.

    Experiment with the flavors until you find your personal favorites, since what feels disjointed to one person might taste fantastic to another. If you like something, then you’re right.

    The Art of Experimentation at Your Bar

    Make your own drinks using the Mr. Potato Head method: Swap one ingredient in an existing recipe for the same amount of a different ingredient. This method is used by bartenders to create original cocktails, and you can use it to learn how well-known drinks share the same structure. A margarita contains two parts tequila, one part Cointreau, and one part lime juice, but is transformed into a sidecar by substituting cognac for the tequila and lemon for the lime.

    There is nothing like tasting to develop your palate – and your ability to determine what ingredients complement each other. Most people can distinguish flavors like fruit, spices, and herbs more easily than spirits and liqueurs, so take your time tasting your alcohols and comparing them (this is the tricky part).

    Take inspiration from what you eat when it comes to flavor pairings. A popular culinary adage says “what grows together, goes together,” generally meaning that ingredients from the same region will work well together. A tiki-style drink might combine rum (distilled from fermented sugar cane) and pineapple, both of which have tropical origins. Sweeteners should be derived from plants that are similar to your base spirit. The best way to make a margarita is with agave syrup, and the proper way to make a rum old fashioned is with demerara simple syrup.

    Two tests should be conducted before you make a new cocktail a staple: 1) Get someone else to make the recipe, and 2) let the cocktail sit for 15 minutes before tasting.

    The balance of some drinks changes as they warm up. You should serve them as soon as you can, but they must be balanced for at least 10 to 15 minutes. Otherwise, people talking instead of drinking may think there is something wrong with their drink.

    Don’t be afraid to add more of an ingredient than you think is necessary when in doubt. It’s only when you reach a point where a drink feels too much that you know it can’t be improved. Always push a tiny bit farther than you think you can. Once you’ve gone too far, you can always dial it back.

    Bill Rice is Founder and Co-Publisher of the Great Family Cookbook Project, a website that helps families and individuals collect, preserve and share food memories by creating their own printed personal cookbooks. He is the author of  The Art of Craft Cocktails: Make Cocktails at Home Like a Pro  and the Cape Cod Cocktail Cookbook (both available on Amazon), created using FamilyCookbookProject.com. He is also editor of the Donovan Family Cookbook, now in its third printing and is an avid genealogist tracing his family back to the 1600’s.

    Follow Family Cookbook Project on Facebook, Instagram, Twitter and Pinterest!

  • Homemade Aioli Makes Every Sandwich Better

    Homemade Aioli Makes Every Sandwich Better

    Ever get a gourmet sandwich at a restaurant and wonder how they made it so flavorful?  How about a basket of fries with a special dipping sauce? We’re talking about the fancy mayo we can’t get enough of – aioli. But what is aioli in the first place?

    What Is Aioli?

    Just like mayonnaise, aioli is an emulsion, a mixture of two ingredients that naturally don’t want to mix and are forced together. The oil never truly combines with the rest of the ingredients, but rather becomes suspended in the liquid after being vigorously whisked in, one drop at a time. In mayo’s case, that means oil and a water-based liquid, like vinegar or lemon juice, plus egg yolk.

    Aioli, which means “garlic oil” in French, is a different story, yet still similar. The traditional condiment, made with olive oil, rather than mayo’s typical canola, is also an emulsion, but as you can imagine, it’s tough to get oil to combine with raw garlic alone. Since this emulsion was prone to breaking, which would leave you with greasy, unappetizing mush, people started to use egg yolk in aioli, too—the ingredient that helps keep the oil suspended.

    With the addition of egg yolk, aioli became more similar to mayonnaise. And over time, aioli and mayo basically became interchangeable terms. Aioli today is often just mayonnaise spiked with a lot of garlic, but it can also refer to any specially seasoned mayo.

    While today’s “aioli” may not exactly be true to the original, we’re not complaining—it saves us the elbow grease, plus the flavor can still be just as heavenly – even if you start with store-bought mayonnaise.

    There’s no need to spend your whole day trying to perfect an emulsion. You can simply spruce up homemade or store-bought mayonnaise with garlic, citrus juice and any other ingredients you crave in a creamy, decadent dip, sauce or spread.

    Here’s a list of ingredients you can try and turn your basic mayo into a tasty aioli:

    • Minced raw garlic – The classic.
    • Roasted garlic – Roasting gives the garlic a subtle, buttery, almost caramelized flavor.
    • Sriracha  – This is what is served in most sushi restaurants.
    • Wasabi Cilantro – Another spicy option with an Asian flair
    • Browned Butter and Lemon – Try this on a lobster roll!
    • Rosemary – A wonderfully subtle flavor
    • Roasted Red Pepper – A perfect dip for veggies
    • Sweet Relish – Better known as Tartar Sauce
    • Lemon-Dill – A light and fresh alternative
    • Chimichurri – Left overs from steak night can make a interesting aioli
    • Truffle oil – Perfect for French fries

    For the amount of how much to use, it is best to work by taste. Add a little, give it a stir and give it a taste. Repeat until it acquires the taste you enjoy.


    Bill Rice is Founder and Co-Publisher of the Great Family Cookbook Project, a website that helps families and individuals collect, preserve and share food memories by creating their own printed personal cookbooks. He is the author of The Wellfleet Oyster Cookbook and the Cape Cod Cocktail Cookbook (Available on Amazon), both created using FamilyCookbookProject.com. He is also editor of the Donovan Family Cookbook, now it’s third printing and is an avid genealogist tracing his family back to the 1600’s.

    Follow Family Cookbook Project on Facebook, Instagram, Twitter and Pinterest!

  • Standard Measurements for Family Cookbook Recipes

    Standard Measurements for Family Cookbook Recipes

    For many generations, recipes were handed down by word of mouth from mother to daughter. Recipes consisted of a little of this and a smidgin of that. The food always came our great – or at least that is what we told out mothers! Today things are different. Computers make is easy to write down our recipes and share them with friends and family members over the Internet. However it is important to remember that cooking has a language of its own. It is a language of ingredients and measurements and directions. I believe the most important of these is measurements. If we did not have standard measurements for cooking, “T” could be a teaspoon, a tablespoons, a thimble full or a truck load! Here are a list of Standard Measures Abbreviations commonly used in recipes.

    teaspoon……………………… tsp.
    tablespoon…………………… tbsp. or T.
    cup…………………………….. c.
    quart…………………………… qt.
    ounce…………………………. oz.
    pint…………………………….. pt.
    gallon…………………………. gal.
    inch…………………………….. in.
    pound………………………….. lb.
    milliliter…………………………. ml
    liter……………………………….. L
    milligram……………………….. mg
    gram……………………………… g
    kilogram ……………………….. kg
    millimeter……………………… mm
    centimeter…………………….. cm
    meter……………………………. m
    Celsius…………………………… C
    Fahrenheit……………………. F

    Another important thing about standard measurements is that they don’t work if you don’t use them! Including an ingredient in your recipe without a specific amount is likely to leave someone trying the recipe for the first time scratching their head and wondering what to do. Remember know one will know unless you include it in your recipe.


    Bill Rice is Co-Publisher of the Great Family Cookbook Project, a website that helps families and individuals collect, preserve and share food memories by creating their own printed personal cookbooks. He is the author of The Wellfleet Oyster Cookbook (Available on Amazon) and the Cape Cod Cocktail Cookbook, both created using FamilyCookbookProject.com. He is also editor of the Donovan Family Cookbook, now it’s third printing.

    Follow Family Cookbook Project on Facebook, Instagram and Pinterest!

  • Use Standard Measurements For Your Recipes

    Use Standard Measurements For Your Recipes

    For many generations, recipes were handed down by word of mouth from mother to daughter. Recipes consisted of a little of this and a smidgin of that. The food always came our great – or at least that is what we told out mothers!

    Today things are different. Computers make is easy to write down our recipes and share them with friends and family members over the Internet. However it is important to remember that cooking has a language of its own. It is a language of ingredients and measurements and directions. I believe the most important of these is measurements. If we did not have standard measurements for cooking, “T” could be a teaspoon, a tablespoons, a thimble full or a truck load! Here are a list of Standard Measures Abbreviations commonly used in recipes.

    teaspoon……………………… tsp.
    tablespoon…………………… tbsp. or T.
    cup…………………………….. c.
    quart…………………………… qt.
    ounce…………………………. oz.
    pint…………………………….. pt.
    gallon…………………………. gal.
    inch…………………………….. in.
    pound………………………….. lb.
    milliliter…………………………. ml
    liter……………………………….. L
    milligram……………………….. mg
    gram……………………………… g
    kilogram ……………………….. kg
    millimeter……………………… mm
    centimeter…………………….. cm
    meter……………………………. m
    Celsius…………………………… C
    Fahrenheit……………………. F

    Another important thing about standard measurements is that they don’t work if you don’t use them! Including an ingredient in your recipe without a specific amount is likely to leave someone trying the recipe for the first time scratching their head and wondering what to do. Remember know one will know unless you include it in your recipe.

    Bill Rice is founder and Co-Publisher of the Great Family Cookbook Project, a website that helps families and individuals collect and share food memories through customized printed cookbooks filled with treasured recipes. Follow us on Facebook and Pinterest!

  • How to Best Serve Oysters

    How to Best Serve Oysters

    If you’ve ever been to Wellfleet OysterFest, you’ve seen thousands of people enjoying freshly opened Wellfleet Oysters by the bushel full – served on paper plates. While this might work for this huge event, there are better ways to serve them at home.

    The difficulty of serving Wellfleet oysters is their non-uniform rounded bottom shape. Rarely will one have a flat bottom that allows the oyster meat and liqueur to stay in the shell. So there are a number of ways to present your oysters that will overcome this challenge.

    • Crushed Ice – Oysters on the half-shell should be served chilled. The best way to do that is to serve them on a bed of crushed ice. Most of us don’t have an ice machine at home that can churn out crushed ice on demand, but if you have a food processor, you’re in business. If you don’t have a food processor, you can try crushing ice in a blender or by hand with a mallet.  Once you have the needed ice, place it evenly in a rimmed bowl or serving dish. Add some salt to the ice which will help it not to melt as fast. Finally place your oysters onto the ice and you’re ready to serve.
    • Rock Salt – You can serve oysters on a bed of rock salt. Rock salt won’t melt like ice and can be used again and again if you save it. Like the ice, you can place it evenly in a rimmed bowl or serving dish and nestle the oysters onto the salt. The other option is to create small individual piles of salt and place an oyster on each one.
    • Aluminum Foil – You can serve oysters on a crinkled piece of aluminum foil. This is a great way to hold your oysters while you are shucking and it can make an effective low-cost presentation, especially if you have a lot of oysters to pass around.
    • Oyster Plate – Buy an Oyster plate. Wellfleet has many wonderful gift stores that offer many oyster related items. One popular item is an oyster plate with individual rounded areas that typically holds six oysters. It’s best to have a couple of these plates available to serve your Wellfleet oysters.


    Bill Rice is the author of The Wellfleet Oyster Cookbook and is founder and Co-Publisher of the Great Family Cookbook Project, a website that helps families and individuals collect and share food memories through customized printed cookbooks filled with treasured recipes. Follow us on Facebook, Instgram, YouTube and Pinterest!

  • How To Shuck An Oyster: Step by Step

    How To Shuck An Oyster: Step by Step

    Shucking takes some practice, but if you keep at it, you’ll figure it out. You may never be as fast as Chopper Young,  six time Champion Oyster Shucker, but you’ll be fast enough to open one or two dozen at home without too much trouble.

    Step 1: Get Set Up

    The first step of shucking Wellfleet oysters is to get them covered with ice so they stay cold while you are shucking them. Safety never takes a holiday.

    Next, fold a clean kitchen towel lengthwise into thirds. You’ll be using it to brace the oyster during shucking, and to protect your hand from an accidental slip of the knife. If you have a protective glove, that will work as well, but I prefer the towel.

    If you’re removing the oysters from the shells completely, have a bowl for your oysters. This is where you’ll drop the shucked oysters and their liquor (the liquid inside an oyster). If you’re leaving them on the half shell, fill a platter or rimmed baking sheet with crumpled up aluminum foil to keep the oysters upright while you work.

    Also, make sure you have a garbage can right next to you, or a large bowl for collecting the spent shells.

    Step 2: Place the Oyster in the Towel

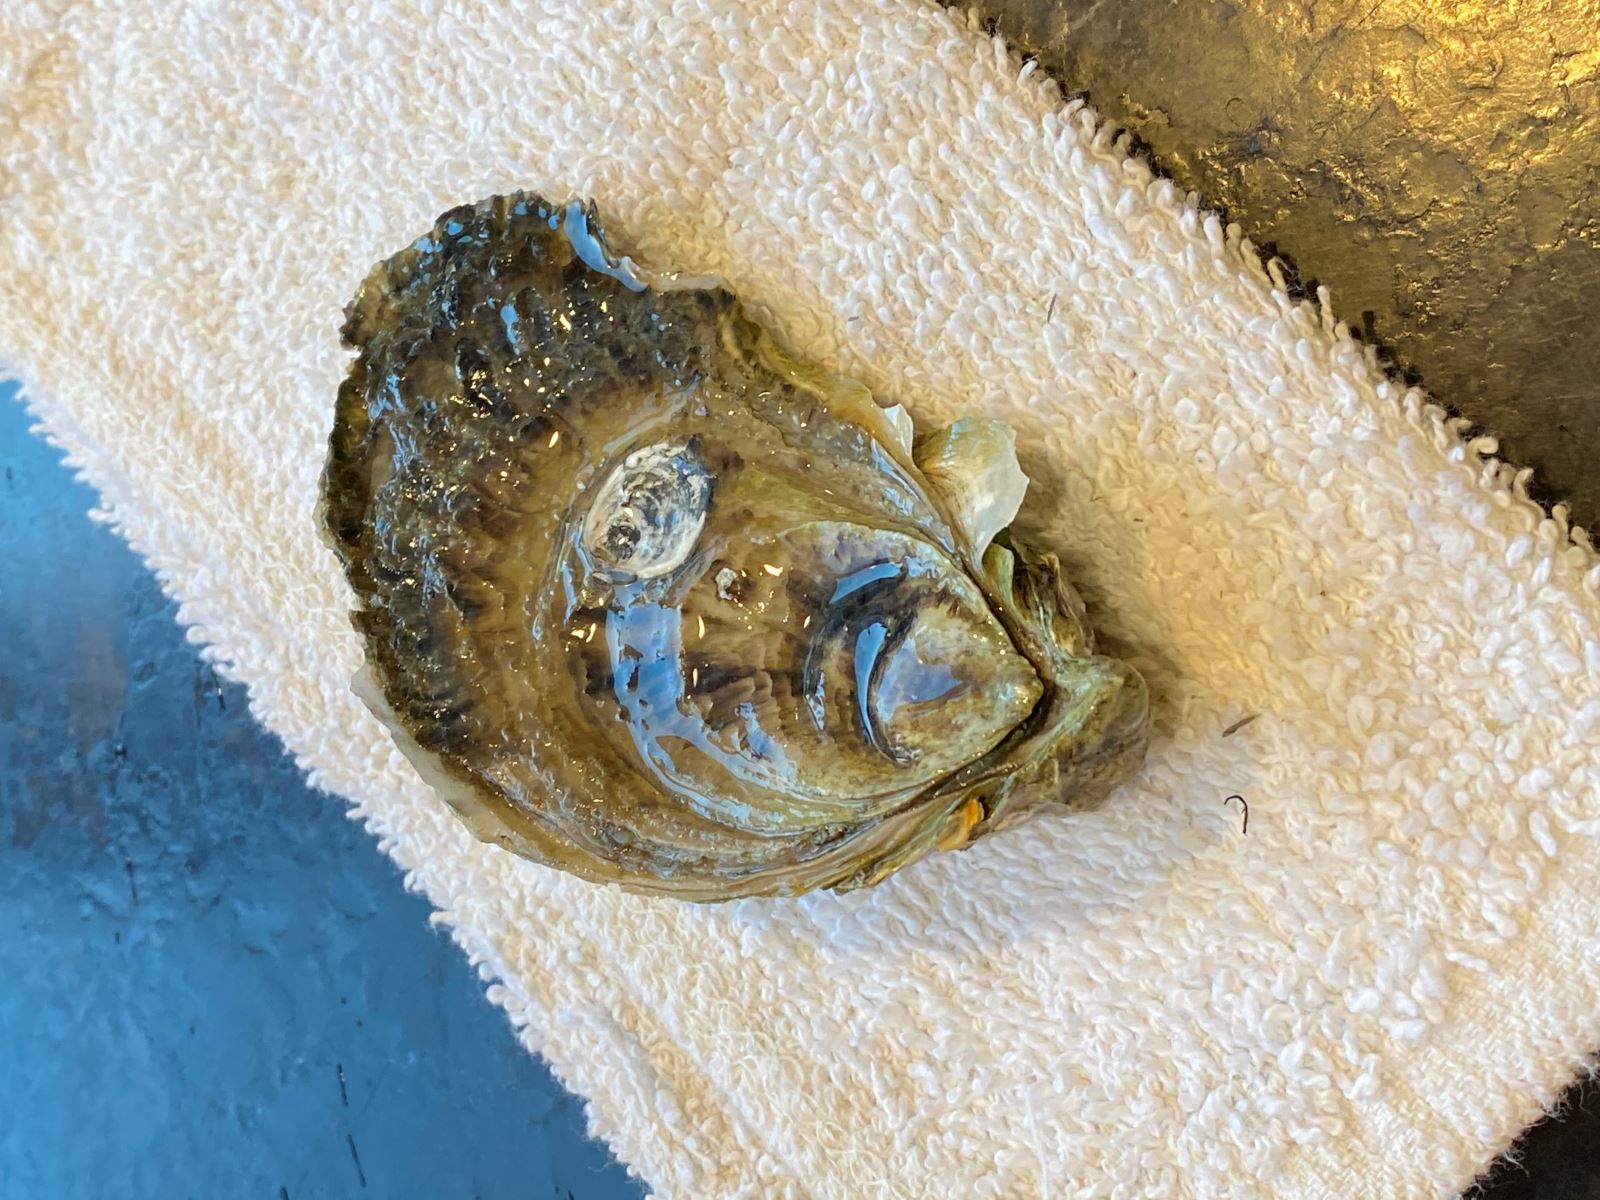
    It’s time to grab your first oyster. You’ll notice that one side will usually be flatter than the other. The flat side is the top and rounded side is the bottom. If you are working with wild Wellfleet oysters, sometimes it will be more difficult to tell  the difference, so just wing it.

    Set your oyster bottom side down on the folded towel so the more pointed end of the oyster faces your knife hand.

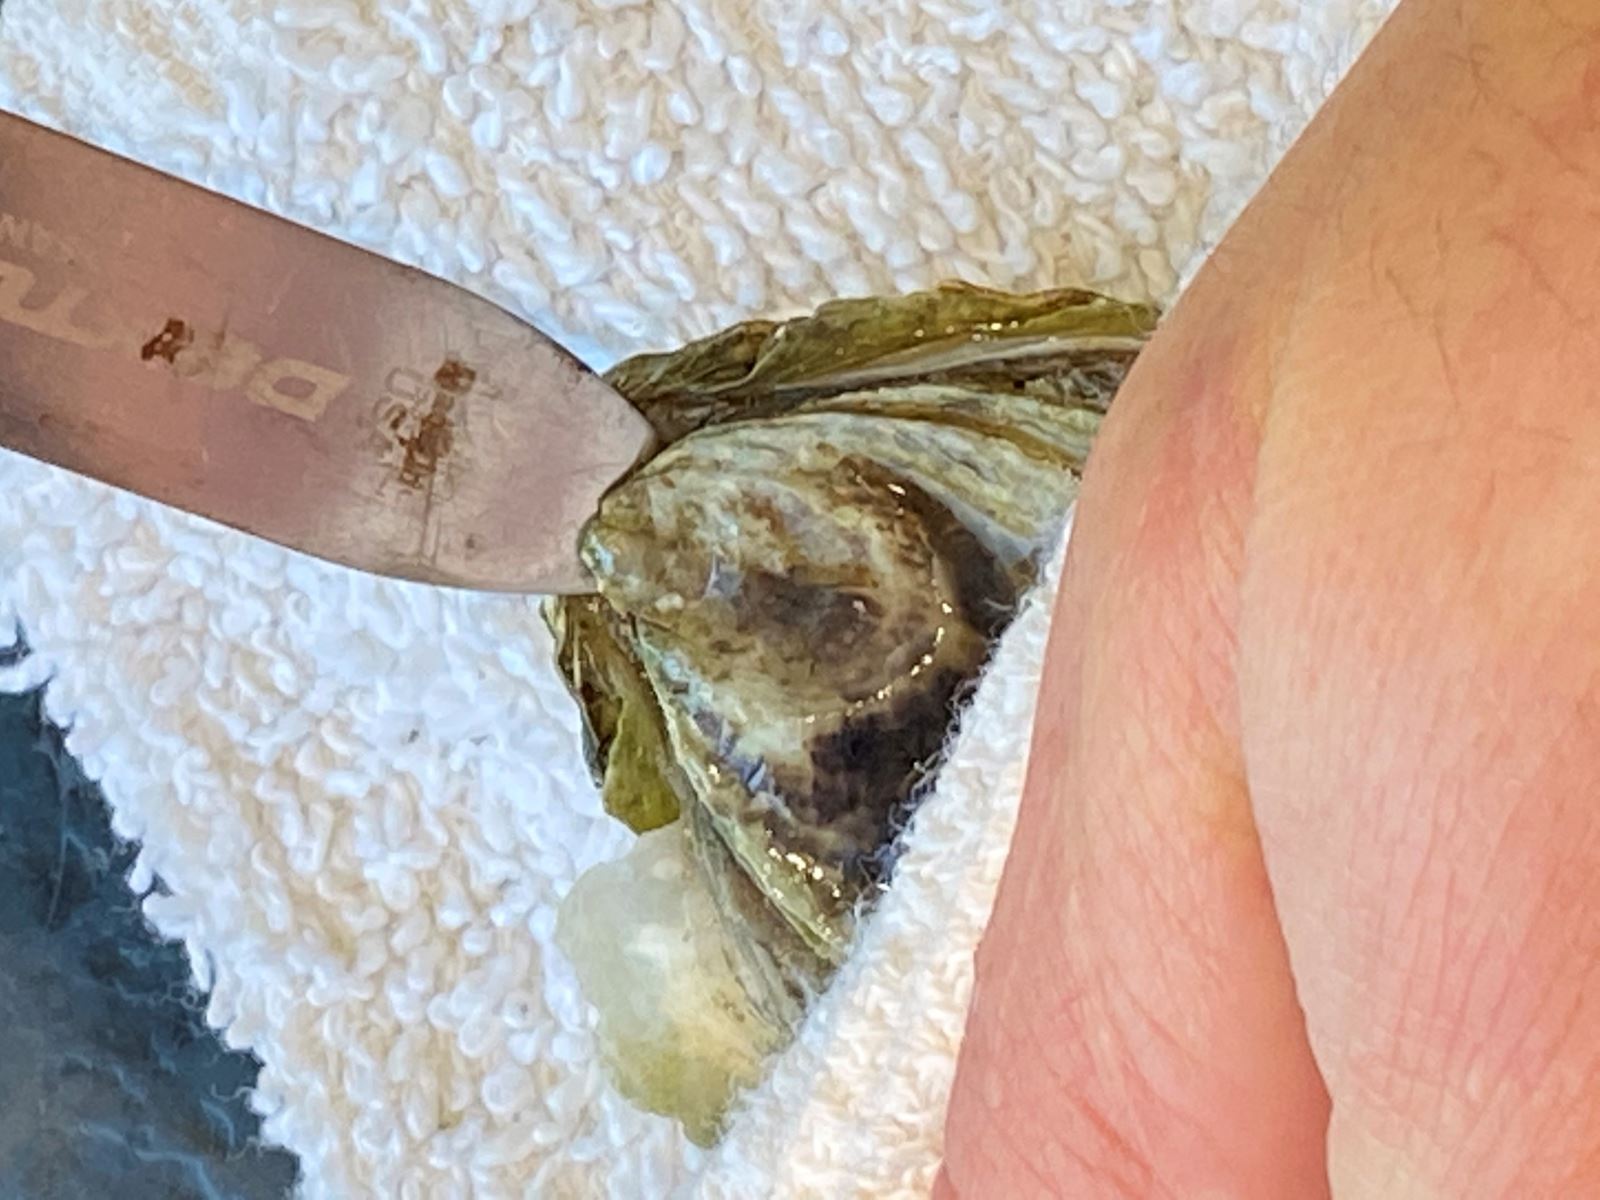
    Now fold the towel over the oyster so that only the hinge is exposed, and place your nondominant hand on top to hold it steady. Try to bunch up the folded towel in front of that hand—if the oyster knife slips, that towel is the only thing preventing your hand from getting jabbed, so make sure it’s protecting you.

    Step 3: Place the Oyster Knife Tip in the Hinge

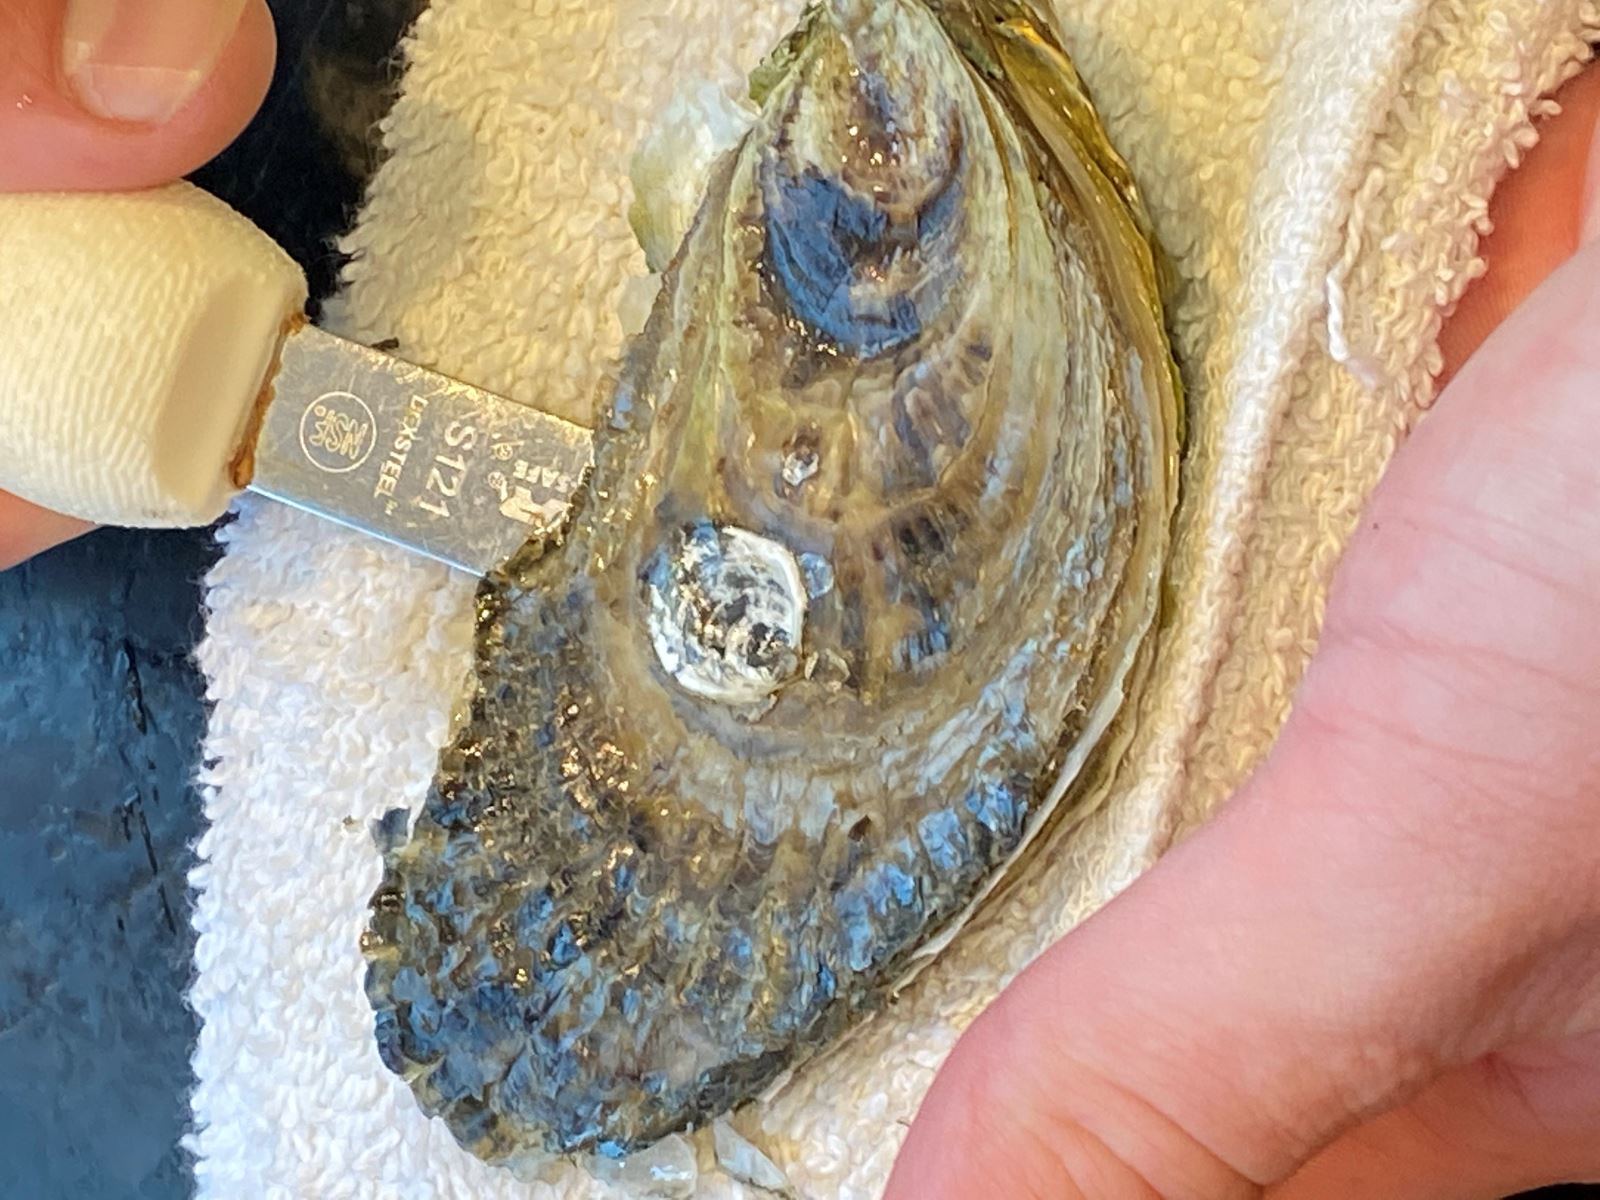
    Work your oyster knife into the hinge. This is the part that takes practice. Like a rock climber seaching for   a handhold, you’re trying to find a sweet spot in that hinge where the knife can get some leverage. Wiggle the knife around until you feel like you can exert some pressure against both the top and bottom shells at once by twisting and prying the knife.

    Step 4: Run the knife down the side

    Once you feel like you’ve got the knife tip solidly in place, work the oyster  knife up and down cutting the top mussel that holds the shells together.

    Once the shells have popped, you’ll usually have a very narrow opening— the oyster may have lost the ability to shut its shell completely, but it’s still not opening wide for you. Twist your knife so that the broad flat of the blade pries the shells apart even more.

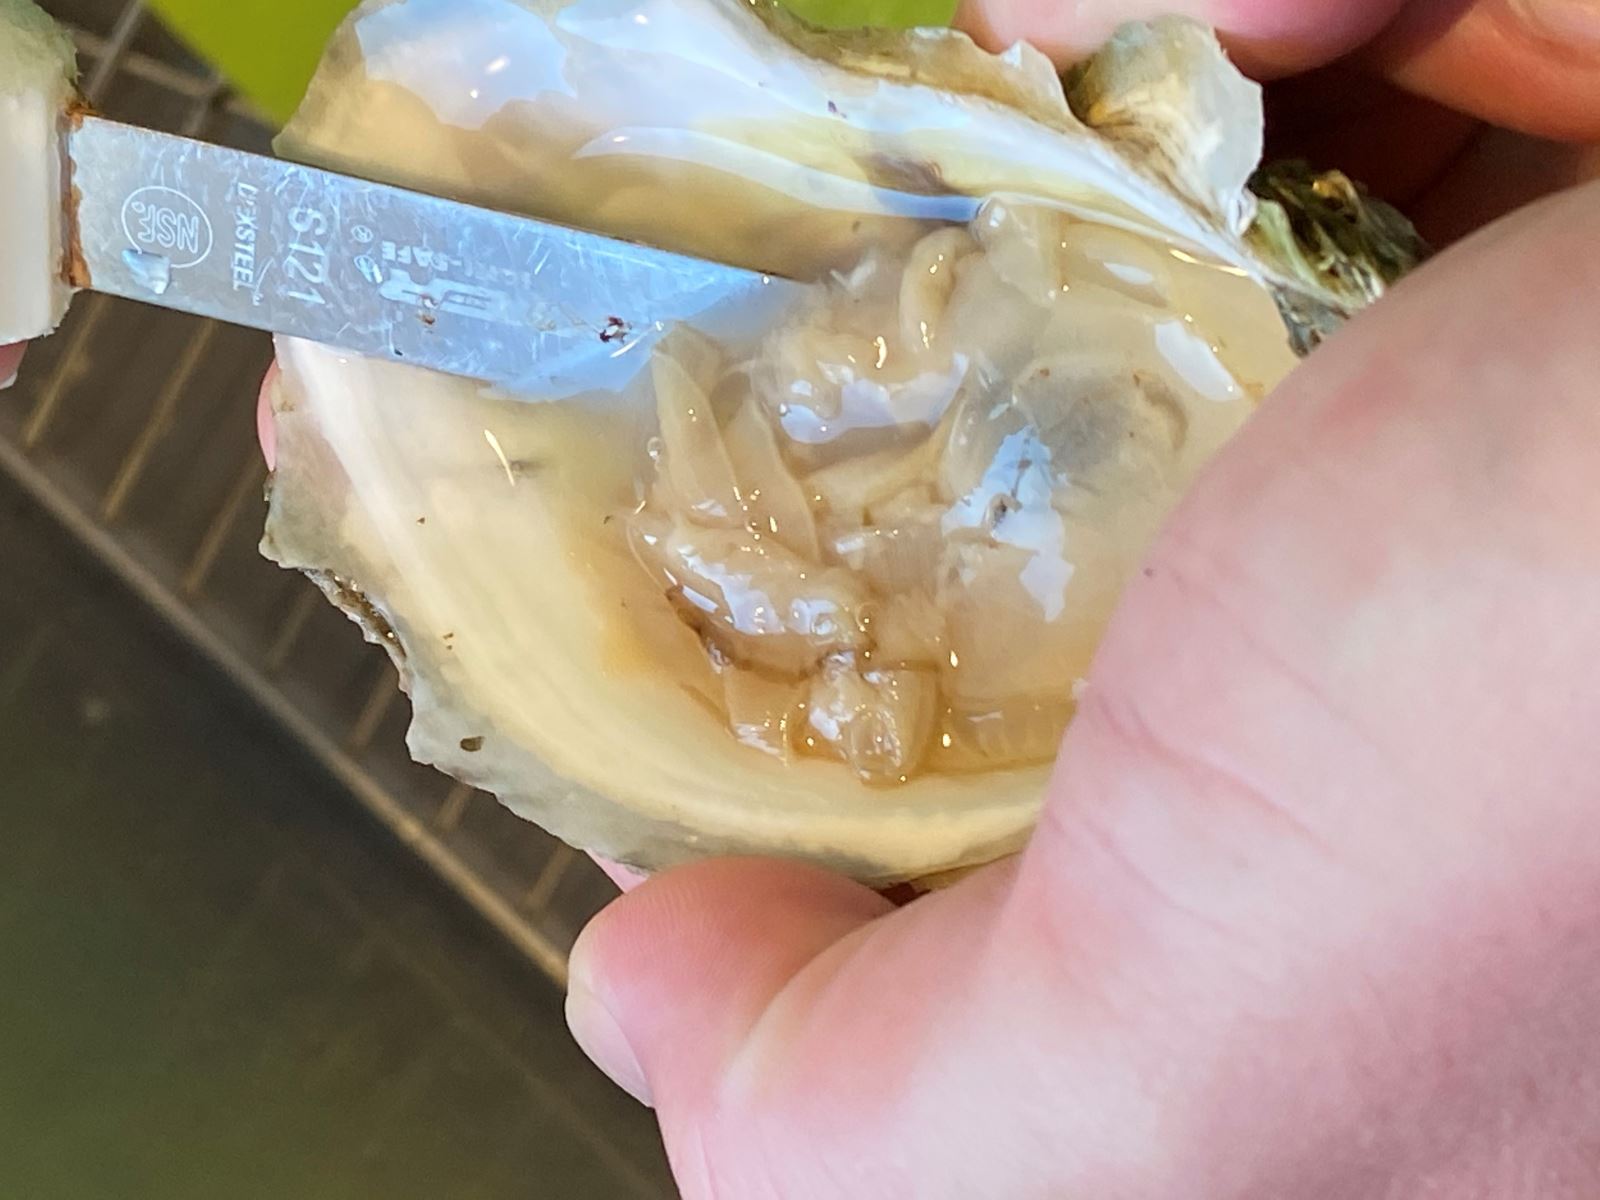
    Once you cut the muscle, you should be able to pull the top shell off. Use the knife to free any oyster meat that is still clinging to the top shell, trying your best not to damage the oyster in the process.

    Step 5: Throw Out the Top Shell and Inspect the Oyster

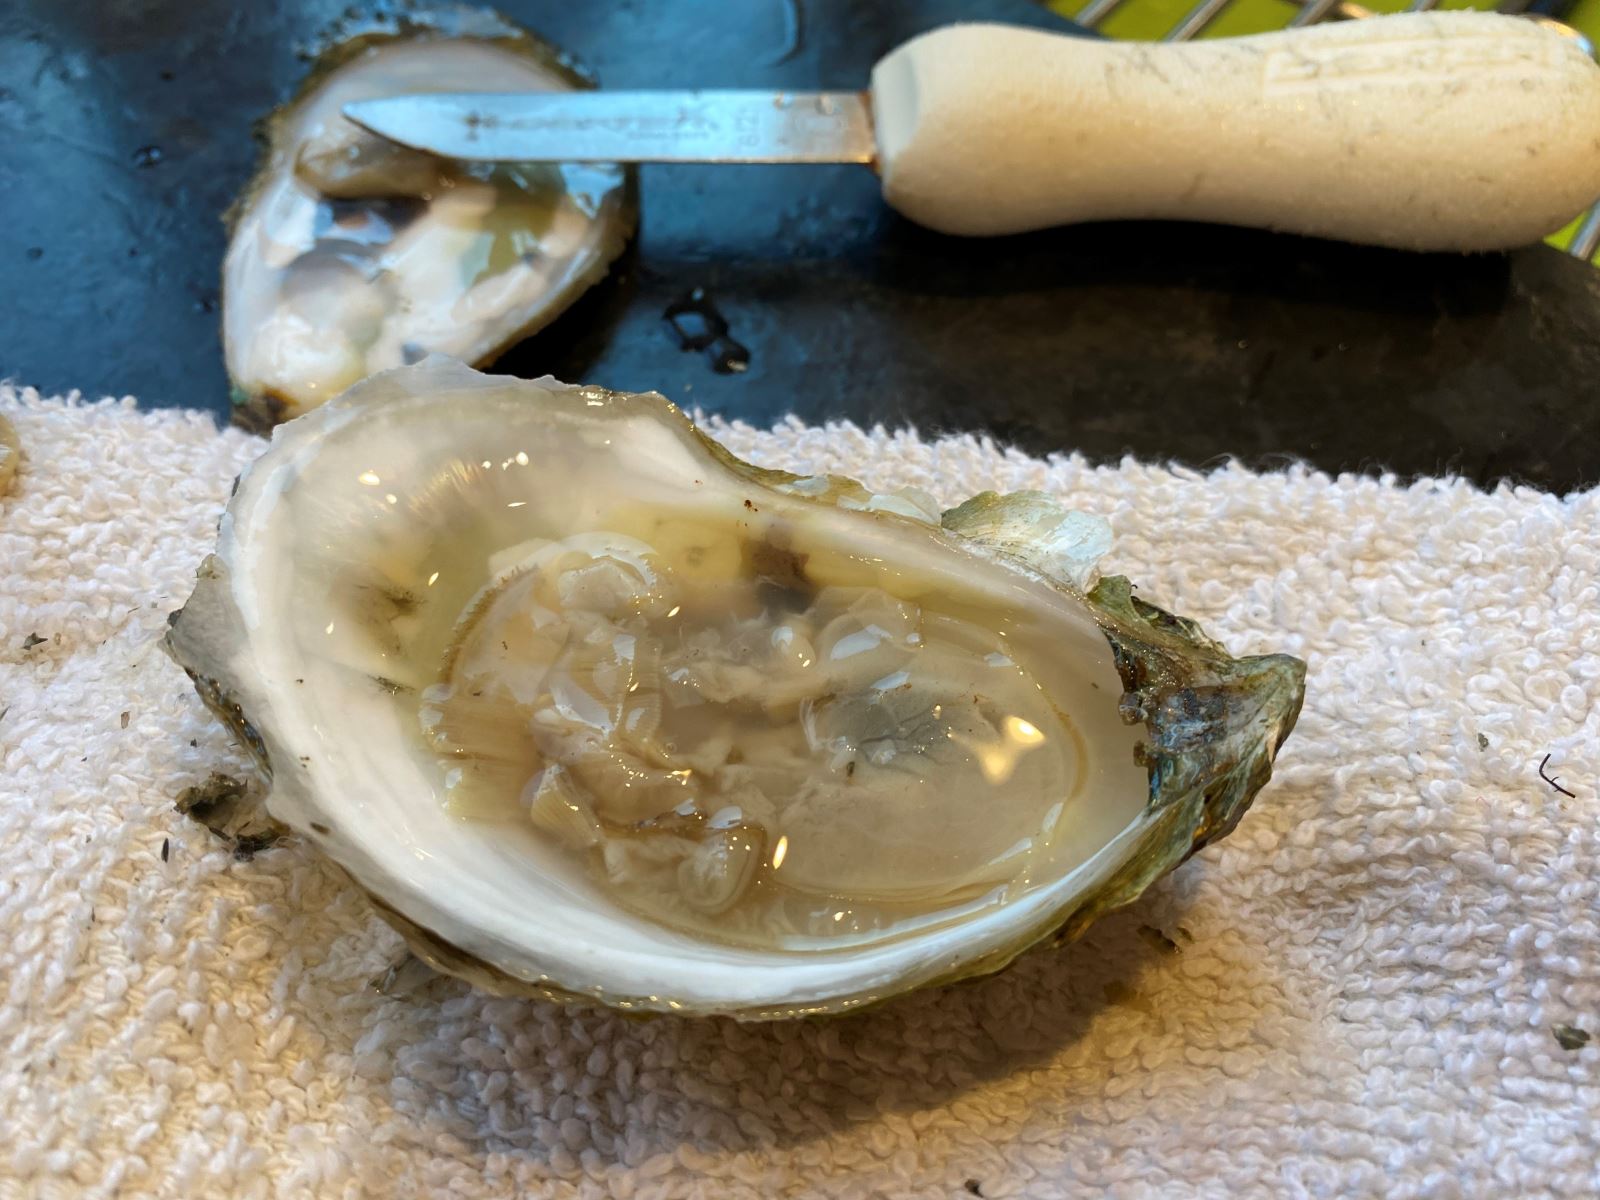
    Get rid of that top shell, because you’re done with it. Now look at your oyster. It should look clear and fresh, with plenty of liquid around it. Smell it, and throw away any oyster that smells off or looks dry.

    Also inspect the oyster for any shell fragments that got onto it when you popped it open, especially near the hinge. Use the tip of your clean oyster knife to discard them.

    Be careful not to tip the oyster and lose all its liquor when you handle it.

    Step 6: Free the Oyster From the Bottom Shell

    The final step is to slide the knife under the oyster, severing the muscle from the bottom shell. (Otherwise, it won’t slide out straight into your mouth, which is where it would be headed) Push the oyster around to make sure it’s totally free in the shell. You can also turn the oyster over if the top of the meat was cut during opening.

    Now set it on your prepared platter, if eating them on the half shell. Or slide  the oyster and its liquor into the bowl, and throw out the bottom shell. Grab your next oyster and repeat.

    “So, have you heard about the oyster who went to a disco and pulled a mussel?”

    —Billy Connolly

    This articles was excerpted from The Wellfleet Oyster Cookbook.

    Bill Rice is the author of The Wellfleet Oyster Cookbook and is founder and Co-Publisher of the Great Family Cookbook Project, a website that helps families and individuals collect and share food memories through customized printed cookbooks filled with treasured recipes. Follow us on Facebook, Instgram, YouTube and Pinterest!

  • The Best Cookie Recipes Can Be Frozen

    The Best Cookie Recipes Can Be Frozen

    In our house, there is nothing like a warm, soft cookie right out of the oven. However since it is not practical to make dough for only a few cookies at a time, the next best thing is to freeze your cookie dough and pull out enough cookies for your immediate needs.

    Freezing cookies also provides time saving opportunities when you want to get ready for a holiday cookie swap in October or getting ready for a school bake sale anytime.

    How you best freeze cookies depends on what type of cookie you are making. The FamilyCookbook Project had collected thousands of cookie recipes if you need a suggestion.

    Cookies like chocolate chip and oatmeal-raisin freeze best if you make the actual cookie beforehand. Scoop out the dough just as if you were about to bake it and place it on a baking sheet lined with parchment or a Silpat (they can be close, but not touching). Instead of putting it into the oven, but them into the freezer for atleast 6 hours instead. Once frozen, the dough balls get sealed inside a plastic freezer bag and when it is time to bake, you are ready to go.

    Cookies like shortbread or sandies, or any smooth slice-and-bake cookies can be pressed into logs, wrapped in wax paper and frozen solid. Prepare the dough as usual, then shape it into one or two logs that can be covered with wax paper and placed in a plastic freezer bag. When you’re ready to bake, let them warm on the counter for 10 to 15 minutes before slicing. You might also want to let the logs thaw in the fridge for a few hours before you’re ready to use the dough. Slice the cookies into thick disks and you’re ready to put them in the oven as usual.

    The third type of cookies that can be frozen are cut-out cookies, like sugar cookies and many holiday cookies. The dough for these cookies can be frozen in disks and then stacked together with wax paper between them. When ready to bake, thaw until bendable and continue with the recipe.

    Most frozen cookies will need an extra minute or two in the oven. Otherwise, prepping and baking the cookies is exactly the same as in the recipe.


    Bill Rice is founder and Co-Publisher of the Great Family Cookbook Project, a website that helps families and individuals collect and share food memories through customized printed cookbooks filled with treasured recipes. Follow us on Facebook and Pinterest!

  • Using Standard Measurements for Your Recipes

    Using Standard Measurements for Your Recipes

    For many generations, recipes were handed down by word of mouth from mother to daughter. Recipes consisted of a little of this and a smidgin of that. The food always came our great – or at least that is what we told out mothers!

    Today things are different. Computers make is easy to write down our recipes and share them with friends and family members over the Internet. However it is important to remember that cooking has a language of its own. It is a language of ingredients and measurements and directions. I believe the most important of these is measurements. If we did not have standard measurements for cooking, “T” could be a teaspoon, a tablespoons, a thimble full or a truck load! Here are a list of Standard Measures Abbreviations commonly used in recipes.

    teaspoon……………………… tsp.
    tablespoon…………………… tbsp. or T.
    cup…………………………….. c.
    quart…………………………… qt.
    ounce…………………………. oz.
    pint…………………………….. pt.
    gallon…………………………. gal.
    inch…………………………….. in.
    pound………………………….. lb.
    milliliter…………………………. ml
    liter……………………………….. L
    milligram……………………….. mg
    gram……………………………… g
    kilogram ……………………….. kg
    millimeter……………………… mm
    centimeter…………………….. cm
    meter……………………………. m
    Celsius…………………………… C
    Fahrenheit……………………. F

    Another important thing about standard measurements is that they don’t work if you don’t use them! Including an ingredient in your recipe without a specific amount is likely to leave someone trying the recipe for the first time scratching their head and wondering what to do. Remember know one will know unless you include it in your recipe.

    Bill Rice is founder and Co-Publisher of the Great Family Cookbook Project, a website that helps families and individuals collect and share food memories through customized printed cookbooks filled with treasured recipes. Follow us on Facebook and Pinterest!

  • A Mother’s Gift

    We owe our mothers so much. They give us life, they nurture us, feed us and teach us.

    Our mothers are also often our first teachers in the kitchen. From them we learn table manners, what a family meal is and how it brings us all together. Our lessons start when we watch and mimic what we see in the kitchen and at the dinner table. As we grow and understand, we are taught by being allowed to become a “mother’s helper” and do some of the simpler tasks of getting the family meal prepared. Later in life, we use all of the years of learning by contributing our favorite family dishes when the family gathers at holidays, taking some of the pressure off of our mothers.

    As a mom, it is important to pass those life skills on to our children so they have the same foundation in the kitchen that we learned from our parents.

    Here are some simple ideas to consider when teaching the next generation how to prepare the family meal:

    Teach measurements– Find tasks for young ones that allow them to stay in one location, but keep them busy. Give them a measuring spoon and ask them to count how many teaspoons are in a cup of flour or water. Once they fill the cup, use it in your recipe.

    Name the tools – Many of the tools of the trade in the kitchen have specific names and specific uses. Teach the names of the tool as well as their purpose in preparing the meal. That way when you ask for a wisk you don’t get a potato masher!

    Plan meals together– For most families, dinner usually includes a main dish or entre, a side dish or two providing a starch and vegetable, and if we are lucky a dessert. Discuss why certain side dishes go together and how to plan a well-balanced meal.

    Use recipes – Many mothers have made their favorite family recipes so many times, that they don’t even use a recipe any more or they never had one from their mother. Trial and error can come later, to start have a set of family recipes that can be used to provide step by step instructions to a young chef. If you don’t have them, write them down as you make a dish and start collecting them.

    A great way to help mom collect and share her family recipes is to help her create a family cookbook. The Family Cookbook Project (www.FamilyCookbookProject.com) offers a gift certificate that can printed out and included in a Mother’s Day card. This gift will help any mom create an easy online family cookbook that can then be printed and shared for generations to come.

    Mom’s can also give themselves a gift to help preserve their family food traditions. By creating a family cookbook and collecting your family recipes, you will be creating a helpful guide for future generations.

    Bill Rice is Co-Publisher of the Great Family Cookbook Project, a website that helps families and individuals collect and share food memories. Follow us on Facebook and Pinterest!