Author: Bill Rice

  • How to Dictate a Recipe Into Your Family Cookbook Project

    How to Dictate a Recipe Into Your Family Cookbook Project

    If you have a stack of recipes to enter into FamilyCookbookProject.com but dread the typing, there’s an easier way! You can use the speech-to-text feature on your phone or computer to dictate your recipes. The text can then be edited and pasted into the Add a Recipe form in your editor account.

    Using Your Mobile Phone

    For iPhone users:

    1. Open the Notes app and create a new note.
    2. Tap the microphone icon at the bottom right of the keyboard.
    3. Start dictating your recipe. The phone will convert your speech into text.

    You might need to do some editing, but it’s a great timesaver!

    Using Microsoft Word

    On both Mac and PC:

    1. Ensure your computer has a microphone (built-in or external).
    2. Open a Word document and go to the Home tab.
    3. Click the microphone icon labeled “Dictate” on the right side of the menu bar.
    4. Start speaking clearly and include punctuation by saying “period,” “comma,” etc.

    Using Dedicated Apps

    There are various apps available for dictation, but the built-in features of your phone and Word are usually sufficient.

    Dictating your recipes can save a lot of time. Once you have the text in a document, simply cut and paste it into the Add a Recipe form, and you’re done!

    By the way, this entire article was dictated on an iPhone. Good luck!


    Bill Rice is Founder and Co-Publisher of the Family Cookbook Project, a website that helps families and individuals collect, preserve and share food memories by creating their own printed personal cookbooks. He is the author of The Wellfleet Oyster Cookbook and the Cape Cod Cocktail Cookbook (Available on Amazon), both created using FamilyCookbookProject.com. He is also editor of the Donovan Family Cookbook, now it’s third printing.

    Follow Family Cookbook Project on Facebook, Instagram, Twitter and Pinterest!

  • From Paella to Gazpacho: Your Guide to Cooking Spanish Food at Home

    From Paella to Gazpacho: Your Guide to Cooking Spanish Food at Home

    Spanish cuisine is a vibrant mix of fresh ingredients, bold flavors, and a deep appreciation for the country’s regional culinary traditions. From savory tapas to hearty stews, cooking Spanish food at home is an exciting way to explore the flavors of the Mediterranean. Whether you’re making a classic paella or whipping up some refreshing gazpacho, Spanish cooking is both accessible and full of variety.

    In this article, FamilyCookbookProject.com walks you through the essential ingredients you should have on hand, must-have spices for Spanish cooking, and a few simple dishes to help you get started.

    Essential Ingredients for Spanish Cooking

    Spanish cooking is all about using fresh, high-quality ingredients that are simple but full of flavor. Here are some of the key ingredients you’ll need to create authentic Spanish dishes at home:

    Olive Oil

    Spanish olive oil is central to almost every dish in Spanish cuisine. Whether you’re frying, sautéing, or drizzling it over a salad, extra-virgin olive oil is a must-have for authentic Spanish cooking.

    Garlic

    Garlic is used extensively in Spanish food, adding depth and flavor to dishes like gambas al ajillo (garlic shrimp), sopa de ajo (garlic soup), and various sauces and marinades.

    Tomatoes

    Fresh tomatoes and canned tomatoes are commonly used in Spanish cooking. They are key ingredients in dishes like paella, gazpacho, and pan con tomate (tomato bread). Spanish cuisine frequently celebrates the natural sweetness of ripe tomatoes.

    Paprika (Pimentón)

    Spanish paprika, or pimentón, comes in sweet (dulce), smoked (ahumado), and hot (picante) varieties. It’s a cornerstone of Spanish flavor, used in everything from chorizo seasoning to patatas bravas (fried potatoes with spicy sauce).

    Saffron

    Saffron is the golden spice that gives Spanish paella its distinctive color and flavor. It’s a bit of a splurge but worth the investment for special dishes. Even a small pinch of saffron can elevate a dish to another level.

    Rice (Bomba or Calasparra)

    Spanish cuisine often features rice, especially in dishes like paella and arroz con pollo (chicken and rice). The best rice for these dishes is Bomba or Calasparra rice, which absorbs liquid while maintaining a firm texture.

    Spanish Ham (Jamón)

    Jamón, particularly jamón ibérico or jamón serrano, is a delicacy in Spain and a common addition to tapas and charcuterie boards. It’s cured and thinly sliced, with a rich, savory flavor.

    Chorizo

    Spanish chorizo is a cured pork sausage seasoned with paprika and garlic. It’s different from Mexican chorizo, which is raw and must be cooked. Spanish chorizo can be sliced and eaten as is or cooked into dishes like paella and stews.

    Seafood (Shrimp, Mussels, Calamari)

    Spanish cuisine heavily features seafood, particularly in coastal regions. Ingredients like shrimp, mussels, and calamari are often used in dishes such as paella and zarzuela (Spanish seafood stew).

    Potatoes

    Potatoes are a versatile ingredient in Spanish cuisine, used in dishes like tortilla española (Spanish omelette) and patatas bravas.

    Must-Have Spices for Spanish Cooking

    While Spanish cuisine doesn’t rely on an extensive array of spices, it makes careful use of a few key flavors. Here are the spices you’ll need to create authentic Spanish dishes:

    Pimentón (Spanish Paprika)

    Paprika, or pimentón, is essential in Spanish cooking. It’s available in sweet, hot, and smoked varieties, with smoked pimentón being especially important for adding depth to meats and stews.

    Saffron

    Known for its golden hue and unique flavor, saffron is a critical spice in Spanish rice dishes like paella. A small amount goes a long way, but it’s indispensable for authentic Spanish cuisine.

    Cumin

    Cumin is often used in Spanish stews and sausages. It lends an earthy, slightly spicy flavor to dishes like chorizo and albondigas (Spanish meatballs).

    Oregano

    Oregano is used in various Spanish marinades, sauces, and meat dishes. Its herbaceous flavor is especially common in southern Spain, where it complements rich tomato-based sauces.

    Bay Leaves

    Bay leaves are used to flavor soups, stews, and braises, giving dishes like fabada asturiana (white bean stew) their signature herbal aroma.

    Thyme

    Thyme is frequently used in Spanish cooking, especially in stews, marinades, and roasted meat dishes. Its subtle, earthy flavor pairs well with roasted vegetables and meats.

    Simple Spanish Dishes to Start With

    Now that you’ve stocked your pantry with the essential ingredients and spices, here are a few simple Spanish dishes to try at home:

    Tortilla Española (Spanish Omelette)

    One of the most iconic dishes in Spain, tortilla española is a simple omelette made with potatoes, onions, and eggs. It’s cooked slowly in olive oil until the potatoes are tender and the eggs are set. Serve it warm or at room temperature as a tapa or a light meal.

    Search FamilyCookbookProject.com for Spanish Omelette recipes.

    Gazpacho (Chilled Tomato Soup)

    Gazpacho is a refreshing, cold soup made with ripe tomatoes, cucumbers, peppers, garlic, and olive oil. It’s perfect for hot summer days and can be made ahead of time for a quick and easy meal.

    Search FamilyCookbookProject.com for Gazpacho recipes.

    Paella

    Paella is the quintessential Spanish dish, made with rice, saffron, seafood (like shrimp and mussels), and chicken or rabbit. It’s a perfect dish for special occasions, and while it takes some time to prepare, the result is a flavorful, hearty meal.

    Search FamilyCookbookProject.com for Paella recipes.

    Patatas Bravas

    Patatas bravas are crispy fried potatoes served with a spicy tomato sauce or aioli. They’re a popular tapa and easy to make at home. The key is to fry the potatoes until golden and crispy, then drizzle them with a bold, tangy sauce.

    Search FamilyCookbookProject.com for Patatas bravas recipes.

    Gambas al Ajillo (Garlic Shrimp)

    A quick and flavorful dish, gambas al ajillo features shrimp sautéed in olive oil with garlic and a hint of chili. It’s a popular tapa and can be made in just a few minutes.

    Search FamilyCookbookProject.com for Garlic Shrimp recipes.

    Cooking Spanish Food at Home

    Cooking Spanish food at home allows you to experience the vibrant and diverse flavors of Spain in your own kitchen. By keeping essential ingredients like olive oil, tomatoes, paprika, and fresh seafood on hand, along with must-have spices like saffron and pimentón, you’ll be able to recreate authentic Spanish dishes with ease. Start with simple recipes like tortilla española or gambas al ajillo, and as you grow more comfortable, you can explore more elaborate dishes like paella or fabada.

    Spanish food is all about fresh, bold flavors and sharing meals with friends and family, so don’t hesitate to dive into this delicious cuisine. ¡Buen provecho!


    Bill Rice is Founder and Co-Publisher of the Family Cookbook Project, the leading online cookbook publisher with a website that helps families and individuals collect, preserve and share food memories by creating their own printed custom cookbooks. He is the author of The Wellfleet Oyster Cookbook and the Cape Cod Cocktail Cookbook (Available on Amazon), both created using FamilyCookbookProject.com. He is also editor of the Donovan Family Cookbook, now it’s third printing and is an avid genealogist tracing his family back to the 1600’s.

    Follow Family Cookbook Project on Facebook, Instagram, Twitter TikTok, YouTube and Pinterest!


  • The Ultimate Cheese Lovers Guide: Types, Flavors, and How to Cook with Them

    The Ultimate Cheese Lovers Guide: Types, Flavors, and How to Cook with Them

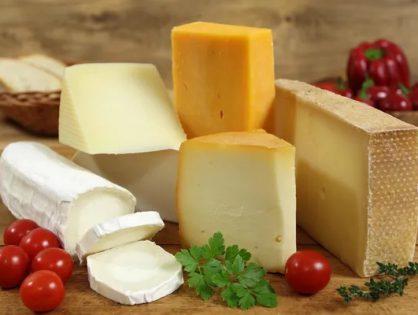
    Cheese is a versatile, flavorful ingredient used in countless dishes around the world. From the creamy richness of brie to the sharp bite of cheddar, cheese can enhance a variety of meals, adding depth, texture, and complex flavors. Each type of cheese has unique characteristics, a distinct place of origin, and a flavor profile that makes it perfect for specific dishes.

    In this article, we’ll explore some of the most common types of cheese, how they’re used in cooking, their key characteristics, where they come from, and what their flavor profiles are.

    Cheddar
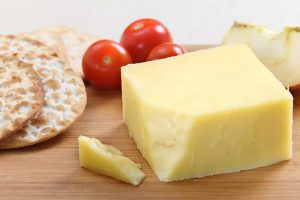
    Origin: England

    Key Characteristics:

    Cheddar is a firm, cow’s milk cheese that ranges in flavor from mild to sharp, depending on its aging process. It’s typically pale yellow or white, though in some cases, it’s colored with annatto to give it a deeper orange hue. Cheddar can be aged anywhere from a few months to several years, with longer aging periods resulting in a sharper flavor and a crumblier texture.

    Flavor Profile:

    Mild cheddar has a creamy, buttery flavor, while sharp cheddar has a stronger, more pungent taste with hints of nuttiness.

    Uses in Cooking:

    •Grated over baked dishes like mac and cheese or casseroles

    •Sliced for sandwiches and burgers

    •Melted into soups and sauces

    •Paired with fruit or crackers on a cheese board

    Brie
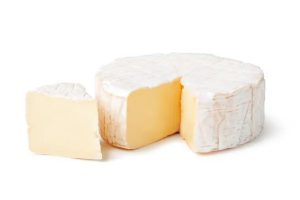
    Origin: France

    Key Characteristics:

    Brie is a soft, creamy cheese made from cow’s milk, characterized by its edible white rind. The interior of brie is smooth and buttery, while the rind has a slightly earthy flavor. It’s typically enjoyed at room temperature for maximum creaminess.

    Flavor Profile:

    Brie has a mild, buttery taste with subtle earthy and mushroom-like undertones. As it ages, the flavor becomes more robust and pungent.

    Uses in Cooking:

    •Baked in puff pastry for baked brie appetizers

    •Served with fruit, nuts, and honey on a cheese platter

    •Spread on bread or crackers

    •Added to sandwiches and grilled cheese

    Mozzarella
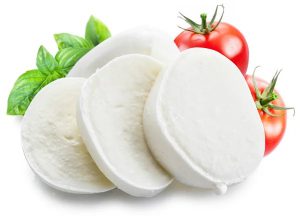
    Origin: Italy

    Key Characteristics:

    Mozzarella is a soft, fresh cheese traditionally made from water buffalo milk, though cow’s milk is commonly used today. It has a high moisture content and is typically sold as fresh mozzarella in balls or blocks. It’s known for its mild flavor and stringy texture when melted.

    Flavor Profile:

    Mozzarella has a delicate, milky flavor that’s fresh and slightly tangy. It’s prized for its stretchy, gooey texture when melted.

    Uses in Cooking:

    •Topping for pizzas

    •Layered in lasagna and baked pasta dishes

    •Sliced for caprese salad (paired with tomatoes and basil)

    •Melted in sandwiches like paninis or grilled cheese

    Parmesan (Parmigiano-Reggiano)
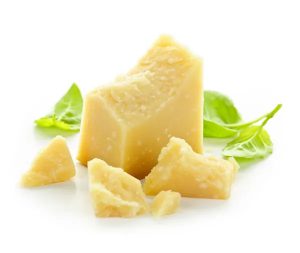
    Origin: Italy

    Key Characteristics:

    Parmesan is a hard, aged cheese made from cow’s milk. Authentic Parmigiano-Reggiano is produced in specific regions of Italy under strict regulations. It’s aged for at least 12 months, resulting in a hard, granular texture and a deep, umami flavor. It’s often sold in wedges or grated.

    Flavor Profile:

    Parmesan has a nutty, savory flavor with a salty tang and a rich umami taste. The longer it ages, the more complex and intense the flavor becomes.

    Uses in Cooking:

    •Grated over pasta, risotto, and soups

    •Shaved onto salads

    •Added to breading for chicken or eggplant parmesan

    •Used in sauces like Alfredo for a rich, savory flavor

    Blue Cheese (Roquefort, Gorgonzola, Stilton)
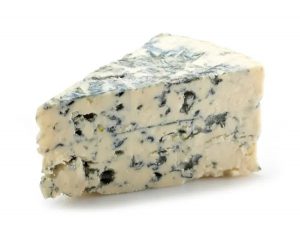
    Origin: Various (Roquefort from France, Gorgonzola from Italy, Stilton from England)

    Key Characteristics:

    Blue cheeses are characterized by their blue or green veins, which are created by the introduction of mold cultures during the aging process. These cheeses have a strong aroma and crumbly texture. Roquefort, Gorgonzola, and Stilton are some of the most well-known varieties of blue cheese, each with distinct characteristics depending on the region they’re from.

    Flavor Profile:

    Blue cheeses have a sharp, tangy flavor with a rich, creamy texture. They can range from mildly earthy to intensely pungent and salty.

    Uses in Cooking:

    •Crumbled over salads (especially with pears, walnuts, or apples)

    •Melted into dressings or dips

    •Served on cheese boards with fruits like figs and grapes

    •Used in sauces for steaks and burgers

    Feta
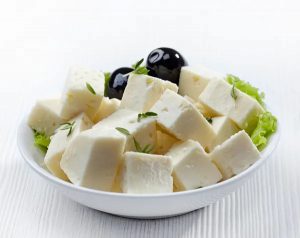
    rigin: Greece

    Key Characteristics:

    Feta is a brined, crumbly cheese made from sheep’s milk or a combination of sheep’s and goat’s milk. It has a soft, grainy texture and is sold in blocks or crumbled. Feta is stored in a salty brine, which helps preserve its fresh, tangy flavor.

    Flavor Profile:

    Feta has a tangy, salty flavor with a creamy yet crumbly texture. Its sharpness varies depending on the length of aging.

    Uses in Cooking:

    •Crumbled over salads, especially Greek salad

    •Used as a filling in pastries like spanakopita

    •Added to omelets or scrambled eggs

    •Served with olives, tomatoes, and olive oil as part of a mezze platter

    Gouda
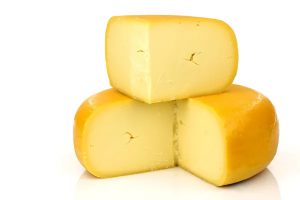
    Origin: Netherlands

    Key Characteristics:

    Gouda is a semi-hard cheese made from cow’s milk. It has a smooth, creamy texture and a yellow rind. Gouda can be aged from a few months to over a year, with older varieties becoming firmer and more intense in flavor. Young Gouda is soft and mild, while aged Gouda is firm and has a deeper, caramel-like taste.

    Flavor Profile:

    Young Gouda is mild, creamy, and slightly sweet. Aged Gouda develops a nutty, caramel flavor with a firmer, crumbly texture.

    Uses in Cooking:

    •Sliced for sandwiches or burgers

    •Melted in casseroles or grilled cheese

    •Grated over vegetables or potatoes

    •Paired with fruits like apples or pears on a cheese platter

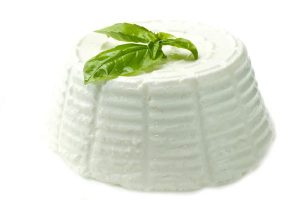
    Ricotta
    Origin: Italy

    Key Characteristics:

    Ricotta is a fresh, soft cheese made from the whey leftover after making other cheeses like mozzarella or provolone. It has a light, fluffy texture and is often used in both savory and sweet dishes. It’s typically made from cow’s milk, though sheep and goat milk ricotta are also available.

    Flavor Profile:

    Ricotta has a mild, slightly sweet flavor with a creamy, grainy texture.

    Uses in Cooking:

    •Filling for lasagna, ravioli, or cannoli

    •Spread on toast with honey or fruit

    •Mixed into pancake or cake batter for added moisture

    •Used in dips or spreads for vegetables or crackers

    Gruyère

    Origin: Switzerland

    Key Characteristics:

    Gruyère is a hard, cow’s milk cheese with a smooth texture and a golden-brown rind. It’s aged for several months, which gives it a dense, firm texture and a slightly nutty flavor. Gruyère is known for its excellent melting properties, making it a popular choice for fondues and gratins.

    Flavor Profile:

    Gruyère has a rich, nutty, and slightly sweet flavor, with hints of fruitiness that develop as it ages. It’s smooth and creamy when melted.

    Uses in Cooking:

    •Melted in fondues or croque monsieur sandwiches

    •Grated over gratins and casseroles

    •Used in quiches and French onion soup

    •Sliced for cheese boards and sandwiches

    Pecorino Romano

    Origin: Italy

    Key Characteristics:

    Pecorino Romano is a hard, salty cheese made from sheep’s milk. It has a crumbly texture and is typically aged for 8–12 months, giving it a sharp, tangy flavor. It’s often used as a finishing cheese, grated over pasta or vegetables.

    Flavor Profile:

    Pecorino Romano has a salty, tangy flavor with a sharp bite. It’s slightly more intense than Parmesan and has a crumbly texture.

    Uses in Cooking:

    •Grated over pasta dishes like cacio e pepe or carbonara

    •Sprinkled on roasted vegetables or salads

    •Shaved onto soups or risottos

    •Used in meatballs or meatloaf for added flavor

    Cooking with Cheese

    Cheese is one of the most versatile ingredients in the culinary world, offering a wide range of textures, flavors, and uses. Whether you’re melting mozzarella on a pizza, crumbling feta over a salad, or grating Parmesan into a sauce, cheese can elevate any dish with its unique flavor profile. By understanding the characteristics and origins of different cheeses, you can experiment with new ways to incorporate them into your cooking and create delicious, flavorful meals.


    Bill Rice is Founder and Co-Publisher of the Family Cookbook Project, the leading online cookbook publisher with a website that helps families and individuals collect, preserve and share food memories by creating their own printed custom cookbooks. He is the author of The Wellfleet Oyster Cookbook and the Cape Cod Cocktail Cookbook (Available on Amazon), both created using FamilyCookbookProject.com. He is also editor of the Donovan Family Cookbook, now it’s third printing and is an avid genealogist tracing his family back to the 1600’s.

    Follow Family Cookbook Project on Facebook, Instagram, Twitter TikTok, YouTube and Pinterest!

    and their uses in cooking!

  • How to Create Your Own Seafood Cookbook: A Guide for Seafood Lovers

    How to Create Your Own Seafood Cookbook: A Guide for Seafood Lovers

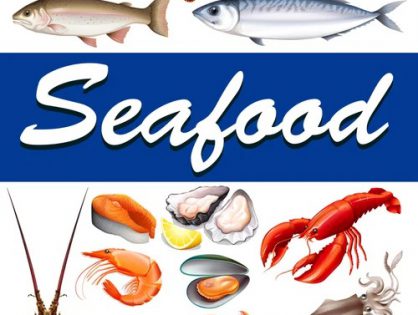
    Seafood is a culinary treasure that offers an endless variety of flavors, textures, and cooking techniques. From the delicate sweetness of shrimp and scallops to the rich, buttery taste of lobster and the robust flavor of salmon, seafood provides something for every palate. If you’re a seafood lover, you’ve probably amassed a wide range of recipes over the years—from family favorites to new discoveries—spanning everything from quick weeknight meals to elegant dinner party dishes.

    With so many types of seafood and so many ways to prepare them, it can be challenging to keep track of all your recipes. This is where creating your own seafood cookbook comes in handy. By organizing all your seafood recipes into one category-specific cookbook, you can streamline your cooking process and have your go-to recipes at your fingertips. Whether you enjoy cooking for yourself or hosting seafood feasts for family and friends, a personalized seafood cookbook can make life easier and add joy to your culinary adventures.

    Why Create a Seafood Cookbook?

    There are many reasons why creating your own seafood cookbook is a smart idea:

    –  Organization: Instead of flipping through multiple cookbooks, websites, or recipe cards, all of your favorite seafood dishes will be collected in one place.

    –  Customization: A seafood cookbook allows you to customize the categories and organization to fit your tastes and needs. You can focus on your favorite types of seafood, cooking methods, or even theme your cookbook around regional or international flavors.

    –  Seasonal Cooking: By organizing your recipes, you can easily plan meals based on what’s fresh and in season, taking full advantage of peak seafood times.

    –  Sharing with Others: A personalized seafood cookbook can be a wonderful gift for friends and family or even serve as a way to pass down family seafood recipes to the next generation.

    –  Building a Legacy: If seafood has been a big part of your life, documenting your recipes in a single cookbook creates a personal legacy of your cooking adventures.

    Step-by-Step Guide to Creating a Seafood Cookbook

    Whether you’re a seasoned home cook or someone who loves experimenting with new recipes, creating your own seafood cookbook is a fun and fulfilling project. Here’s how to get started:

     # 1.  Gather Your Recipes

    The first step in creating a seafood cookbook is to gather all your favorite recipes. These can come from various sources, including:

    –  Family recipes: Dishes that have been passed down through generations, such as a treasured crab cake recipe or a family clam chowder tradition.

    –  Personal creations: Seafood dishes you’ve developed or tweaked over the years.

    –  Online and cookbook discoveries: You may have found fantastic seafood recipes online or in other cookbooks. Collect these, and consider adding your personal notes or adjustments.

    Types of seafood to consider including in your cookbook might be:

    –  Shellfish: Shrimp, crab, lobster, clams, oysters, scallops, mussels

    –  Finfish: Salmon, cod, tuna, halibut, snapper, trout, and sea bass

    –  Mollusks: Octopus, squid, cuttlefish

    –  Other seafood: Crawfish, eels, and sea urchins

    Organize your recipes in a way that suits your style—whether it’s by type of seafood, cooking technique, or meal type (appetizers, mains, sides, etc.).

     # 2.  Create Custom Categories

    One of the joys of creating your own cookbook is organizing it in a way that works best for you. For a seafood cookbook, you could consider organizing by:

    –  Types of seafood: Have separate sections for finfish (like salmon or cod), shellfish (lobster, shrimp), and mollusks (squid, octopus).

    –  Cooking methods: Grilling, broiling, steaming, poaching, frying, or raw (for sushi or ceviche recipes).

    –  Regional or international cuisine: Categorize recipes based on seafood dishes from different regions, such as Mediterranean seafood, New England favorites, or Asian-inspired dishes.

    –  Meal type: Organize your cookbook by appetizers, entrees, soups, and side dishes.

    Creating custom categories makes it easier to find the perfect recipe, whether you’re hosting a seafood boil or preparing a quick weeknight salmon dish.

     # 3.  Add Seasonal and Sustainability Tips

    Seafood lovers often care about sourcing sustainable, high-quality ingredients. Include a section in your cookbook that provides guidance on:

    –  Seasonal availability: Some seafood is at its best in certain seasons. For example, soft-shell crab is in peak season during the spring and early summer, while wild salmon is often caught from May through September. Including this information helps you choose the best recipes for each season.

    –  Sustainability: Support sustainable seafood practices by including tips on choosing environmentally friendly options, such as looking for seafood certified by the Marine Stewardship Council (MSC) or purchasing from local, responsible fisheries.

    –  Storage and freshness: Offer tips on how to store seafood properly, whether fresh or frozen, and how to tell if seafood is still good to eat.

    This information adds extra value to your cookbook and supports a more mindful, eco-friendly approach to cooking with seafood.

     # 4.  Incorporate Cooking Techniques

    Different types of seafood require specific preparation methods to bring out their best qualities. Including cooking tips in your cookbook will help ensure your dishes always turn out perfectly. Consider including the following:

    –  How to clean and prep seafood: Teach readers how to properly clean and de-shell shrimp, crack open lobster, shuck oysters, and prepare fish for grilling or frying.

    –  Cooking methods: Give step-by-step instructions for common techniques like grilling fish, steaming shellfish, pan-searing scallops, and making seafood stock.

    –  Pairing tips: Share suggestions on how to pair seafood with complementary ingredients, like fresh herbs, citrus, garlic, or white wine. You can also offer side dish suggestions such as crusty bread, fresh salads, or seasonal vegetables.

     # 5.  Personalize with Stories and Photos

    What makes a cookbook truly special is the personal touch. Add anecdotes, stories, or memories related to each recipe. Perhaps you have a story about catching fresh shrimp on a family vacation or memories of a New England clam bake. These details add warmth and personality to your cookbook, making it a keepsake for family and friends.

    If you enjoy photography, consider adding pictures of your dishes, your favorite seafood markets, or even your fishing trips. Visuals not only enhance the overall design of the cookbook but also bring the recipes to life.

     # 6.  Consider Regional or Cultural Specialties

    Seafood has deep connections to many regional and cultural cuisines around the world. Consider focusing parts of your cookbook on specific regional specialties:

    –  New England: Chowders, lobster rolls, and clam bakes.

    –  Mediterranean: Grilled octopus, seafood pasta, and fish stews.

    –  Southeast Asia: Shrimp curry, fish cakes, and spicy seafood soups.

    –  Southern U.S.: Crawfish boils, fried catfish, and gumbo.

    Including these specialties can make your cookbook more diverse and offer readers a variety of international or regional seafood dishes to try.

     # 7.  Use a Cookbook Publishing Platform

    Once you’ve compiled all your recipes, categories, tips, and photos, it’s time to organize them into a professional-looking cookbook. You can use online platforms, such as FamilyCookbookProject.com, to create a polished, high-quality cookbook with customizable designs. This allows you to print copies for yourself or share with others, whether as a gift or even to sell at local markets or online.

    Creating a seafood cookbook is a great way to organize your favorite recipes, showcase your culinary creativity, and celebrate your love for seafood. With all your recipes in one place, you’ll never have to search through scattered notes or cookbooks again. Your personalized cookbook will not only serve as a useful kitchen tool, but it will also become a cherished collection of seafood dishes that you can share with family and friends for years to come.

    Whether you’re grilling fresh salmon, preparing a seafood paella, or serving up a simple shrimp cocktail, a seafood cookbook will make cooking with seafood even more enjoyable. So, start collecting your recipes, organizing them into categories, and create a one-of-a-kind cookbook that showcases the best of the ocean’s bounty!


    Bill Rice is Founder and Co-Publisher of the Family Cookbook Project, a website that helps families and individuals collect, preserve and share food memories by creating their own printed personal cookbooks. He is the author of The Wellfleet Oyster Cookbook and the Cape Cod Cocktail Cookbook (Available on Amazon), both created using FamilyCookbookProject.com. He is also editor of the Donovan Family Cookbook, now it’s third printing and is an avid genealogist tracing his family back to the 1600’s.

    Follow Family Cookbook Project on Facebook, Instagram, Twitter TikTok, YouTube and Pinterest!


  • How to Create a Custom Cover for Your Personal or Family Cookbook

    How to Create a Custom Cover for Your Personal or Family Cookbook

    Creating a personal or family cookbook is a special way to preserve treasured recipes, whether they’ve been passed down through generations or collected from your own culinary experiments. One of the most exciting parts of the process is designing a custom cover that reflects your cookbook’s unique character.  FamilyCookbookProject.com makes it easy to customize your cookbook with a wide range of professionally designed covers, but did you know that you can also create your own cover from scratch or personalize one of the existing designs with your own photo?

    Let’s walk through how to create a custom cover for your personal or family cookbook, whether you choose to design it yourself or add a personal touch to one of the pre-designed options from FamilyCookbookProject.com.

    Why Customize Your Cookbook Cover?

    The cover of your cookbook is the first thing people will see, and it sets the tone for the entire book. A personalized cover can make your cookbook stand out and give it a more personal touch. Whether it’s a cherished gift for family members or a cookbook you plan to sell, a custom cover gives your book a special feel. Some benefits of creating a custom cover include:

    –  Reflect Your Personality : A custom cover can showcase your unique style, whether that’s classic, modern, or whimsical.

    –  Highlight Family Tradition : Adding a family photo or personal image to the cover adds sentimental value.

    –  Make It Memorable : A well-designed cover can make your cookbook a beautiful keepsake for years to come.

    Option 1: Create Your Own Custom Cookbook Cover

    If you’re creatively inclined and want complete control over the design, you can create your own custom cover from scratch. Here’s how to get started:

    # 1.  Design Specifications

    When creating a custom cover, it’s important to ensure your design meets the necessary specifications. For FamilyCookbookProject.com, the cover should:

    –  Size : 5.5 inches x 8.5 inches (portrait orientation).

    –  Resolution : 300 dpi (dots per inch) for high-quality printing.

    –  File Format : Save your design as a high-resolution JPEG (.jpg) file.

    Ensuring your cover meets these specifications will ensure it prints beautifully without any pixelation or distortion.

    # 2.  Software to Use

    There are many software programs available that you can use to design your cookbook cover, depending on your skill level and preferences. Some popular options include:

    –  Canva : A user-friendly, free online design tool with plenty of templates, fonts, and images to work with.

    –  Adobe Photoshop : A more advanced design tool for those familiar with graphic design.

    –  Adobe Illustrator : Ideal for vector-based designs and professional-quality graphics.

    –  GIMP : A free, open-source design software that offers similar tools to Photoshop.

    –  Microsoft PowerPoint : While not typically used for graphic design, PowerPoint offers a simple way to create basic designs and export them as JPEGs.

    Each of these programs allows you to customize fonts, add images, adjust colors, and create a design that reflects your personal style.

    # 3.  Design Ideas for Your Cover

    When designing your cover, think about the theme of your cookbook and the audience you’re creating it for. Some ideas include:

    –  Family Photos : Use a photo of your family cooking together or a generational photo for a heartwarming cover.

    –  Recipe Images : Feature a beautiful image of one of the star recipes from your cookbook.

    –  Artwork or Illustrations : If you enjoy drawing or painting, you can create an original illustration for the cover.

    –  Typography : Sometimes, a simple, elegant design with stylish typography can make the cookbook cover stand out.

    Once you’ve created your design, save it as a high-resolution JPEG and prepare to upload it to FamilyCookbookProject.com.

    # 4.  Uploading Your Custom Cover

    After your cover is designed, uploading it to FamilyCookbookProject.com is simple:

    1. Log in to your FamilyCookbookProject.com account.
    2. Navigate to the Photo Manager.
    3. Upload your custom cover design.
    4. Set the photo’s location to Front Cover.

    Once uploaded, you can view the preview and ensure it looks exactly how you want it to appear on your printed cookbook.

    Option 2: Customize One of the Pre-Designed Covers

    If you don’t want to create a cover from scratch, FamilyCookbookProject.com offers over 100 full-color, professionally designed covers to choose from. However, you can still personalize these pre-designed covers by adding your own photo or text. Here’s how:

    # 1.  Choose a Pre-Designed Cover

    Browse through the extensive collection of covers on FamilyCookbookProject.com. Whether you’re looking for a rustic farmhouse style, a classic cookbook design, or something playful and fun, there’s a wide range of options available.

    # 2.  Add a Personal Photo

    Once you’ve selected a cover, you can add your own personal touch by uploading a photo. This could be a family photo, a picture of a favorite dish, or even a nostalgic image from family gatherings. Personalizing the cover makes the cookbook uniquely yours.

    To add your photo:

    1. Log in to your FamilyCookbookProject.com account.
    2. Select the cover you want to use.
    3. Go to the Photo Manager and upload the image you want to add.
    4. Follow the instructions to add your photo to the cover design.

    This small customization option can make the cover feel more personal and meaningful.

    Design Tips for a Custom Cookbook Cover

    Here are a few extra design tips to help make your cookbook cover shine:

    –  Use High-Quality Photos : If you’re adding photos to the cover, make sure they are high resolution (300 dpi) so they print clearly.

    –  Keep It Simple : A cluttered design can be overwhelming. Stick to one or two main design elements for a clean, professional look.

    –  Choose Readable Fonts : Make sure the title of your cookbook is easy to read. Choose fonts that match the tone of the cookbook, whether it’s elegant, casual, or playful.

    –  Color Coordination : Choose colors that complement the theme of your cookbook and work well together. For example, soft pastels work well for a family recipe book, while bold, bright colors might be better suited for a modern cookbook.

    Design a Cover That Reflects Your Cookbook’s Story

    The cover of your cookbook sets the stage for what’s inside, and creating a custom cover allows you to tell your story right from the start. Whether you design your own cover from scratch or personalize one of the pre-designed options from FamilyCookbookProject.com, your custom cover will add a personal touch that makes the cookbook feel truly special.

    Once you’ve finished your cover, uploading it to FamilyCookbookProject.com is a quick and easy process, and soon you’ll have a beautifully printed cookbook that you can share with family, friends, or even sell.

    So, get creative, and start designing a cover that reflects the heart and soul of your recipes!


    Bill Rice is Founder and Co-Publisher of the Family Cookbook Project, a website that helps families and individuals collect, preserve and share food memories by creating their own printed personal cookbooks. He is the author of The Wellfleet Oyster Cookbook and the Cape Cod Cocktail Cookbook (Available on Amazon), both created using FamilyCookbookProject.com. He is also editor of the Donovan Family Cookbook, now it’s third printing and is an avid genealogist tracing his family back to the 1600’s.

    Follow Family Cookbook Project on Facebook, Instagram, Twitter TikTok, YouTube and Pinterest!


  • Use Standard Measurements For Your Recipes

    Use Standard Measurements For Your Recipes

    For many generations, recipes were handed down by word of mouth from mother to daughter. Recipes consisted of a little of this and a smidgin of that. The food always came our great – or at least that is what we told out mothers!

    Today things are different. Computers make is easy to write down our recipes and share them with friends and family members over the Internet. However it is important to remember that cooking has a language of its own. It is a language of ingredients and measurements and directions. I believe the most important of these is measurements. If we did not have standard measurements for cooking, “T” could be a teaspoon, a tablespoons, a thimble full or a truck load! Here are a list of Standard Measures Abbreviations commonly used in recipes.

    teaspoon……………………… tsp.
    tablespoon…………………… tbsp. or T.
    cup…………………………….. c.
    quart…………………………… qt.
    ounce…………………………. oz.
    pint…………………………….. pt.
    gallon…………………………. gal.
    inch…………………………….. in.
    pound………………………….. lb.
    milliliter…………………………. ml
    liter……………………………….. L
    milligram……………………….. mg
    gram……………………………… g
    kilogram ……………………….. kg
    millimeter……………………… mm
    centimeter…………………….. cm
    meter……………………………. m
    Celsius…………………………… C
    Fahrenheit……………………. F

    Another important thing about standard measurements is that they don’t work if you don’t use them! Including an ingredient in your recipe without a specific amount is likely to leave someone trying the recipe for the first time scratching their head and wondering what to do. Remember know one will know unless you include it in your recipe.

    Bill Rice is founder and Co-Publisher of the Great Family Cookbook Project, a website that helps families and individuals collect and share food memories through customized printed cookbooks filled with treasured recipes. Follow us on Facebook and Pinterest!

  • Remove Duplicate Names on the Contributor Page

    Remove Duplicate Names on the Contributor Page

    The names on the contributor list is taken directly from the names entered in the contributor field on each recipe. If you see what looks like the same name in your contributor list more than once, that is because the name in the Contributor field in some recipe(s) is different.  You may not see it, but check for two spaces ” ” between first and last names – or a space at the end of a name.  The software thinks it is a different person.  The best way to see what recipes are affected, go to Index by Contributor.  Scroll the list until you see the person that appears duplicated.  They will be in this list more than once, too.  Edit each recipe under all versions of their name and make sure the Contributor fields match.


    Bill Rice is Co-Publisher of the Great Family Cookbook Project, a website that helps families and individuals collect, preserve and share food memories by creating their own printed personal cookbooks. He is the author of The Wellfleet Oyster Cookbook (Available on Amazon) and the Cape Cod Cocktail Cookbook, both created using FamilyCookbookProject.com. He is also editor of the Donovan Family Cookbook, now it’s third printing and is an avid genealogist tracing his family back to the 1600’s.

    Follow Family Cookbook Project on Facebook, Instagram, Twitter and Pinterest!

  • Baking for a Cause: How to Fundraise with a Cookie Cookbook

    Baking for a Cause: How to Fundraise with a Cookie Cookbook

    In a quaint Vermont town, an elementary school faced a familiar challenge: raising funds for a new playground. The PTA, a group of dedicated parents and teachers, brainstormed ideas to engage the community and achieve their goal. Amid suggestions of bake sales and raffles, one idea stood out—a cookie cookbook. This concept not only promised to generate the needed funds but also brought the community together through the shared love of baking. Thus began their journey of “Baking for a Cause” with CookbookFundraiser.com.

    A Sweet Idea Takes Root

    The idea of using a cookie cookbook as a fundraising tool isn’t entirely new, but its charm lies in its universal appeal and the sense of community it fosters. Cookies are a beloved treat, evoking nostalgia and joy in every bite. They are relatively easy to bake, making them accessible to a broad audience. Moreover, a cookbook filled with cherished recipes becomes a lasting memento, a keepsake that supporters can enjoy long after the fundraising goal is met.

    The Vermont PTA quickly formed a committee of enthusiastic volunteers, each passionate about baking and eager to contribute. They set clear goals, aiming to raise $5,000 for the playground, and established a timeline to guide their project from recipe collection to book launch.

    Gathering Recipes and Stories

    The first step was to reach out to the community for recipe submissions. Flyers were sent home with students, emails were dispatched to parents, and social media posts invited contributions. The response was heartwarming. Grandparents shared their time-honored holiday cookie recipes, parents contributed creative new ideas, and even students offered their own experiments from home economics classes.

    Each submission came with a story—a memory of baking cookies with a loved one, a tradition passed down through generations, or a funny anecdote from a baking mishap. These personal touches added a unique flavor to the cookbook, transforming it from a mere collection of recipes into a tapestry of community memories.

    Crafting the Cookbook

    With over 100 recipes in hand, the committee faced the task of compiling and organizing them. They categorized the recipes into sections like “Holiday Classics,” “Chocolate Delights,” and “Healthy Options,” ensuring a diverse selection that would appeal to different tastes and dietary needs.

    Designing the cookbook was easy with CookbookFundraiser.com . They chose a clean, attractive layout, using high-quality photos of the cookies to entice readers. Each recipe included detailed instructions, tips, and a brief story about its origin. The editing process was meticulous, ensuring consistency and accuracy in measurements and instructions.

    Bringing the Cookbook to Life

    Once the design was finalized, it was time to bring the cookbook to life. The PTA opted for a mix of physical copies and a digital version to reach a wider audience. They partnered with CookbookFundraiser.com to use it’s new Sales Hub to presell their cookbook and other kitchen-related items so their were no upfront costs to worry about.

    Promotion began even before the books were printed. Pre-sales were offered to gauge interest and secure initial funds. Social media buzzed with sneak peeks of recipes and behind-the-scenes photos of the baking sessions. The excitement was palpable, culminating in a grand launch event that featured a bake sale, cookie tasting, and live baking demonstrations.

    The Sweet Taste of Success

    The launch event was a resounding success. The community turned out in droves, eager to support the cause and taste the delicious cookies featured in the cookbook. The sales far exceeded expectations, raising over $7,000—well beyond the initial goal. The new playground became a reality, a testament to the power of community and the shared joy of baking.

    Inspiring Stories from Across the Nation

    The Vermont school’s success story is just one example of how a cookie cookbook can serve as a powerful fundraising tool with CookbookFundraiser.com . Across the country, similar stories abound.

    In California, a community group aimed to support a local food bank. They collected cookie recipes from members, designed a beautiful cookbook, and sold it at farmers’ markets and online. Their efforts raised over $10,000, providing much-needed support to the food bank and raising awareness about food insecurity in their area.

    Meanwhile, in New York, a charity focused on helping homeless youth created a cookie cookbook using CookbookFundraiser.com as part of their annual fundraising campaign. They enlisted local chefs, celebrities, and beneficiaries to contribute unique cookie recipes. The cookbook was not only a financial success, raising thousands of dollars, but it also increased the charity’s visibility and brought attention to the important issue of youth homelessness.

    Tips for Your Own Cookie Cookbook Fundraiser

    If these stories have inspired you to launch your own cookie cookbook fundraiser, here are some tips to get you started:

    1. Start by Creating a Free Account: CookbookFundraiser.com  provides all of the tools necessary to not only create a fabulous cookbook, but to also manage you fundraiser.
    2. Engage Your Community: Involve as many people as possible in the project. The more contributors you have, the broader your network for promotion and sales.
    3. Highlight the Cause: Clearly communicate the purpose of the fundraiser. Share stories and testimonials about how the funds will be used and the impact they will have.
    4. Leverage Social Media: Use social media to build excitement and share updates about the project. Post behind-the-scenes photos, recipe teasers, and testimonials from contributors. CookbookFundraiser.com offers a library of premade posts to get you started.
    5. Offer Incentives: Provide incentives for early buyers, such as a discount on pre-sales or a bonus recipe booklet. Consider offering a package deal for bulk purchases.

    Creating a cookie cookbook as a fundraising tool on CookbookFundraiser.com is a creative and enjoyable way to raise funds for a worthy cause. It brings people together, celebrates the joy of baking, and provides a lasting product that supporters can cherish. By following the steps outlined in this guide and drawing inspiration from success stories, you can launch a successful fundraising campaign that not only meets your financial goals but also strengthens your community bonds. Happy baking and fundraising!


    Bill Rice is Founder and Co-Publisher of the Family Cookbook Project, its website CookbookFundraiser.com helps schools, churches, sports teams and other groups raise money with and bring their community together with a cookbook fundraiser.

    Follow Family Cookbook Project on Facebook, Instagram, Twitter and Pinterest!

  • How to Create a Family Cookbook as a Gift for Weddings and Anniversaries

    How to Create a Family Cookbook as a Gift for Weddings and Anniversaries


    When it comes to creating a truly personal and meaningful gift for weddings or anniversaries, a family cookbook stands out. It’s a unique way to celebrate the union of two people or commemorate years of shared memories. By compiling family recipes into a custom cookbook, you’re not only passing down culinary traditions but also offering a heartfelt keepsake that the couple can treasure for years to come. Let’s walk through the steps to create a beautiful family cookbook for weddings and anniversaries using FamilyCookbookProject.com.

    Step 1: Define the Purpose and Theme

    Before you dive into collecting recipes, it’s important to clarify the purpose of your family cookbook. Is it to celebrate the union of a couple by sharing both sides of the family’s favorite dishes? Or is it to honor years of marriage by showcasing recipes that have become central to family traditions?

    Once the purpose is clear, consider the theme. You could:

    •Focus on family recipes passed down through generations, symbolizing the blending of two families.

    •Highlight recipes that the couple has enjoyed together or are meaningful to their relationship.

    •Create a collection that focuses on meals for special occasions, such as holiday recipes or anniversary dishes.

    •For a more general theme, gather everyone’s favorite recipes, from comfort food to decadent desserts.

    Having a clear theme will help guide your recipe collection and ensure the cookbook has a cohesive feel.

    Step 2: Start Early and Involve Others

    Creating a family cookbook as a wedding or anniversary gift can take some time, so it’s best to start early. Depending on the size of your family and the number of recipes you’d like to include, gathering recipes and organizing the book could take several months.

    The good news is that with FamilyCookbookProject.com, you can easily invite other family members to contribute. Here’s how:

    •Send Contributor Invitations: Use the Contributor Invitation tool to send an invitation to family members. This will give them access to the cookbook where they can add their recipes. In your invitation, explain the purpose of the cookbook and how their recipes will be a special part of this gift.

    •Set Expectations: Let your contributors know what kind of recipes you’re looking for. For example, you might want traditional family recipes, favorite meals the couple has shared, or dishes that symbolize love and togetherness. This gives people a clear idea of what to contribute and makes the process smoother.

    •Assign Roles if Necessary: If you’re working with a large group of contributors, you might want to assign specific categories of recipes to different family members. For example, ask one side of the family to contribute appetizers and desserts, while the other side focuses on main courses and side dishes.

    Step 3: Personalize the Recipes with Stories and Photos

    What makes a family cookbook truly special is the personal touch. Ask contributors not only to submit their recipes but also to share the stories or memories behind them. For a wedding cookbook, this might include:

    •A recipe that was served at the couple’s first dinner together.

    •A dish passed down from one of the families that symbolizes comfort or tradition.

    •A recipe that was prepared for the couple’s engagement celebration or other significant event.

    For an anniversary cookbook, you can ask for stories that reflect the couple’s journey together, such as meals that became family favorites over the years or dishes shared at important family gatherings.

    Encourage contributors to include photos alongside their recipes. These could be images of the dish itself, family members cooking, or pictures of the couple enjoying the meal together. Adding visuals creates a more engaging and sentimental cookbook.

    Step 4: Use the Reminder Tool to Keep Everyone Engaged

    It’s easy for people to get busy and forget about submitting their recipes, especially if you’re working with a large group of contributors. This is where the reminder tool on FamilyCookbookProject.com comes in handy. You can use it to keep everyone on track by sending friendly nudges when deadlines approach.

    How to Use the Reminder Tool:

    •You can send reminders to individual contributors, specific groups, or the entire list of contributors.

    •Personalize your message to remind them of the cookbook’s purpose and how their contribution will make the gift extra special. For example, a gentle reminder could say, “We’re almost there! Don’t forget to submit Grandma’s famous lasagna recipe—it wouldn’t be the same without it!”

    This tool ensures that the recipe collection process stays on track without feeling overwhelming or forgotten.

    Step 5: Submit Sample Recipes to Show What’s Possible

    As the editor of the cookbook, it’s helpful to get the ball rolling by submitting a few recipes early on. Choose some well-loved family recipes that you know the couple or the anniversary recipients will enjoy. By providing examples, you give other contributors a clearer picture of how their recipes will look in the final product.

    Submit recipes that represent both sides of the family and reflect the theme you’ve chosen. Once these are in the cookbook, you can use them as a reference for others and even include personal notes about why these recipes were selected.

    Step 6: Select a Cover Early in the Process

    The cookbook cover is one of the most important elements in the overall design of your gift. It sets the tone and creates excitement for the finished product. FamilyCookbookProject.com offers a variety of customizable covers, allowing you to choose a design that resonates with the occasion.

    For a wedding cookbook, consider using a photo of the couple or a design that reflects their wedding colors and theme. For an anniversary cookbook, you could use a family portrait, a photo from the couple’s wedding day, or something symbolic of their journey together.

    By selecting a cover early in the process, you give contributors a clear visual of what the cookbook will look like, inspiring them to submit their recipes and making the project feel more tangible.

    Step 7: Organize the Recipes into Categories

    A well-organized cookbook makes for an enjoyable reading and cooking experience. Once you’ve collected a substantial number of recipes, begin categorizing them. You can use the following categories as a starting point:

    •Appetizers

    •Main Courses

    •Desserts

    •Drinks

    •Holiday Recipes

    •Family Favorites

    •International Dishes

    For wedding cookbooks, you can also include categories such as:

    •Recipes for Two

    •Celebration Meals

    •Romantic Dinners

    For anniversary cookbooks, consider categories like:

    •Family Traditions

    •Kids’ Favorites

    •Party Dishes

    These categories will help give the cookbook structure and make it easier for the recipients to find specific recipes.

    Step 8: Edit and Customize the Cookbook

    Once you have all the recipes submitted, it’s time to review and edit the content. FamilyCookbookProject.com allows you to format and organize the recipes, add headers, and even include a dedication page. A few editing tips to keep in mind:

    •Check for Consistency: Ensure all recipes follow the same format for ingredients and instructions. This creates a professional and polished final product.

    •Add Personal Notes: Consider including a dedication page at the front of the cookbook, where you can add a personalized message to the couple or the anniversary recipients. This could be a heartfelt note about the significance of the recipes and the love that went into compiling them.

    •Incorporate Photos: If contributors haven’t already included photos, consider adding your own. You could use photos from the wedding or significant moments from the couple’s relationship, along with pictures of family gatherings and meals.

    Step 9: Print and Present the Cookbook

    After you’ve finalized the content, you can print the cookbook through FamilyCookbookProject.com. The platform offers high-quality, professionally bound cookbooks that make for a beautiful gift. Be sure to order extra copies for the couple or family members who contributed to the project.

    When presenting the cookbook, consider how you’ll deliver this meaningful gift:

    •For a wedding, present the cookbook at the rehearsal dinner or as a special gift on the wedding day. It’s a lovely way to symbolize the blending of two families and their traditions.

    •For anniversaries, present the cookbook at the anniversary party, allowing the couple to reminisce about all the meals that have shaped their relationship.

    Step 10: Make It a Tradition

    Once you’ve created your first family cookbook, you might find that this becomes a tradition for other family events. A family cookbook can be a meaningful gift for other special occasions, such as milestone birthdays, holiday gatherings, or even future anniversaries.

    By preserving recipes and stories in a family cookbook, you’re creating a lasting legacy that will be cherished for generations. With each new edition, you can continue to build on the traditions and memories that have shaped your family’s culinary journey.

    Creating a family cookbook for weddings and anniversaries is a truly unique and meaningful gift that goes beyond material possessions. It celebrates love, family, and tradition in a way that will last for years to come. By using FamilyCookbookProject.com’s easy-to-use platform, you can gather recipes, stories, and photos to create a beautiful keepsake that the couple will treasure forever.

    Whether you’re celebrating a new union or honoring decades of marriage, a family cookbook is a heartfelt gift that brings loved ones together around the table—one recipe at a time.

    Bill Rice is Founder and Co-Publisher of the Family Cookbook Project, the leading online cookbook publisher with a website that helps families and individuals collect, preserve and share food memories by creating their own printed custom cookbooks. He is the author of The Wellfleet Oyster Cookbook and the Cape Cod Cocktail Cookbook (Available on Amazon), both created using FamilyCookbookProject.com. He is also editor of the Donovan Family Cookbook, now it’s third printing and is an avid genealogist tracing his family back to the 1600’s.

    Follow Family Cookbook Project on Facebook, Instagram, Twitter TikTok, YouTube and Pinterest!


  • The Importance of Personal Notes in a Family Cookbook

    The Importance of Personal Notes in a Family Cookbook

    In the heart of every family cookbook lies more than just a collection of recipes; it’s a repository of memories, stories, and the essence of familial love shared through food. One of the most cherished elements that elevate a family cookbook from a mere compilation of recipes to a treasured heirloom is the inclusion of personal notes. These handwritten annotations, often scribbled in the margins or alongside ingredients, add a layer of depth and intimacy that transcends the act of cooking itself. Here’s why personal notes are such an important part of a family cookbook, along with ideas on what to include in these heartfelt annotations.

    The Emotional Connection

    Recipes with personal notes evoke a sense of connection and continuity across generations. They are more than just instructions; they carry the essence of the person who penned them. Whether it’s Grandma’s secret ingredient for her famous pie crust or Dad’s tips for achieving the perfect grill marks, these notes encapsulate the wisdom and experience passed down through the years. Each note tells a story, offering a glimpse into the lives and personalities of those who came before, making cooking not just about nourishment but about honoring family traditions and memories.

    Capturing Memories

    A recipe’s personal notes in a family cookbook serve as a time capsule, preserving moments that might otherwise be lost to memory. They capture the joy of a shared meal, the laughter in the kitchen, and the aroma that filled the air during holidays and special occasions. These notes transform recipes into living memories, ensuring that future generations can experience not just the taste but the sentiment behind each dish. As families grow and change, these notes become a link to the past, a reminder of the love and care that went into creating meals that nourished both body and soul.

    Ideas for What to Include in Recipe Notes

    When adding personal notes to recipes in your family cookbook, consider including the following:

    1. Family Stories: Share anecdotes or memories associated with the recipe. For example, recount how Grandma used to bake her famous cookies every Christmas while telling stories of her childhood.
    2. Cooking Tips: Offer practical advice or variations on the recipe. This could include ingredient substitutions, cooking times, or techniques that have been passed down through generations.
    3. Special Occasions: Note when the recipe is traditionally served or its significance during family gatherings. For instance, mention that Aunt Sarah always makes her signature casserole for Thanksgiving dinner.
    4. Recipe Origins: Provide background information on where the recipe originated or how it became a family favorite. This could involve tracing its roots to a specific region, culture, or even a beloved family member’s invention.
    5. Adjustments: Mention any adjustments made to the recipe over time to suit changing tastes or dietary preferences. This could include reducing sugar content, making it gluten-free, or incorporating locally sourced ingredients.
    6. Secret Ingredients: Share any special ingredients that give the dish its unique flavor. This might include a pinch of a particular spice, a dash of a family-made sauce, or a special technique that sets your version of the recipe apart.
    7. Family Traditions: Highlight any rituals or customs associated with preparing or enjoying the dish. This could involve the order of serving, special garnishes, or specific utensils used only for this recipe.
    8. Notes on Presentation: Offer suggestions on how to plate the dish attractively or serve it in a way that enhances its appeal. This might include pairing suggestions with wines or beverages that complement the flavors.
    9. Memorable Moments: Recall fond memories or events that centered around this particular recipe. This could range from birthdays celebrated with a special cake to comforting meals shared during challenging times.
    10. Encouragement and Love: Add personal messages of encouragement or love for those who will be recreating the recipe. This could be a simple note wishing them joy in cooking or expressing hope that they create similar cherished memories with their loved ones.

    Preserving the Legacy

    Incorporating personal notes into your family cookbook is more than just a practical exercise; it’s a labor of love that ensures your family’s culinary heritage endures. These annotations transform recipes into cherished heirlooms, passing down not only flavors but also the stories and traditions that define your family’s unique identity. As you compile your family cookbook, remember that each note is a testament to the bonds that unite us across time and generations, celebrating the joy of sharing meals and creating lasting memories together.

    By infusing your family cookbook with personal notes, you create a living document of your family’s culinary journey, ensuring that future generations can savor not just the taste of your dishes but also the love and history behind them.


    Bill Rice is Founder and Co-Publisher of the Family Cookbook Project, a website that helps families and individuals collect, preserve and share food memories by creating their own printed personal cookbooks. He is the author of The Wellfleet Oyster Cookbook and the Cape Cod Cocktail Cookbook (Available on Amazon), both created using FamilyCookbookProject.com. He is also editor of the Donovan Family Cookbook, now it’s third printing and is an avid genealogist tracing his family back to the 1600’s.

    Follow Family Cookbook Project on Facebook, Instagram, Twitter and Pinterest!