Category: How to Ideas

  • How To Shuck An Oyster: Step by Step

    How To Shuck An Oyster: Step by Step

    Shucking takes some practice, but if you keep at it, you’ll figure it out. You may never be as fast as Chopper Young,  six time Champion Oyster Shucker, but you’ll be fast enough to open one or two dozen at home without too much trouble.

    Step 1: Get Set Up

    The first step of shucking Wellfleet oysters is to get them covered with ice so they stay cold while you are shucking them. Safety never takes a holiday.

    Next, fold a clean kitchen towel lengthwise into thirds. You’ll be using it to brace the oyster during shucking, and to protect your hand from an accidental slip of the knife. If you have a protective glove, that will work as well, but I prefer the towel.

    If you’re removing the oysters from the shells completely, have a bowl for your oysters. This is where you’ll drop the shucked oysters and their liquor (the liquid inside an oyster). If you’re leaving them on the half shell, fill a platter or rimmed baking sheet with crumpled up aluminum foil to keep the oysters upright while you work.

    Also, make sure you have a garbage can right next to you, or a large bowl for collecting the spent shells.

    Step 2: Place the Oyster in the Towel

    It’s time to grab your first oyster. You’ll notice that one side will usually be flatter than the other. The flat side is the top and rounded side is the bottom. If you are working with wild Wellfleet oysters, sometimes it will be more difficult to tell  the difference, so just wing it.
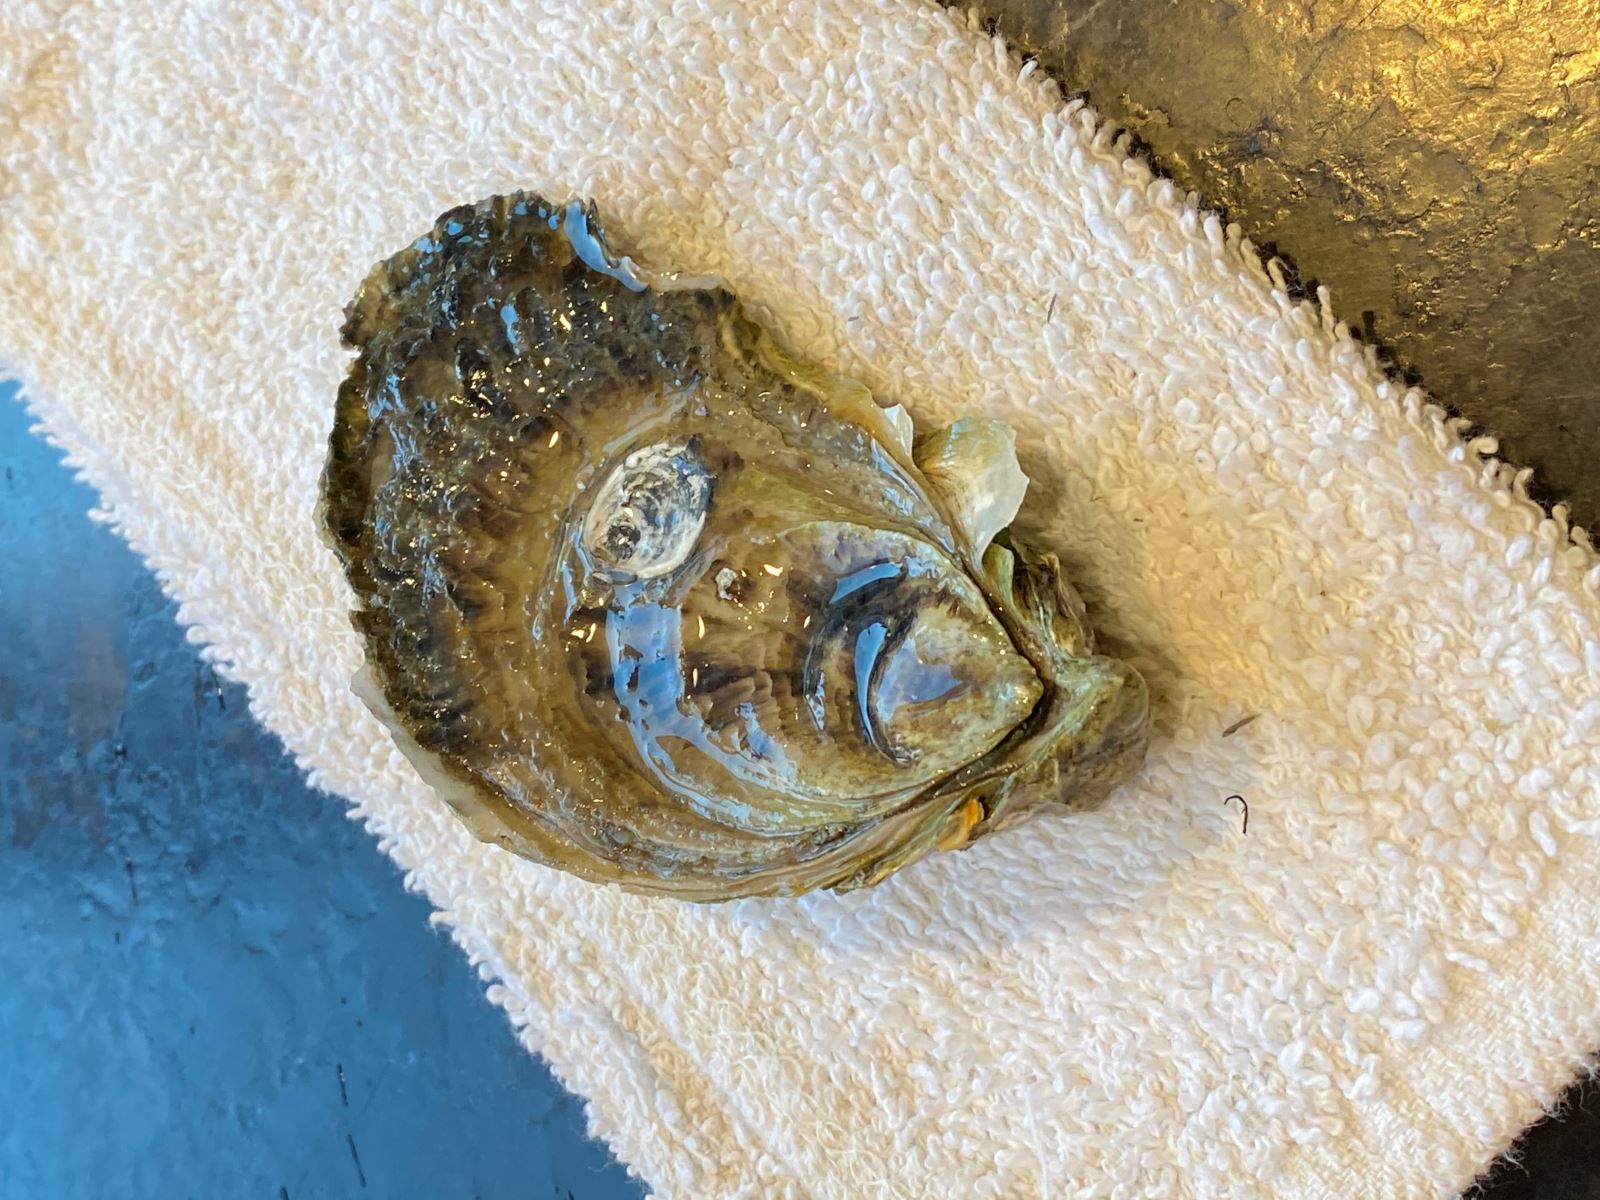
    Set your oyster bottom side down on the folded towel so the more pointed end of the oyster faces your knife hand.

    Now fold the towel over the oyster so that only the hinge is exposed, and place your nondominant hand on top to hold it steady. Try to bunch up the folded towel in front of that hand—if the oyster knife slips, that towel is the only thing preventing your hand from getting jabbed, so make sure it’s protecting you.

    Step 3: Place the Oyster Knife Tip in the Hinge
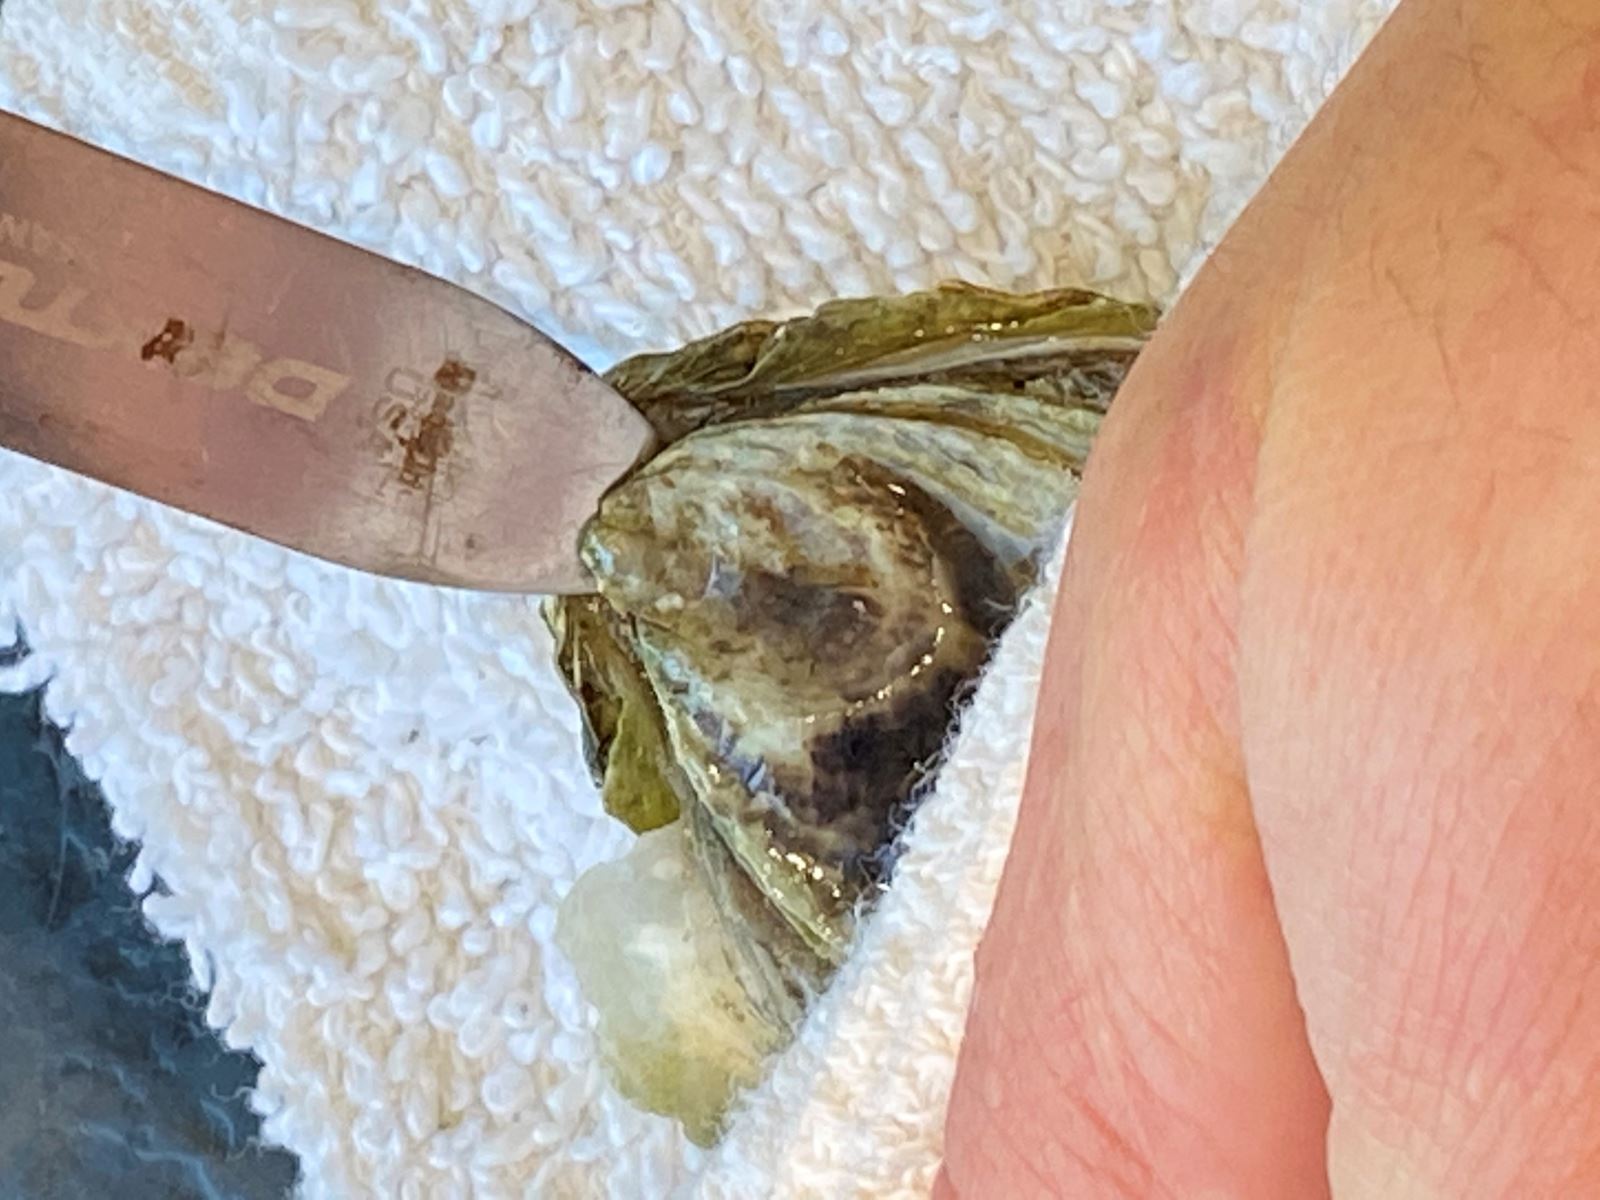
    Work your oyster knife into the hinge. This is the part that takes practice. Like a rock climber seaching for   a handhold, you’re trying to find a sweet spot in that hinge where the knife can get some leverage. Wiggle the knife around until you feel like you can exert some pressure against both the top and bottom shells at once by twisting and prying the knife.

    Step 4: Run the knife down the side
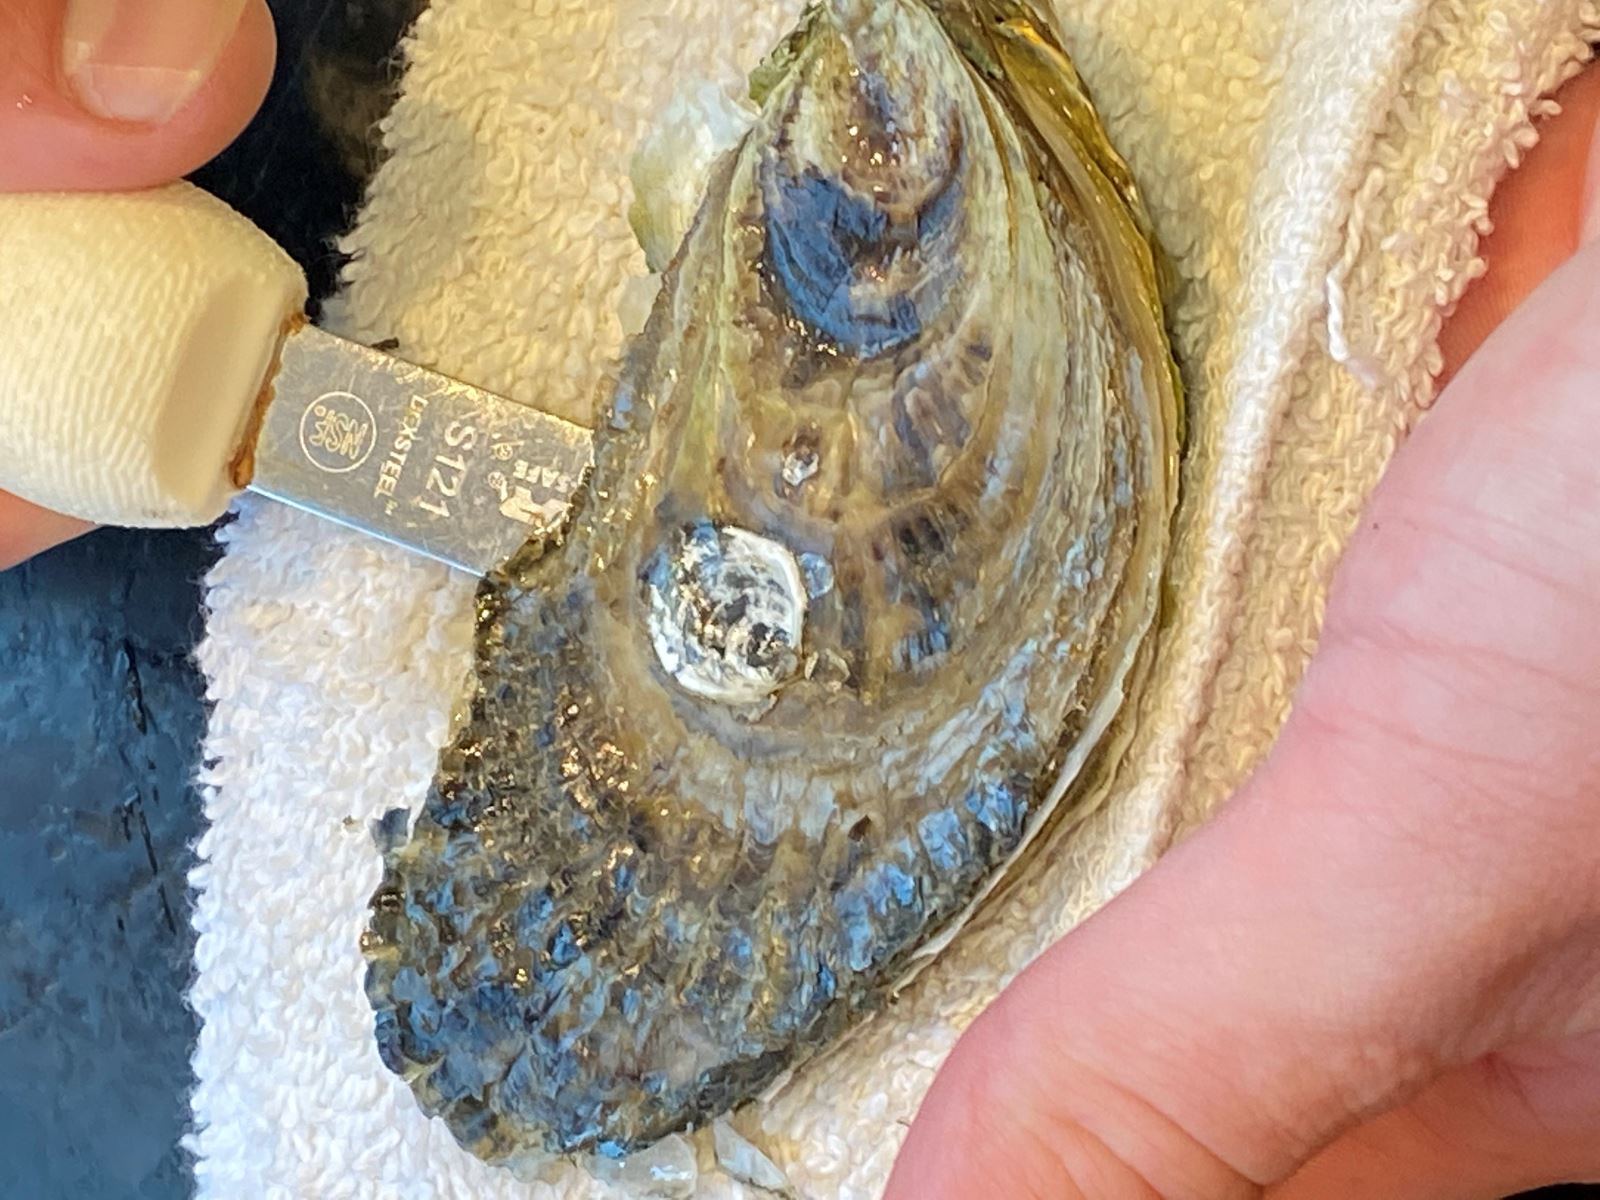
    Once you feel like you’ve got the knife tip solidly in place, work the oyster  knife up and down cutting the top mussel that holds the shells together.

    Once the shells have popped, you’ll usually have a very narrow opening— the oyster may have lost the ability to shut its shell completely, but it’s still not opening wide for you. Twist your knife so that the broad flat of the blade pries the shells apart even more.

    Once you cut the muscle, you should be able to pull the top shell off. Use the knife to free any oyster meat that is still clinging to the top shell, trying your best not to damage the oyster in the process.

    Step 5: Throw Out the Top Shell and Inspect the Oyster

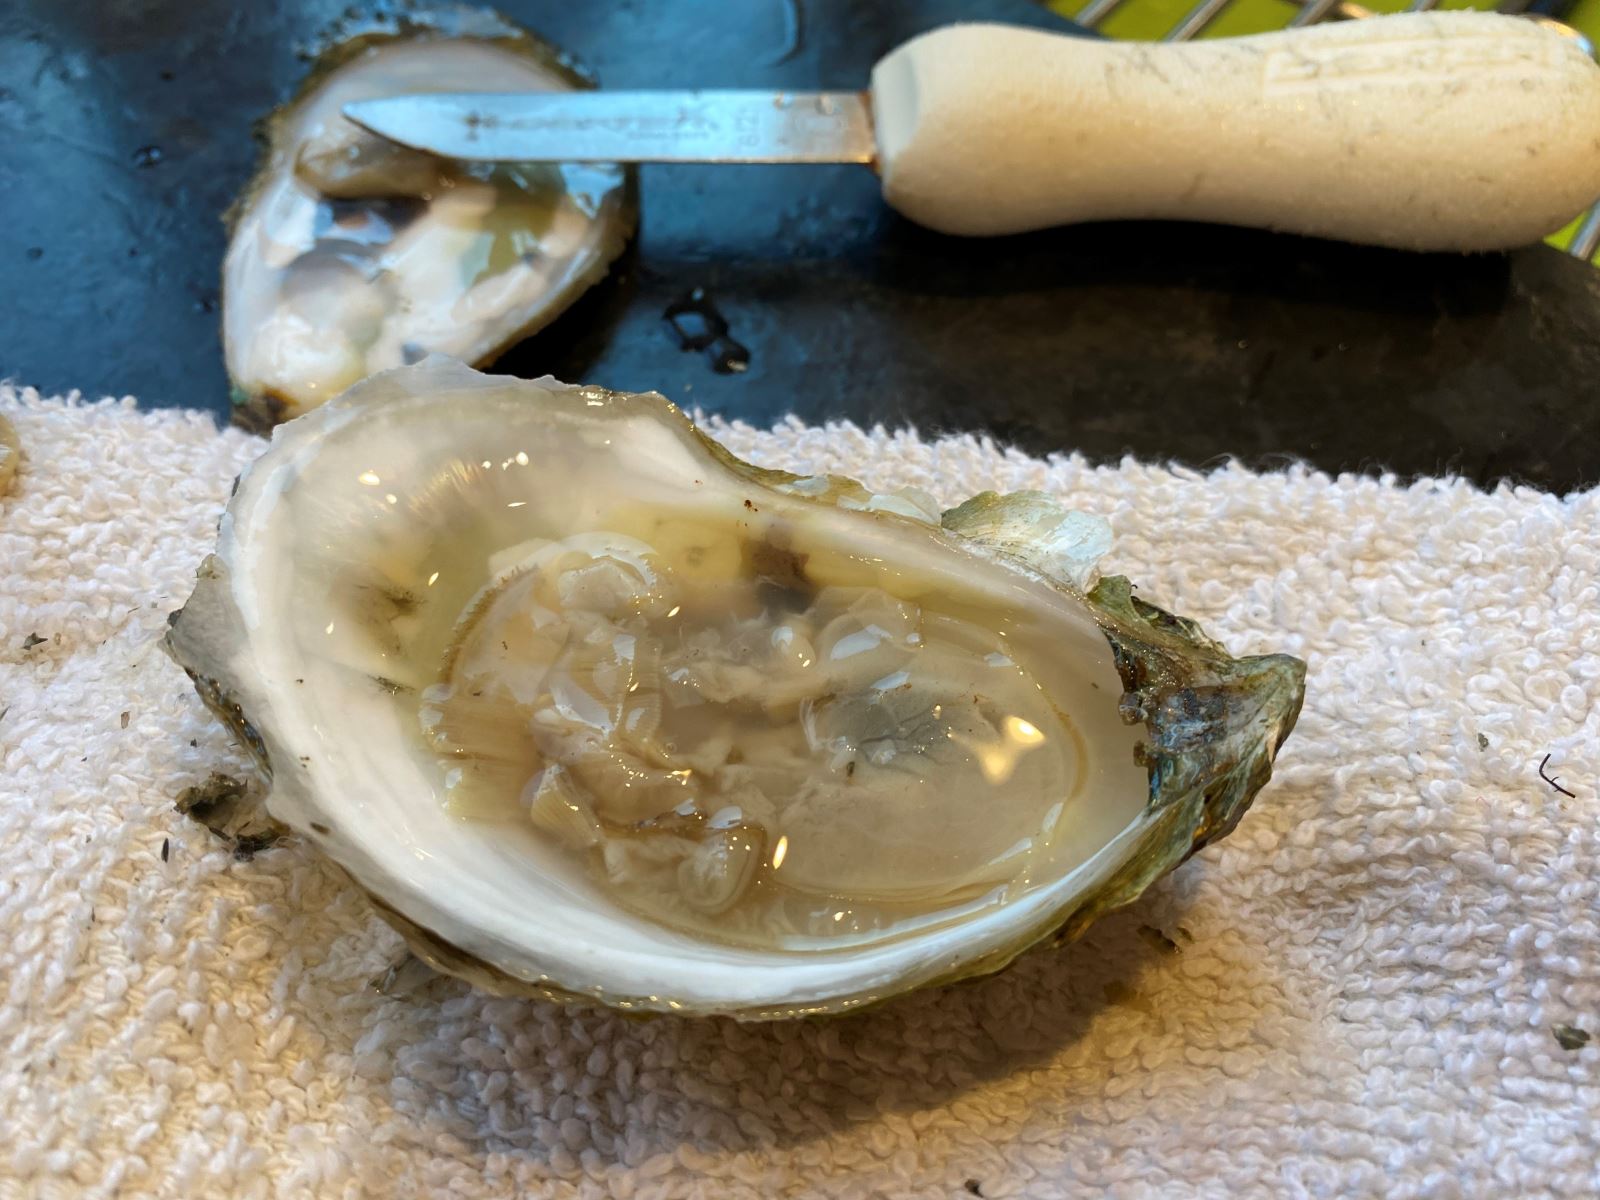
    Get rid of that top shell, because you’re done with it. Now look at your oyster. It should look clear and fresh, with plenty of liquid around it. Smell it, and throw away any oyster that smells off or looks dry.

    Also inspect the oyster for any shell fragments that got onto it when you popped it open, especially near the hinge. Use the tip of your clean oyster knife to discard them.

    Be careful not to tip the oyster and lose all its liquor when you handle it.

    Step 6: Free the Oyster From the Bottom Shell
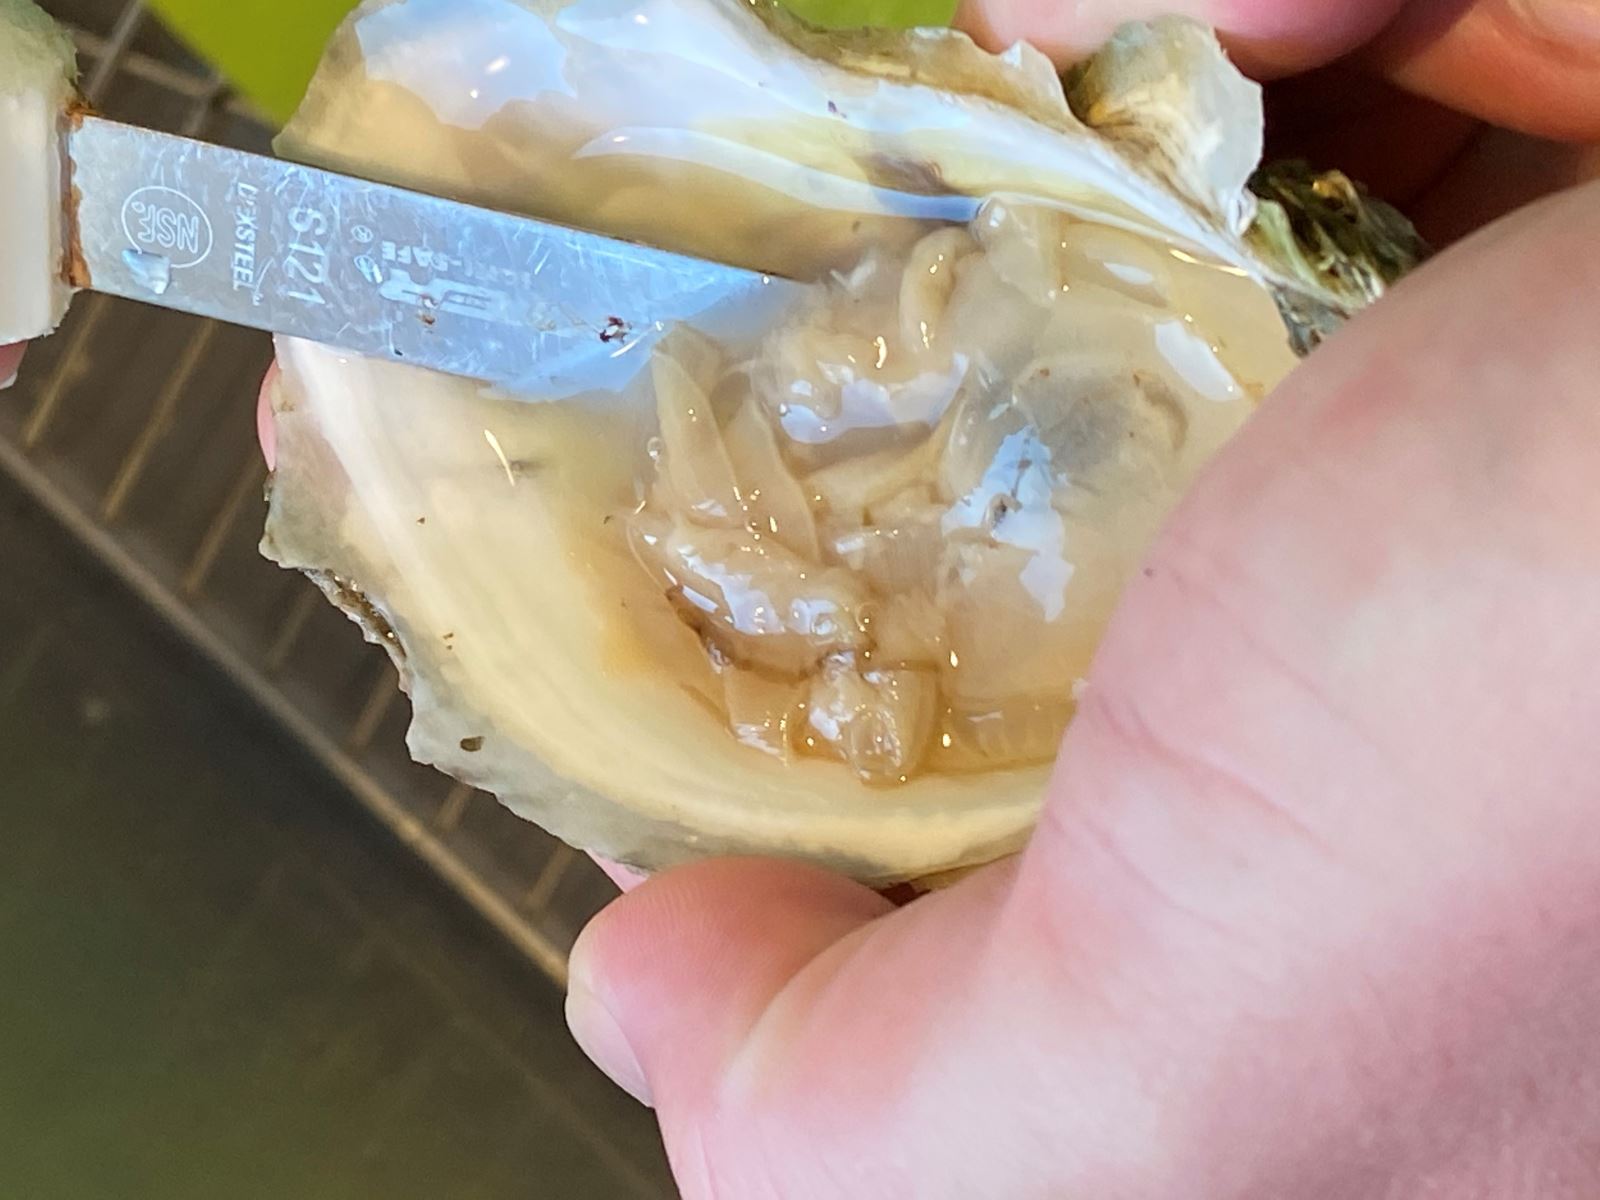
    The final step is to slide the knife under the oyster, severing the muscle from the bottom shell. (Otherwise, it won’t slide out straight into your mouth, which is where it would be headed) Push the oyster around to make sure it’s totally free in the shell. You can also turn the oyster over if the top of the meat was cut during opening.

    Now set it on your prepared platter, if eating them on the half shell. Or slide  the oyster and its liquor into the bowl, and throw out the bottom shell. Grab your next oyster and repeat.

    “So, have you heard about the oyster who went to a disco and pulled a mussel?”

    —Billy Connolly

    This articles was excerpted from The Wellfleet Oyster Cookbook.

    Bill Rice is the author of The Wellfleet Oyster Cookbook and is founder and Co-Publisher of the Great Family Cookbook Project, a website that helps families and individuals collect and share food memories through customized printed cookbooks filled with treasured recipes. Follow us on Facebook, Instgram, YouTube and Pinterest!

  • Preserving Cherished Food Memories with a Family Cookbook

    Preserving Cherished Food Memories with a Family Cookbook

    Back when I was in my youth, I loved my Gram Helen’s cooking. She made thing that my mother did not. However, when she passed in 1993, most of her recipes went with her. I can still remember her meatloaf with a can of Cream of Mushroom soup on it, but for the life of me it never comes out the way I remember when she made it.

    So a decade later, my family and I were sitting around a table and decided to create a family cookbooks so all of the recipes we loved would be available to every member of the family today and more importantly, preserved for future generations. Since my family was all over the country, I had my high school friend help me create a website that became the great Family Cookbook Project.

    FamilyCookbookProject.com makes it easy to create a printed personal cookbook filled with your own recipes. Our program has helped thousands of individuals organize recipes, provide professionally designed covers and recipe layouts and automatically creates a table of contents and index of recipes for beautiful printed cookbooks. We make it easy and fun to create your own cookbook.

    My mom with our family cookbook she created.

    Family Cookbooks help preserve family memories and food traditions for future generations. There is nothing like seeing a handwritten recipe from a family member that you remember or even never met, but who’s recipe is still used today.

    Here are some tips from Family Cookbook Project:

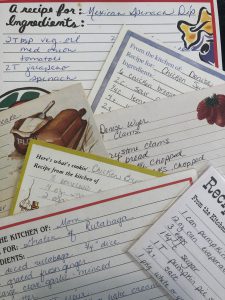
    • Often collection of recipes in the form of a recipe box, magazine and newspaper clippings, or cookbooks with pages marked is a great place to start creating your cookbook.
    • For those recipes that you never wrote down because you made them so many times you knew it by memory, make it again and this time write it down step by step as you make it.
    • Measure the ingredients! Even if you use a “handful” of something, take a handful and put it into a measuring cup and write it down before throwing it into the pot.
    • Remember to write personal notes about why this recipe was important, who gave it to you or any special memories of meals that it was served. My mothers Chicken Supreme will always remind me of her serving at the rehearsal dinner for my wedding.
    • Including lots of photos is also a great way to make your special cookbook and help preserve the special memories.

    Remember, behind every recipe you love is a story you want to share.


    Bill Rice is founder and Co-Publisher of the Great Family Cookbook Project, a website that helps families and individuals collect and share food memories through customized printed cookbooks filled with treasured recipes. Follow us on Facebook and Pinterest!

  • How To Get Your Cookbook Ready To Print

    How To Get Your Cookbook Ready To Print

    So you’ve collected your recipes, entered them in the cookbook, written your introduction and made all of you are design selections. Now you’re ready to print your cookbook.

    Lock Your Cookbook

    The first step in getting ready to publish a cookbook is to go to the publishing center in your editors account and lock your cookbook. There are three levels of luck in your cookbook:

    • Level one locks contributors for making changes. Once you start editing, you don’t want people adding new recipes or changing things that you’ve already edited. Checking this box prevents this.
    • Level two stops all changes by contributors.
    • Level three locks the cookbook completely and now you’re ready to submit to print.

    Once you locked your cookbook from contributor changes now is the time to read everything and check for typos

    Proofread your introduction

    Print out your narrative and give it to someone else to read. Often it is difficult to proofread your own work and allowing someone else to do it will find things that you would mess.

    Review all of the recipes

    Look for ingredients that are listed but not included in the directions or ingredients in the indirect and directions that are not included in the ingredients list.

    Make sure the directions seem complete.

    Check the layout

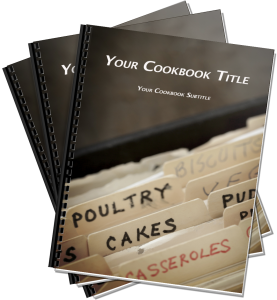
    Go to the box that says preview your cookbook in the black navigation bar in your editors account. Here you can either download a PDF of your cookbook or use our 3-D preview tool.

    Here you are checking for how pages break. If you find a page with only a word or two, maybe you can shorten version directions to make that recipe just a little shorter.

    The changes you make here will determine how your cookbook will be printed. However it looks in your final PDF preview, is how it will look when your cookbook is printed.

    Place your order

    Now that your cookbook looks exactly the way you want it, it’s time to order.
    On the ordering page you’ll see the number of recipes you’ve entered, and the number of pages in your cookbook. This is what will determine the cost of your cookbook along with the number of color photos.

    Remember that the more copies of your cookbook you are order, the less the price per book will be. This is because the set up charges are spread out over more copies of the cookbook.

    Once you’ve calculated your price, you need to enter your shipping address and click submit. This places your order with our publishing system. You then will be directed to a link that will allow you to pay online or you can send a check drawn on a US bank for payment.

    One frequent question is can cookbooks be sent to more than one address. Currently you would need to place an order for each delivery address.

    Once you’ve placed your order you can expect your cookbooks to arrive in 2 to 3 weeks. However during our busiest times of the year, it could take longer. if you want your cookbooks in time for Christmas, the deadline for ordering is November 30, however do not wait until the last minute if you can.


    Bill Rice is founder and Co-Publisher of the Great Family Cookbook Project, a website that helps families and individuals collect and share food memories through customized printed cookbooks filled with treasured recipes. Follow us on Facebook and Pinterest!


  • How to Take Great Food Photos for Your Recipes

    How to Take Great Food Photos for Your Recipes

    They say a picture is worth a thousand words and with recipes that is especially true.

    It’s wonderful to read a list of ingredients and see the potential in a recipe, but to look at the finished product can make your mouth water!

    Family Cookbook Project highly recommends adding a photo to every recipe you can in your online cookbook. It helps people to see what to expect when they follow your recipe and gives them a standard to meet when comparing their finished dish to the original.

    With the advent of digital camera built into cell phones, you don’t have to be a professional photographer to take good food photos.

    Here are some pointers to help improve your recipe photos:

    Use Natural Light – Make sure that the light is right – shoot the food either next to a bright window or under a pendant light in the restaurant. Don’t use your camera’s flash! Set your dish near a window and turn off any artificial lights that might be on nearby. Try to photograph with the light at your back or to the side of a dish, so that the shadows are to the side or behind it. 

    Hold Still – Taking photos inside, even with ample natural light, often means you have to hold the camera very still to keep it from registering hand shake. If you have a tripod, that’s ideal. If you don’t, you can duplicate the tripod effect by resting your elbows on the table or counter and using them to stabilize the camera. Moving the camera when taking a photo will only lead to blurry unusable photos. 

    Get close to the food! – Don’t stand back three feet and get the food with the stove, the dirty dishes, and all the condiments around it. Move in and get up close and personal, and let the pan…or the plate…or the cutting board fill the frame.  

    Stage the shot – The food isn’t the only thing in the photo. Using plates, silverware and linens in complementary colors can help your dish come alive. Shoot food on a beautiful plate or on a table with texture and character. The more appetizing the ingredients, the better your photo will be. Plates that contain colored vegetables and/or meat, preferably in light-colored sauces, are often the most appealing to the eye in photos. Also Don’t be Afraid of a mess. A few crumbs or a smear of dressing can be beautiful, if you let them. 

    Focus on the food –  If you are using a DSLR, stop down your lens to f/1.8 or f/2.0 that limits your depth of field to one part of the image only, blurring out everything around the subject, simulating a shot taken with a macro lens. If you are using an iPhone, there are apps, such as Camera+ or VSCO Cam, that will create the same effect. Remember, you want the food to be the main focus, not the background. 

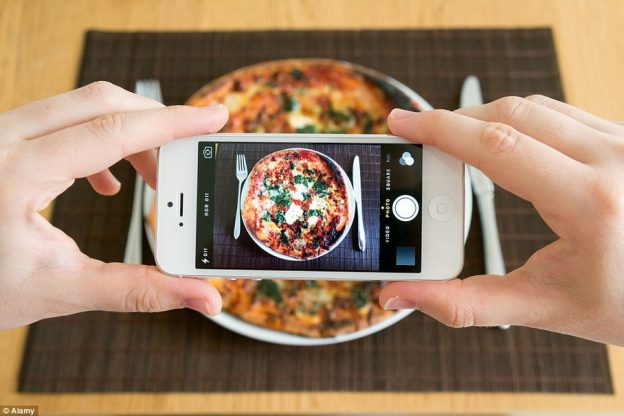
    Try different angles –  Get up over the food and shoot straight down on it. When shooting overheads, if appropriate, try filling up the frame with what’s already on the table such as cups, wine glasses, utensils and moving hands. You can also  think in three dimensions, You might not usually serve brownies piled in a vertical column, but stacking any flat food, like pancakes, cookies, or even onion rings, is a great way to show off texture and make the photo more appealing. You can also add dimension to your food photos by showing the dish right after the that first bite is taken, or the second and third. These are little details that make a viewer feel like they’ve sat down and are enjoying the meal. 

    Get Close to Ugly Foods  – Some foods, no matter how good they taste, just don’t make good photos. But the closer you get to your subject, the more the visual story becomes about texture and color, rather than pure mouth-watering beauty.Avoid foods that are white and gloppy, such as congealed gravy on white pasty mashed potatoes. 

    Size Matters –  Make sure your camera settings are set for a good sized photo. Small photos look blurry when they are enlarged on line. A photo viewed online only has to be 72 dpi (dots per inch, the measure for quality), but if you are going to print your photo, you want it to be at least 300 dpi. 600 pixels wide (a measurement for size) is a good target for minimum photo size.

    Using other’s photos – It is important to note that the Internet makes it easy to find photos of recipes already taken. While this might be much easier, the photo still is the property of whomever holds the rights. Don’t always assume that because a photo is on the Internet you can simply use it for your recipe. Make sure you ask permission from the owner before you use it.


    Bill Rice takes more than 20,000 photos a year and is Co-Publisher of the Great Family Cookbook Project Project, a website that helps families and individuals collect and share food memories. Follow us on Facebook and Pinterest!

  • A fun Idea For Your Family Reunion Cookbook

    A fun Idea For Your Family Reunion Cookbook


    Family reunions are a great opportunity to create a family cookbook and get lots of people to participate. A family reunion cookbook motivates family members to communicate before the event and helps get everyone excited!

    We have hundred’s of family reunion cookbooks under our belts and we’d love to work on yours. Our site is perfect for communicating with larger groups of family members via email and keeping everyone motivated.

    Here is a fun idea for your Family Reunion Cookbook – a family directory section!

    Here’s how to do it:

    • Start by creating a custom recipe category entitled “Family Members”.
    • Next, add your family member’s names and email addresses into the invitation tool so you can invite them to participate and directly add recipes and bios to your cookbook account.
    • Next ask everyone to use the add a recipe tool and have them enter their name as the title of the recipe, Their photo as the recipe photo and their bio as the personal notes. They can leave everything else blank and all of the bios will be together in one section in the back of the book.

    You might want to also include a family tree so everyone knows how each other is related.

    The other way to create a family directory would be to have everyone email you their info and photo and you create custom pages for each one.

    Family members can even pick up the cookbooks at the reunion!


    Bill Rice is founder and Co-Publisher of the Great Family Cookbook Project, a website that helps families and individuals collect and share food memories through customized printed cookbooks filled with treasured recipes. Follow us on Facebook and Pinterest!

  • How To Create a Mini Cookbook

    How To Create a Mini Cookbook

    Do you have a lot of recipes of a specific type? Maybe you love to make cookies or pies or cakes. You can create a “mini cookbook” to organize your recipes and even share with family and friends.

    With a few as 10 recipes, you can create a single category cookbook or multiple categories within a theme.

    For example, were I live, oysters plentiful and are some of the best in the world. My family eats a lot of oysters each summer and I thought it would be great to create a cookbook with just oyster recipes. It was so well received, it is now available on Amazon!

    You can buy a copy of The Wellfleet Oyster Cookbook by clicking on this link.

    Next, I plan on creating a BBQ mini cookbook and giving it out as gifts for Christmas to my friends and family.

    To create you own mini cookbook, go to the Production Center on your editor page and select “more cookbooks”. Here you can create your own mini cookbook and even import your recipes from your main cookbook using our recipe transfer tool.


    Bill Rice is founder and Co-Publisher of the Great Family Cookbook Project, a website that helps families and individuals collect and share food memories through customized printed cookbooks filled with treasured recipes. Follow us on Facebook and Pinterest!

  • How to Write A Great Recipe Title

    Your recipe title is the single most important element of your recipe. This is because your title is a headline, and the headline in any type of content has one special and powerful property.

    Think about how you read a cookbook looking for a recipe to try.  You don’t start in the front and read every page like a novel then pick the one you want. No, you scan the pages looking for a photo or recipe title that catches your eye and looks interesting!

    Of all the elements in your recipe, the title has the greatest power for grabbing your readers’ attention and the greatest responsibility for enticing them to continue and read your recipe It follows that the better your title, the higher the chance of turning a recipe scanner into a recipe reader (and ultimately a recipe user).

    For a recipe title to be effective it needs to consider several things:

    Grab Attention – Like any headline you need to grab the readers attention.

    Describe the food being prepared – “Gruel” is one of my son’s favorite dishes, however it no one outside the family knows what it is. Including the main ingredient of the dish and even how it us prepared make the title more useful. “Baked Hamburger Gravy” would be a more descriptive title for our gruel.

    Be different and unique – If you have seen the recipe title before, it does not belong on your recipe!

    Include the source – In family cookbooks, certain people are associated with certain recipes. Grandma’s Apple Pie or Lou’s Lemon Bars help the reader image exactly what dish you are referring to. It just does not help anyone who is not at family gatherings!

    Sell the sizzle as well as the steak – This means to highlight the benefit, the reason why this recipe is worth making.

    Recipe titles that address cooking and eating needs are more likely to seduce the reader into the recipe itself. A good title clearly shows the reader which of their cooking and eating needs the recipe addresses. Every readers’ need is different. For example, it could be for something indulgent or something low fat, or something quick and easy or something sophisticated and thus involved, or something refined or something rustic.

    Consider the following recipe titles: ‘Soft and Chewy Chocolate Chip Cookies’, ‘Quick ‘n’ Easy Chocolate Chip Cookies’, ‘Grandma’s Favorite Chocolate Chip Cookies’, ‘Gluten Free Chocolate Chip Cookies’. Notice how each title addresses a different need and even appeals to different audiences. Quite simply, as the chocolate chip cookie examples show, it’s all down to the words you choose for your title.

    With a little thought and imagination, your recipe titles can stand out and make your readers give your recipes the attention they deserve.

    Bill Rice is founder and Co-Publisher of the Great Family Cookbook Project, a website that helps families and individuals collect and share food memories through customized printed cookbooks filled with treasured recipes. Follow us on Facebook and Pinterest!

  • A Mother’s Gift

    We owe our mothers so much. They give us life, they nurture us, feed us and teach us.

    Our mothers are also often our first teachers in the kitchen. From them we learn table manners, what a family meal is and how it brings us all together. Our lessons start when we watch and mimic what we see in the kitchen and at the dinner table. As we grow and understand, we are taught by being allowed to become a “mother’s helper” and do some of the simpler tasks of getting the family meal prepared. Later in life, we use all of the years of learning by contributing our favorite family dishes when the family gathers at holidays, taking some of the pressure off of our mothers.

    As a mom, it is important to pass those life skills on to our children so they have the same foundation in the kitchen that we learned from our parents.

    Here are some simple ideas to consider when teaching the next generation how to prepare the family meal:

    Teach measurements– Find tasks for young ones that allow them to stay in one location, but keep them busy. Give them a measuring spoon and ask them to count how many teaspoons are in a cup of flour or water. Once they fill the cup, use it in your recipe.

    Name the tools – Many of the tools of the trade in the kitchen have specific names and specific uses. Teach the names of the tool as well as their purpose in preparing the meal. That way when you ask for a wisk you don’t get a potato masher!

    Plan meals together– For most families, dinner usually includes a main dish or entre, a side dish or two providing a starch and vegetable, and if we are lucky a dessert. Discuss why certain side dishes go together and how to plan a well-balanced meal.

    Use recipes – Many mothers have made their favorite family recipes so many times, that they don’t even use a recipe any more or they never had one from their mother. Trial and error can come later, to start have a set of family recipes that can be used to provide step by step instructions to a young chef. If you don’t have them, write them down as you make a dish and start collecting them.

    A great way to help mom collect and share her family recipes is to help her create a family cookbook. The Family Cookbook Project (www.FamilyCookbookProject.com) offers a gift certificate that can printed out and included in a Mother’s Day card. This gift will help any mom create an easy online family cookbook that can then be printed and shared for generations to come.

    Mom’s can also give themselves a gift to help preserve their family food traditions. By creating a family cookbook and collecting your family recipes, you will be creating a helpful guide for future generations.

    Bill Rice is Co-Publisher of the Great Family Cookbook Project, a website that helps families and individuals collect and share food memories. Follow us on Facebook and Pinterest!

  • How Much Does Printing a Family Cookbook Cost?

    One of the most ask questions we at FamilyCookbookProject.com receive from people considering creating their own personal cookbook full of family recipes is “How much will it cost to print my cookbook?”

    The cost of printing a cookbook has two variables: The number of pages in the cookbook, the amount of color and the number of copies to be printed.

    If you think about it, this is fairly straight forward. More pages means more paper and ink need to be used to create the cookbook. Color images printed using 4 different inks so they are more expensive than black and white page.  So much of the cost is based on the materials being used to create the cookbook.

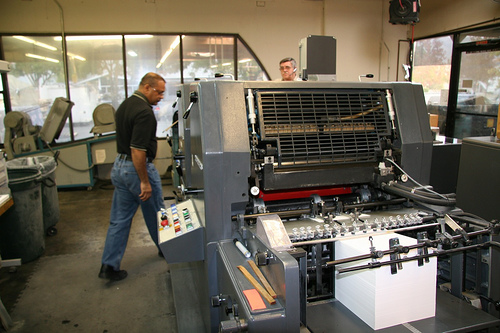
    The number of copies is important because the printing press and bindery equipment must be set up for each cookbook. The cost of this set up is split over each cookbook, so it you only print one cookbook (our minimum) that set up cost will have a larger impact on the price per copy than if you printed 100 copies.

    You will find the complete pricing for the use of the site at http://www.familycookbookproject.com/price_to_print_a_family_cookbook.asp

    You will also find a way to estimate the cost of your cookbook printing at the bottom of the page, however the actual cost will be determined by the number of pages contained in your cookbook when you send it to print.

    If you already have a Family Cookbook Project account, go to the Publishing Center and you can get a quote based on the current number of actual pages in your cookbook. You also can adjust these totals to see what the impact on pricing would be.

    Lowering the cost of printing

    The best way to lower the cost of printing your family cookbook is to lower the number of pages.

    To save pages, go to Layout and Design Center in your editor’s account.  Under Recipe Layout, choose any or all of these options to save space:

    • Choose Arial or Times Roman, Two Column Small for the smallest type face.
    • UNcheck Print my recipes in non-continued format
    • UNcheck Force recipe photos to be on same page as recipe
    • CHECK Print Directions and Comments as single paragraphs
    • Under Recipe Sorting, choose Print my recipes in book order – shortest to longest


    Bill Rice is founder and Co-Publisher of the Great Family Cookbook Project, a website that helps families and individuals collect and share food memories through customized printed cookbooks filled with treasured recipes. Follow us on Facebook and Pinterest!


  • How To Write A Great Recipe

    Whether you are adding a family favorite on FamilyCookbookProject.com, starting a blog, or entering a recipe contest, learning how to properly write a recipe is a valuable skill any food lover can use.

    Below are a few standards and general rules of thumb when it comes to writing a recipe.  It is important to accurately communicate the ingredients and process, so your recipe can be recreated by others.

    There are five parts to a great recipe, the Title, Ingredient List, Preparation Method, Number of servings and Comments. Each one plays an important part in the overall recipe.

    Recipe Title:
    This is the  name of your recipe using words that accurately describe the dish.  Feel free to have a little fun and make it catchy!  You want people to keep reading and be inspired to make the recipe themselves. Which would you rather have, a “chocolate chip cookie” or a “Grandma’s Ultimate Chocolate Chip Cookie”.

    The Ingredient List

    The ingredients tell the reader what is needed to make the recipe.  List all ingredients in order of use, as described in step-by-step instructions. When several ingredients are used at the same time (in the case of baking, often all the dry ingredients are sifted or mixed together at once), list them in descending order according to volume. If there is an issue over preparation, list in order, so for example if you need the zest and juice of a lemon, list the zest first and then the juice since that is the order you will do the preparation.

    If the recipe has different elements (a pie, for example has a crust, a filling), break up the ingredient list with headings such as “Crust” and “Filling.” On the FamilyCookbookProject.com Add a Recipe form, there is a checkbox to make a multipart recipe. This is handy for creating sub recipes within a larger recipe.

    Try not use two numerals together. You need to set off the second number in parenthesis. This comes up with sizes of packages. For example, “1 (8-ounce) package cream cheese.”

    If an ingredient begins with a letter instead of a number, freshly ground black pepper, for example, capitalize the first letter, as in “Freshly ground black pepper.”

    If the preparation of an ingredient is simple, place that technique in the ingredient list, as in “2 eggs, beaten” or “1 stick butter, softened.”

    If an ingredient is used more than once in a recipe, list the total amount at the place in the ingredient list where it is first used, then add “divided.” In the method part of the recipe, indicated the amount used at each step. For example “1 cup all-purpose flour, divided” then in the method “Sift 3/4 cup of the flour with the…” and later “Sprinkle the remaining 1/4 cup of flour on top of…”

    Use generic names of ingredients (semi-sweet chocolate chips, not “Tollhouse chips”

    The Preparation Method

    The recipe directions tell the reader the specific steps needed to make the dish. Where helpful, indicate the size of bowls and cookware. For example, “In a large mixing bowl….”. The same hold true with level of heat when cooking on a stove top.  For example, “Simmer over low heat.”

    Separate each step into a different paragraph. If you are mixing dry ingredients in a bowl, for example, use one paragraph for all the instructions for that step.

    State exact or approximate cooking times, with descriptive hints for doneness, if appropriate. For example, “Sear 1 minute on each side,” and “Bake 18-22 minutes, or until crust is light golden brown.”

    Comments

    Personal notes helps make a recipe come alive. Writing about your favorite memories of the recipe or the person who first introduced the recipe to you helps to make the recipe more interesting and personal.

    Use this area to also communicate anything additional information someone would need to know to recreate your recipe at home. You can also offer ideas for alternate ingredients, tips, or serving suggestions.

    Anytime you are sharing a recipe from an outside source, make sure you give credit where credit is due.

    Time and Servings

    When you start a recipe, you want to know how much time it will take to make and how many people it will serve. Preparation time includes all the measuring, chopping and other preparation of ingredients. Cooking time refers to the total time the food takes to cook, including any preliminary cooking needed.

    Pictures/Videos

    One of the best ways to get someone interested in your recipe is to include a photo. How many times did you look through a cookbook and say “my that food looks good”. Photos also help the person making the recipe know if their final product looks right compared to the original.


    Bill Rice is founder and Co-Publisher of the Great Family Cookbook Project, a website that helps families and individuals collect and share food memories through customized printed cookbooks filled with treasured recipes. Follow us on Facebook and Pinterest!