How to Take Great Food Photos for Your Recipes
They say a picture is worth a thousand words and with recipes that is especially true.
It’s wonderful to read a list of ingredients and see the potential in a recipe, but to look at the finished product can make your mouth water!
Family Cookbook Project highly recommends adding a photo to every recipe you can in your online cookbook. It helps people to see what to expect when they follow your recipe and gives them a standard to meet when comparing their finished dish to the original.
With the advent of digital camera built into cell phones, you don’t have to be a professional photographer to take good food photos.
Here are some pointers to help improve your recipe photos:
 Use Natural Light – Make sure that the light is right – shoot the food either next to a bright window or under a pendant light in the restaurant. Don’t use your camera’s flash! Set your dish near a window and turn off any artificial lights that might be on nearby. Try to photograph with the light at your back or to the side of a dish, so that the shadows are to the side or behind it.
Hold Still – Taking photos inside, even with ample natural light, often means you have to hold the camera very still to keep it from registering hand shake. If you have a tripod, that’s ideal. If you don’t, you can duplicate the tripod effect by resting your elbows on the table or counter and using them to stabilize the camera. Moving the camera when taking a photo will only lead to blurry unusable photos.
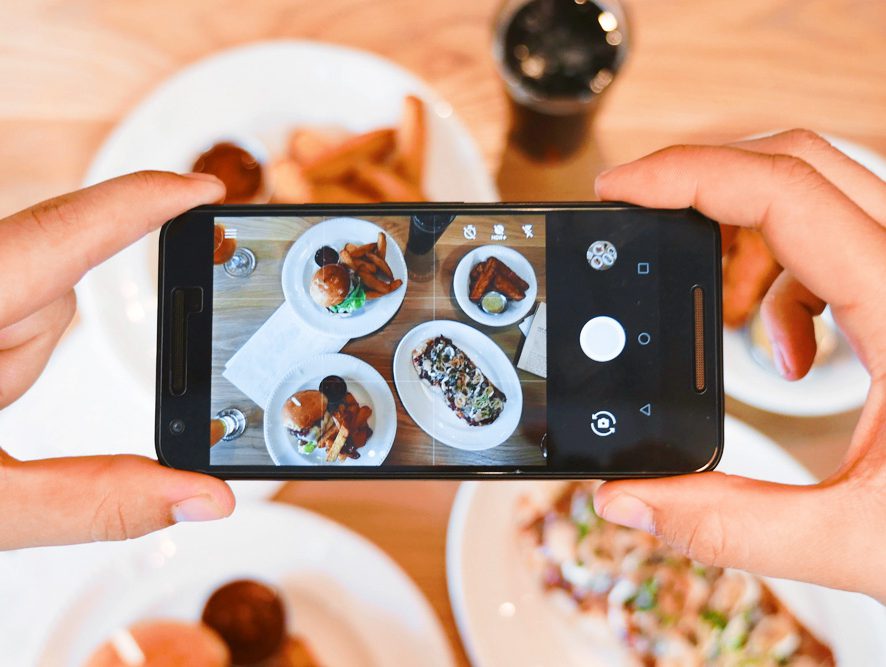
Get close to the food! – Don’t stand back three feet and get the food with the stove, the dirty dishes, and all the condiments around it. Move in and get up close and personal, and let the pan…or the plate…or the cutting board fill the frame.
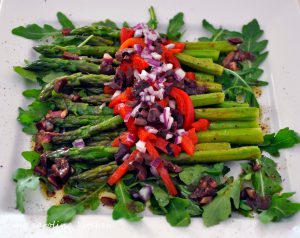
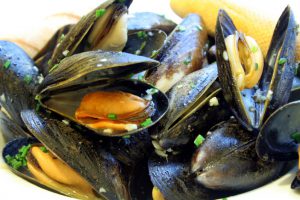
 Stage the shot – The food isn’t the only thing in the photo. Using plates, silverware and linens in complementary colors can help your dish come alive. Shoot food on a beautiful plate or on a table with texture and character. The more appetizing the ingredients, the better your photo will be. Plates that contain colored vegetables and/or meat, preferably in light-colored sauces, are often the most appealing to the eye in photos. Also Don’t be Afraid of a mess. A few crumbs or a smear of dressing can be beautiful, if you let them.
Focus on the food – If you are using a DSLR, stop down your lens to f/1.8 or f/2.0 that limits your depth of field to one part of the image only, blurring out everything around the subject, simulating a shot taken with a macro lens. If you are using an iPhone, there are apps, such as Camera+ or VSCO Cam, that will create the same effect. Remember, you want the food to be the main focus, not the background.
Try different angles – Get up over the food and shoot straight down on it. When shooting overheads, if appropriate, try filling up the frame with what’s already on the table such as cups, wine glasses, utensils and moving hands. You can also think in three dimensions, You might not usually serve brownies piled in a vertical column, but stacking any flat food, like pancakes, cookies, or even onion rings, is a great way to show off texture and make the photo more appealing. You can also add dimension to your food photos by showing the dish right after the that first bite is taken, or the second and third. These are little details that make a viewer feel like they’ve sat down and are enjoying the meal.
 Get Close to Ugly Foods – Some foods, no matter how good they taste, just don’t make good photos. But the closer you get to your subject, the more the visual story becomes about texture and color, rather than pure mouth-watering beauty. Avoid foods that are white and gloppy, such as congealed gravy on white pasty mashed potatoes.
Size Matters – Make sure your camera settings are set for a good sized photo. Small photos look blurry when they are enlarged on line. A photo viewed online only has to be 72 dpi (dots per inch, the measure for quality), but if you are going to print your photo, you want it to be at least 300 dpi. 600 pixels wide (a measurement for size) is a good target for minimum photo size.
Using other’s photos – It is important to note that the Internet makes it easy to find photos of recipes already taken. While this might be much easier, the photo still is the property of whomever holds the rights. Don’t always assume that because a photo is on the Internet you can simply use it for your recipe. Make sure you ask permission from the owner before you use it.
Bill Rice takes more than 20,000 photos a year and is Co-Publisher of the Great Family Cookbook Project Project, a website that helps families and individuals collect and share food memories. Follow us on Facebook, Instagram and Pinterest!