Category: How to Ideas

  • How To Freeze Cookie Dough

    In our house, there is nothing like a warm, soft cookie right out of the oven. However since it is not practical to make dough for only a few cookies at a time, the next best thing is to freeze your cookie dough and pull out enough cookies for your immediate needs.

    Freezing cookies also provides time saving opportunities when you want to get ready for a holiday cookie swap in October or getting ready for a school bake sale anytime.

    How you best freeze cookies depends on what type of cookie you are making. The FamilyCookbook Project had collected thousands of cookie recipes if you need a suggestion.

    Cookies like chocolate chip and oatmeal-raisin freeze best if you make the actual cookie beforehand. Scoop out the dough just as if you were about to bake it and place it on a baking sheet lined with parchment or a Silpat (they can be close, but not touching). Instead of putting it into the oven, but them into the freezer for atleast 6 hours instead. Once frozen, the dough balls get sealed inside a plastic freezer bag and when it is time to bake, you are ready to go.

    Cookies like shortbread or sandies, or any smooth slice-and-bake cookies can be pressed into logs, wrapped in wax paper and frozen solid. Prepare the dough as usual, then shape it into one or two logs that can be covered with wax paper and placed in a plastic freezer bag. When you’re ready to bake, let them warm on the counter for 10 to 15 minutes before slicing. You might also want to let the logs thaw in the fridge for a few hours before you’re ready to use the dough. Slice the cookies into thick disks and you’re ready to put them in the oven as usual.

    The third type of cookies that can be frozen are cut-out cookies, like sugar cookies and many holiday cookies. The dough for these cookies can be frozen in disks and then stacked together with wax paper between them. When ready to bake, thaw until bendable and continue with the recipe.

    Most frozen cookies will need an extra minute or two in the oven. Otherwise, prepping and baking the cookies is exactly the same as in the recipe.


    Bill Rice is Co-Publisher of the Great Family Cookbook Project, a website that helps families and individuals collect and share food memories. Follow us on Facebook and Pinterest!

  • How to Host a Chili Cook-off

    How to Host a Chili Cook-off

    How to Host a Chili Cook-off

    Chili is always a family favorite and most families have many chili recipes depending on the branch. A fun event for bringing the family together is to host a chili cook off where everyone brings a crockpot full of chili and a blind tasting is used to determine which chili will win the prize that year.

    Here are some rules and guidelines we at Family Cookbook Project use when our family has a chili cook off.

    Pre-Chili Cook-Off Planning

    • Invite guests to bring their best chili in a slow cooker, hot and ready to serve. Encourage a variety – meatless, spicy, white, or surprise ingredient. Have them bring their recipes as well.
    • Not everyone has to bring chili but make sure you have no more than 10 options for people to try otherwise they will get overloaded and not be able to tell the difference between each participant.
    • Make sure you have enough bowls and spoons or buy disposables so everyone can have a separate spoon for each chili.
    • Make Chili Name Tags with the name of each chili, a rating for heat level and the entry number.
    • Make enough ballots so each guest has a ballot for each chili. The ballot should have entry numbers from 1 to 10, a space where the taster can rank them from 1 to 10 and a third column for notes.

    Chili-Tasting Set-Up

    • Just before the guests arrive, set up a Chili Toppings Bar—offer a variety of chili toppings and “go-withs “. Include shredded cheese, chopped onions, tomatoes, olives, bell peppers, sliced jalapenos and sour cream for toppings. You can get these ready the day before. Just cover and refrigerate until needed. Great go-withs include crackers, corn bread, tortillas and corn chips.
    • You may want to invest in several power strips to plug-in the crockpots spread out among among several outlets, so you don’t pop a circuit breaker.
    • Offer a variety of drinks; soft drinks, beer and maybe even a signature cocktail. You can also add a tossed green salad and dessert to round out the meal.

    Suggested Rules of the Cook-Off 

    • Keep the name of the cook of each chili secret—as to not throw the vote!
    • Invite your guests to taste a spoonful of each chili and fill out a ballot for their favorite before eating it as a meal. Disposable spoons makes this more sanitary. Have them clean their palate between tastings with a little water or soda cracker.
    • Have guests rate each chili on the ballot. The chili with the most points wins!
    • Announce the maker of each chili and then announce the winner.
    • Award prizes – grand prize, hottest, most creative, or easiest for just a few ideas. Amazon.com has some great chili contest recipes that you’ll find here.
    • Add each of the recipes to your family cookbook. You can even create a stand-a-lone chili cookbook to share with family and friends.

    If in doubt you can always check with the experts at the International Chili Society. They have a whole laundry list of rules and regulations for how a chili cook-off should be run.

    At the end of the day, you want everyone to have fun and enjoy the food.


    Bill Rice loves Chili and is Publisher of the Family Cookbook Project which helps families and individuals create personalized cookbooks to preserve recipes for future generations. Learn more at FamilyCookbookProject.com

  • Understand Egg Carton Dates

    If you’re confused about the dates you see on egg cartons, it’s not surprising. Food product dating is hard to understand. One of the more puzzling facts is that none of the dates on food packages — not even “use by” dates — are an indication of food safety. Instead, package dates refer to product quality.

    An “expiration” or “sell by” date on some egg cartons helps to ensure that the eggs are fresh by informing the grocery store not to sell the eggs after the marked date. These dates are also intended to encourage you to use the eggs when they’re still at their highest quality. An expiration date on the carton is not required but, if one is used, it can be no more than 30 days after the eggs were packed. Since the packer or retailer may choose a date under 30 days, your local retailer can give you more complete information about how many days a “sell by” or “expiration date” allows after packing.

    Some cartons show a Julian date on the short side of the carton. The Julian date is the day the eggs were packed — starting with 001 as Jan 1 and ending with 365 for December 31. For example, eggs packed on June 15 would be marked 166. Some other egg packers print an open “use by” date — July 15, for example — right on the eggshell itself. If properly refrigerated, shell eggs will keep with insignificant quality loss for at least four to five weeks after the Julian or pack date. If there is no Julian or pack date, using your eggs within three weeks of purchase will allow for the possibility that your eggs may have been temporarily warehoused by the retailer before you bought them.

    Why isn’t safety a factor in these dates? Food safety depends on many things, including how you handle and store eggs and other foods. Both quality and safety changes can happen before or after the date on a package. For example, if you put a fully-cooked deli ham and a carton of eggs in the trunk of your car on a hot day and then run several errands before you refrigerate the ham and eggs at home, you’ve both reduced the ham’s and eggs’ shelf-life and increased your risk of food-borne illness — no matter what the package dates say.

    Even when eggs are refrigerated, time causes a quality difference, too, especially in appearance. As eggs age, the whites thin and the yolks flatten. This means that the eggs will spread more in a pan if you fry them and there will be more “angel wings” of white in the water if you poach them. Because the yolk membranes also weaken with age, the yolks may break whether you want them to or not.

    For recipes where shape isn’t important, particularly when whites and yolks are beaten together, you can still use the eggs. The weakening of the yolk membrane, however, makes it easier for bacteria — if they’re present — to reach the nutritious yolk. So, to prevent the possibility of foodborne illness, it’s best to use older eggs in fully cooked items, such as quiches, stratas and baked goods.

    When correctly handled, eggs have a fairly long shelf-life compared to other perishable foods. For both quality and safety, simply keep eggs refrigerated and cook them properly.

    If you love to cook, consider creating your very own family cookbook at www.FamilyCookbookProject.com. We make it easy to turn a collection of recipes from family and friends into a beautiful family cookbook!


    Bill Rice is Co-Publisher of the Great Family Cookbook Project, a website that helps families and individuals collect and share food memories. Follow us on Facebook and Pinterest!

  • Cookbook Fundraisers For Scout Troops

    It’s a fact of life. When you are part of Scouting, fundraising events helped the troop to provide the valuable activities and services that the scouts need to participate.

    It is also a fact of life that doing the same old fundraisers year in and year out can put a damper on the enthusiasm of the scouts in your troop to participate-and their family and friends to support the efforts.

    As an assistant scoutmaster for BSA Scout Troop 175 in Simsbury Connecticut, we have used Family Cookbook Project.com to host a successful fundraiser cookbook that everyone involved enjoyed.

    One of our scouts, Jon, was looking for an innovative funding mechanism for his Eagle Scout project. He created an account on FamilyCookbookProject.com, invited the other scouts in the troop to contribute recipes and then sold the finished product to families in the troop and in the community. He raise thousands of dollars that he was able to use to build a wooden walkway through a wetlands area of a local state park.

    The scouts all had a great time coming up with interesting recipes and seeing their name in print. The troop had a physical reminder of the project and new patrol leaders all have access to copies to help them with their trip menu planning and cooking merit badge.

    John used a photo of his trip to Philmont on the cover of his cookbook however Family Cookbook Project offers several scouting related covers for troops to use.

    If your troop would like to start a cookbook fundraiser, check out How to create a successful cookbook fundraiser.

    Bill Rice is publisher of the Family Cookbook Project. He is also a father of an Eagle Scout and is a long-time Assistant Scoutmaster with BSA Troop 175 in Simsbury Connecticut.

  • How To Make A Bridal Shower Cookbook

    Here is a great idea next you need to plan a bridal shower for a friend or family member – a bridal cookbook!
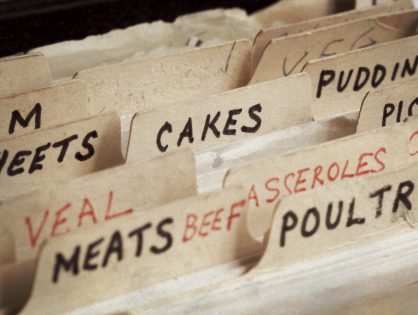
    One thing every new bride to be needs is great recipes to feed her family. Both families as well as friends can help get this started by contributing recipes as part of a bridal shower!

    Here’s how to do it:

    When you send out your bridal shower invitations, include a link to your family cookbook project cookbook, use the Invitation Tool and add everyone’s email. This will send everyone a link that will allow them to contribute their recipes. Set a deadline for entering recipes about three weeks from when the invitations are sent. Remember people will also wait until the deadline!

    Get both of the mother’s to contribute the most recipes if possible. This way both the bride and groom with have lots of recipes that they grew up with in their cookbook. Using Family Cookbook Project’s Custom Categories Tool, you can even create a special category for each mom’s recipes.

    As the recipes are being entered, start planning how the cookbook will look.

    Cover – Family Cookbook Project offers several cookbook covers specifically for bridal cookbooks or wedding cookbooks. You also can create a custom cover with the name of the cookbook and a photo of the couple.

    Write an introduction – The best bridal cookbooks will have an introduction written by the individuals giving the bridal shower. An introduction can be used wish the couple well wishes and to talk about the importance of family.

    Add Photos – Photos can help bring your cookbook to life. You can add photos of the lucky couple on top of recipes, or create custom pages to highlight photos of the bride and groom as they were growing up and while they were dating.

    Finally, it is time to print your cookbook. Make sure you give yourself enough time to order your cookbooks and have them printed, at least 3-4 weeks if possible. Be sure to order enough copies for each attendee as well as several extra copies for family members that can not attend the event.

    For the event, make some of the dishes from bridal cookbook and serve them at the event. Include a place card with the dish name and include the page number from the cookbook. Finally, if you are looking for a great wedding favor, try creating a Wedding Cookbook for your family and friends!


    Bill Rice is Co-Publisher of the Great Family Cookbook Project, a website that helps families and individuals collect and share food memories. Follow us on Facebook and Pinterest!

  • How to Use Scanned Recipes in Your Family Cookbook

    How to Use Scanned Recipes in Your Family Cookbook

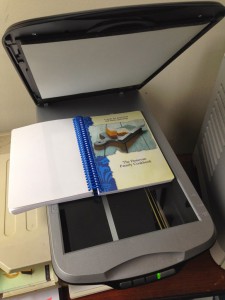
    Scan_Cookbook1Many of us have old recipe boxes that contain many many recipes that are written in the handwriting of someone from the past that we would like to preserve and include it our cookbook. 

    At FamilyCookbookProject.com, you can scan a recipe, personal letter or other family treasure and include it in your cookbook very easily. Here’s how: First you need to scan the recipe card or find someone who can do this for you. Many people have home scanners that are very easy to use – or know someone who has one. 

    When scanning, make sure the scanner saves the image as a JPEG file (check the settings). If it saves it as a PDF, you will need to open the PDF and “save as” a JPEG. Another setting you need to check is the image quality. Usually 150 to 300 DPI (Dots per Inch) is high enough for including in your cookbook. 

    Scanning actually creates a photo image of your recipe card that we can import into your cookbook software. Now your scanned image can be simply placed into your cookbook as you would any other photo.  

    Collections of Scanned Recipes 

    Sometimes family cookbook editors was their entire cookbooks to be a collection of scanned recipes. While not impossible, this can be a lot of work for the editor. 

    The problem with scanned recipes is that the cookbook software system can not read the text in the image to create titles and indexes and other parts of the cookbook. The computer just sees them as photos. 

     So you have two options: 

    You can include the scanned images as photos attached to recipes that you have typed into the system. This way the original item is included above the typed version. I don’t know about you, but my mother’s cursive writing is not always the most easy thing to read (sorry mom) and recipe cards are often smudged with food from meals passed and not always easy to read. 

    The other option is to enter just the title of the recipe and it’s category and leave the rest of the fields on the “add a recipe” form blank. This will give you the title of the recipe and allow an index to be created. Next upload the scanned image of the recipe and save. This way, the image of your recipe will be the recipe itself.


    Bill Rice is Co-Publisher of the Great Family Cookbook Project, a website that helps families and individuals collect and share food memories. Follow us on Facebook and Pinterest!

  • Recipe Standard Measurements

     measuring_cup

    For many generations, recipes were handed down by word of mouth from mother to daughter. Recipes consisted of a little of this and a smidgin of that. The food always came our great – or at least that is what we told out mothers! Today things are different. Computers make is easy to write down our recipes and share them with friends and family members over the Internet. However it is important to remember that cooking has a language of its own. It is a language of ingredients and measurements and directions. I believe the most important of these is measurements. If we did not have standard measurements for cooking, “T” could be a teaspoon, a tablespoons, a thimble full or a truck load! Here are a list of Standard Measures Abbreviations commonly used in recipes.

    teaspoon……………………… tsp.
    tablespoon…………………… tbsp. or T.
    cup…………………………….. c.
    quart…………………………… qt.
    ounce…………………………. oz.
    pint…………………………….. pt.
    gallon…………………………. gal.
    inch…………………………….. in.
    pound………………………….. lb.
    milliliter…………………………. ml
    liter……………………………….. L
    milligram……………………….. mg
    gram……………………………… g
    kilogram ……………………….. kg
    millimeter……………………… mm
    centimeter…………………….. cm
    meter……………………………. m
    Celsius…………………………… C
    Fahrenheit……………………. F

    Another important thing about standard measurements is that they don’t work if you don’t use them! Including an ingredient in your recipe without a specific amount is likely to leave someone trying the recipe for the first time scratching their head and wondering what to do. Remember know one will know unless you include it in your recipe.

    Bill Rice is Co-Publisher of the Great Family Cookbook Project, a website that helps families and individuals collect and share food memories. Follow us on Facebook and Pinterest!

  • Keeping Your Cookbook Contributors Motivated

    megaphoneAs with any family project, getting everyone to contribute can be a challenge, especially if they have not seen the end product beforehand.

    Here are some tips to keep your contributors motivated:

    The more the merrier – Be sure to include everyone, not just the great cooks. Everyone likes to be asked to participate and the more you invite, the more recipes you’ll likely get. To add contributors and send an email invitation, > Use the Invitation Tool

    Set a reasonable deadline – Set the submission deadline on the “Project Information Editor” page, but don’t set it too far in the future. We all tend to put off whatever we can and contributing recipes is often one of those things. A month is usually enough time to give everyone to find the recipes they want to contribute and get them entered. Two things to remember: most of the recipes will come in just in time for the deadline and second, you can always extend the deadline if you want more recipes.

    Send regular updates – Use the Reminder Tool to email some or all of your contributors on a regular basis. Remind them of the deadline and ask them to meet a specific goal, like “please add one or two recipes to each category”.

    Target the biggest recipe boxes – Every family has a handful of people who are known for their cooking (you are most likely one of them in your family!). Send a personal message to them either using the remainder tool or reaching out by telephone, Facebook or with a personal visit. People are flattered when their skills are recognized. Let them know the cookbook would not be complete without their contributions.

    Ask for specific recipes – Send a reminder to everyone asking for a specific recipe from your family’s past that will get everyone thinking of past gatherings. Include your memories of that dish or the person who created it. It might help remind everyone why putting together a family cookbook is important.

    Use social media – As you add your own recipes to your family cookbook, it is easy to post them to Facebook or pin them to Pinterest. Sharing your recipes this way shows other family members that you are contributing and shows them they should as well.

    Bill Rice is Co-Publisher of the Great Family Cookbook Project, a website that helps families and individuals collect and share food memories. Follow us on Facebook and Pinterest!

  • Cookbooks Make a Great Fundraiser

    fundraising_made-easyFunding worthwhile projects can be a challenge. While there are many fundraising programs that happen year after year, it’s always good to try something new every once in a while to keep people interested.

    A fundraising cookbook not only can help you find important projects and activities, but it also can help to bring a community together in a fun activity that everyone can benefit from.

    Who doesn’t like to see their name in print? Having a recipe submitted and included in a community cookbook gives added incentive to buy those cookbooks and share them with friends and family.

    Here are some ideas on how to get the most from your fundraising cookbook project.

    1) The more people you get involved with your cookbook, the more people will likely be your target audience to buy that cookbook once it is printed.

    Cookbook fundraiser.com has built-in tools to invite as many people as possible to contribute to your cookbook. We make it easy!

    2) Include advertising from local businesses and individuals to help support the cost of printing the cookbook. That way the proceeds from the sale of the cookbook can go directly to the worthy cause.

    Cookbookfundraiser.com allows you to add as many extra pages to the back of your cookbook as you would like. These make it easy to add advertising pages!

    3) Most fundraising cookbooks seem to be priced between $12 and $20 and contain about 150 recipes. Determine how much money your organization wants to raise and that will help you determine how many copies you need to sell and at what price to reach your goal.

    Our website has a great cost estimator to help you determine what to expect from your printing cost. We also offer many hints on how to format your cookbook to decrease the cost of printing.

    4) Reach out to not only those who contributed recipes, but all those in your community to pre-order the cookbook before you go to print. The more copies you presell, the more copies you can order which will lower your per copy cost.

    Our pre-ordering tool makes getting orders from contributors a snap. You can also order a single copy of your cookbook to display at community events and help to generate additional sales.

    5) Add an ISBN number and bar code to your cookbook and you can sell the cookbook at local bookstores and online on Amazon.com. This can provide ongoing revenue for your organization.

    Family cookbook project offers a marketing package that includes an ISBN number and barcode. We also will get your cookbook listed on Amazon.com!

    6) Ask local retail stores to also sell your cookbook to their customers. Often grocery stores and small retailers will support community fundraising efforts at no charge by offering the product at their checkout counter.

    These are but I handful of ways to help you get the most from your cookbook fundraiser project. However, as with every fundraising project, it takes one individual to get the ball rolling.

    To get started with your cookbook fundraiser project, go to www.cookbookfundraiser.com and create a free account today!

  • Why Blank Pages Are Important In Your Family Cookbook

    Blank_Cookbook1

    One of the questions we get a lot as Cookbook Publishers is “how do I remove the blank pages in my cookbook?”

    It seems that when people preview their family cookbook on FamilyCookbookProject.com, they see the cover, then a blank page, then the title page, then another blank page, and so on. They want those blank pages eliminated to lower the cost of printing.

    In publishing, especially cookbook publishing, a cookbook needs to be laid out in a specific way in order for the most important pages to be on the right side when the book is opened. Think about it, Whenever you open a book, the title page is the first thing you see and it is always on the right page of a two page spread. Same goes for the Introduction, Table of Contents and the section dividers.

    On FamilyCookbookProject.com, if you create a preview cookbook PDF, you want to open it in your Adobe Reader program and select the option to view “Facing Pages” or “Double-up” (look under the View menu), you’ll see how the pages back up to each other.

    Now with that said, there is no reason why those pages have to be blank. The inside front cover can have a family photo photo or bio of the cookbook editor. The same goes for other blank pages as well. If your introduction is one page and after it is a blank page, consider writing more, adding a photo or even making the text larger to fill up that extra space.

    One benefit form using FamilyCookbookProject.com is that we provide a complete set of handy kitchen information that can be used on the back of the recipe category dividers with the touch of a button.

    Bill Rice takes more than 20,000 photos a year and is Co-Publisher of the Great Family Cookbook Project, a website that helps families and individuals collect and share food memories. Follow us on Facebook and Pinterest!