Month: January 2025

  • Remove Duplicate Names on the Contributor Page

    Remove Duplicate Names on the Contributor Page

    The names on the contributor list is taken directly from the names entered in the contributor field on each recipe. If you see what looks like the same name in your contributor list more than once, that is because the name in the Contributor field in some recipe(s) is different.  You may not see it, but check for two spaces ” ” between first and last names – or a space at the end of a name.  The software thinks it is a different person.  The best way to see what recipes are affected, go to Index by Contributor.  Scroll the list until you see the person that appears duplicated.  They will be in this list more than once, too.  Edit each recipe under all versions of their name and make sure the Contributor fields match.


    Bill Rice is Co-Publisher of the Great Family Cookbook Project, a website that helps families and individuals collect, preserve and share food memories by creating their own printed personal cookbooks. He is the author of The Wellfleet Oyster Cookbook (Available on Amazon) and the Cape Cod Cocktail Cookbook, both created using FamilyCookbookProject.com. He is also editor of the Donovan Family Cookbook, now it’s third printing and is an avid genealogist tracing his family back to the 1600’s.

    Follow Family Cookbook Project on Facebook, Instagram, Twitter and Pinterest!

  • Baking for a Cause: How to Fundraise with a Cookie Cookbook

    Baking for a Cause: How to Fundraise with a Cookie Cookbook

    In a quaint Vermont town, an elementary school faced a familiar challenge: raising funds for a new playground. The PTA, a group of dedicated parents and teachers, brainstormed ideas to engage the community and achieve their goal. Amid suggestions of bake sales and raffles, one idea stood out—a cookie cookbook. This concept not only promised to generate the needed funds but also brought the community together through the shared love of baking. Thus began their journey of “Baking for a Cause” with CookbookFundraiser.com.

    A Sweet Idea Takes Root

    The idea of using a cookie cookbook as a fundraising tool isn’t entirely new, but its charm lies in its universal appeal and the sense of community it fosters. Cookies are a beloved treat, evoking nostalgia and joy in every bite. They are relatively easy to bake, making them accessible to a broad audience. Moreover, a cookbook filled with cherished recipes becomes a lasting memento, a keepsake that supporters can enjoy long after the fundraising goal is met.

    The Vermont PTA quickly formed a committee of enthusiastic volunteers, each passionate about baking and eager to contribute. They set clear goals, aiming to raise $5,000 for the playground, and established a timeline to guide their project from recipe collection to book launch.

    Gathering Recipes and Stories

    The first step was to reach out to the community for recipe submissions. Flyers were sent home with students, emails were dispatched to parents, and social media posts invited contributions. The response was heartwarming. Grandparents shared their time-honored holiday cookie recipes, parents contributed creative new ideas, and even students offered their own experiments from home economics classes.

    Each submission came with a story—a memory of baking cookies with a loved one, a tradition passed down through generations, or a funny anecdote from a baking mishap. These personal touches added a unique flavor to the cookbook, transforming it from a mere collection of recipes into a tapestry of community memories.

    Crafting the Cookbook

    With over 100 recipes in hand, the committee faced the task of compiling and organizing them. They categorized the recipes into sections like “Holiday Classics,” “Chocolate Delights,” and “Healthy Options,” ensuring a diverse selection that would appeal to different tastes and dietary needs.

    Designing the cookbook was easy with CookbookFundraiser.com . They chose a clean, attractive layout, using high-quality photos of the cookies to entice readers. Each recipe included detailed instructions, tips, and a brief story about its origin. The editing process was meticulous, ensuring consistency and accuracy in measurements and instructions.

    Bringing the Cookbook to Life

    Once the design was finalized, it was time to bring the cookbook to life. The PTA opted for a mix of physical copies and a digital version to reach a wider audience. They partnered with CookbookFundraiser.com to use it’s new Sales Hub to presell their cookbook and other kitchen-related items so their were no upfront costs to worry about.

    Promotion began even before the books were printed. Pre-sales were offered to gauge interest and secure initial funds. Social media buzzed with sneak peeks of recipes and behind-the-scenes photos of the baking sessions. The excitement was palpable, culminating in a grand launch event that featured a bake sale, cookie tasting, and live baking demonstrations.

    The Sweet Taste of Success

    The launch event was a resounding success. The community turned out in droves, eager to support the cause and taste the delicious cookies featured in the cookbook. The sales far exceeded expectations, raising over $7,000—well beyond the initial goal. The new playground became a reality, a testament to the power of community and the shared joy of baking.

    Inspiring Stories from Across the Nation

    The Vermont school’s success story is just one example of how a cookie cookbook can serve as a powerful fundraising tool with CookbookFundraiser.com . Across the country, similar stories abound.

    In California, a community group aimed to support a local food bank. They collected cookie recipes from members, designed a beautiful cookbook, and sold it at farmers’ markets and online. Their efforts raised over $10,000, providing much-needed support to the food bank and raising awareness about food insecurity in their area.

    Meanwhile, in New York, a charity focused on helping homeless youth created a cookie cookbook using CookbookFundraiser.com as part of their annual fundraising campaign. They enlisted local chefs, celebrities, and beneficiaries to contribute unique cookie recipes. The cookbook was not only a financial success, raising thousands of dollars, but it also increased the charity’s visibility and brought attention to the important issue of youth homelessness.

    Tips for Your Own Cookie Cookbook Fundraiser

    If these stories have inspired you to launch your own cookie cookbook fundraiser, here are some tips to get you started:

    1. Start by Creating a Free Account: CookbookFundraiser.com  provides all of the tools necessary to not only create a fabulous cookbook, but to also manage you fundraiser.
    2. Engage Your Community: Involve as many people as possible in the project. The more contributors you have, the broader your network for promotion and sales.
    3. Highlight the Cause: Clearly communicate the purpose of the fundraiser. Share stories and testimonials about how the funds will be used and the impact they will have.
    4. Leverage Social Media: Use social media to build excitement and share updates about the project. Post behind-the-scenes photos, recipe teasers, and testimonials from contributors. CookbookFundraiser.com offers a library of premade posts to get you started.
    5. Offer Incentives: Provide incentives for early buyers, such as a discount on pre-sales or a bonus recipe booklet. Consider offering a package deal for bulk purchases.

    Creating a cookie cookbook as a fundraising tool on CookbookFundraiser.com is a creative and enjoyable way to raise funds for a worthy cause. It brings people together, celebrates the joy of baking, and provides a lasting product that supporters can cherish. By following the steps outlined in this guide and drawing inspiration from success stories, you can launch a successful fundraising campaign that not only meets your financial goals but also strengthens your community bonds. Happy baking and fundraising!


    Bill Rice is Founder and Co-Publisher of the Family Cookbook Project, its website CookbookFundraiser.com helps schools, churches, sports teams and other groups raise money with and bring their community together with a cookbook fundraiser.

    Follow Family Cookbook Project on Facebook, Instagram, Twitter and Pinterest!

  • How to Create a Family Cookbook as a Gift for Weddings and Anniversaries

    How to Create a Family Cookbook as a Gift for Weddings and Anniversaries


    When it comes to creating a truly personal and meaningful gift for weddings or anniversaries, a family cookbook stands out. It’s a unique way to celebrate the union of two people or commemorate years of shared memories. By compiling family recipes into a custom cookbook, you’re not only passing down culinary traditions but also offering a heartfelt keepsake that the couple can treasure for years to come. Let’s walk through the steps to create a beautiful family cookbook for weddings and anniversaries using FamilyCookbookProject.com.

    Step 1: Define the Purpose and Theme

    Before you dive into collecting recipes, it’s important to clarify the purpose of your family cookbook. Is it to celebrate the union of a couple by sharing both sides of the family’s favorite dishes? Or is it to honor years of marriage by showcasing recipes that have become central to family traditions?

    Once the purpose is clear, consider the theme. You could:

    •Focus on family recipes passed down through generations, symbolizing the blending of two families.

    •Highlight recipes that the couple has enjoyed together or are meaningful to their relationship.

    •Create a collection that focuses on meals for special occasions, such as holiday recipes or anniversary dishes.

    •For a more general theme, gather everyone’s favorite recipes, from comfort food to decadent desserts.

    Having a clear theme will help guide your recipe collection and ensure the cookbook has a cohesive feel.

    Step 2: Start Early and Involve Others

    Creating a family cookbook as a wedding or anniversary gift can take some time, so it’s best to start early. Depending on the size of your family and the number of recipes you’d like to include, gathering recipes and organizing the book could take several months.

    The good news is that with FamilyCookbookProject.com, you can easily invite other family members to contribute. Here’s how:

    •Send Contributor Invitations: Use the Contributor Invitation tool to send an invitation to family members. This will give them access to the cookbook where they can add their recipes. In your invitation, explain the purpose of the cookbook and how their recipes will be a special part of this gift.

    •Set Expectations: Let your contributors know what kind of recipes you’re looking for. For example, you might want traditional family recipes, favorite meals the couple has shared, or dishes that symbolize love and togetherness. This gives people a clear idea of what to contribute and makes the process smoother.

    •Assign Roles if Necessary: If you’re working with a large group of contributors, you might want to assign specific categories of recipes to different family members. For example, ask one side of the family to contribute appetizers and desserts, while the other side focuses on main courses and side dishes.

    Step 3: Personalize the Recipes with Stories and Photos

    What makes a family cookbook truly special is the personal touch. Ask contributors not only to submit their recipes but also to share the stories or memories behind them. For a wedding cookbook, this might include:

    •A recipe that was served at the couple’s first dinner together.

    •A dish passed down from one of the families that symbolizes comfort or tradition.

    •A recipe that was prepared for the couple’s engagement celebration or other significant event.

    For an anniversary cookbook, you can ask for stories that reflect the couple’s journey together, such as meals that became family favorites over the years or dishes shared at important family gatherings.

    Encourage contributors to include photos alongside their recipes. These could be images of the dish itself, family members cooking, or pictures of the couple enjoying the meal together. Adding visuals creates a more engaging and sentimental cookbook.

    Step 4: Use the Reminder Tool to Keep Everyone Engaged

    It’s easy for people to get busy and forget about submitting their recipes, especially if you’re working with a large group of contributors. This is where the reminder tool on FamilyCookbookProject.com comes in handy. You can use it to keep everyone on track by sending friendly nudges when deadlines approach.

    How to Use the Reminder Tool:

    •You can send reminders to individual contributors, specific groups, or the entire list of contributors.

    •Personalize your message to remind them of the cookbook’s purpose and how their contribution will make the gift extra special. For example, a gentle reminder could say, “We’re almost there! Don’t forget to submit Grandma’s famous lasagna recipe—it wouldn’t be the same without it!”

    This tool ensures that the recipe collection process stays on track without feeling overwhelming or forgotten.

    Step 5: Submit Sample Recipes to Show What’s Possible

    As the editor of the cookbook, it’s helpful to get the ball rolling by submitting a few recipes early on. Choose some well-loved family recipes that you know the couple or the anniversary recipients will enjoy. By providing examples, you give other contributors a clearer picture of how their recipes will look in the final product.

    Submit recipes that represent both sides of the family and reflect the theme you’ve chosen. Once these are in the cookbook, you can use them as a reference for others and even include personal notes about why these recipes were selected.

    Step 6: Select a Cover Early in the Process

    The cookbook cover is one of the most important elements in the overall design of your gift. It sets the tone and creates excitement for the finished product. FamilyCookbookProject.com offers a variety of customizable covers, allowing you to choose a design that resonates with the occasion.

    For a wedding cookbook, consider using a photo of the couple or a design that reflects their wedding colors and theme. For an anniversary cookbook, you could use a family portrait, a photo from the couple’s wedding day, or something symbolic of their journey together.

    By selecting a cover early in the process, you give contributors a clear visual of what the cookbook will look like, inspiring them to submit their recipes and making the project feel more tangible.

    Step 7: Organize the Recipes into Categories

    A well-organized cookbook makes for an enjoyable reading and cooking experience. Once you’ve collected a substantial number of recipes, begin categorizing them. You can use the following categories as a starting point:

    •Appetizers

    •Main Courses

    •Desserts

    •Drinks

    •Holiday Recipes

    •Family Favorites

    •International Dishes

    For wedding cookbooks, you can also include categories such as:

    •Recipes for Two

    •Celebration Meals

    •Romantic Dinners

    For anniversary cookbooks, consider categories like:

    •Family Traditions

    •Kids’ Favorites

    •Party Dishes

    These categories will help give the cookbook structure and make it easier for the recipients to find specific recipes.

    Step 8: Edit and Customize the Cookbook

    Once you have all the recipes submitted, it’s time to review and edit the content. FamilyCookbookProject.com allows you to format and organize the recipes, add headers, and even include a dedication page. A few editing tips to keep in mind:

    •Check for Consistency: Ensure all recipes follow the same format for ingredients and instructions. This creates a professional and polished final product.

    •Add Personal Notes: Consider including a dedication page at the front of the cookbook, where you can add a personalized message to the couple or the anniversary recipients. This could be a heartfelt note about the significance of the recipes and the love that went into compiling them.

    •Incorporate Photos: If contributors haven’t already included photos, consider adding your own. You could use photos from the wedding or significant moments from the couple’s relationship, along with pictures of family gatherings and meals.

    Step 9: Print and Present the Cookbook

    After you’ve finalized the content, you can print the cookbook through FamilyCookbookProject.com. The platform offers high-quality, professionally bound cookbooks that make for a beautiful gift. Be sure to order extra copies for the couple or family members who contributed to the project.

    When presenting the cookbook, consider how you’ll deliver this meaningful gift:

    •For a wedding, present the cookbook at the rehearsal dinner or as a special gift on the wedding day. It’s a lovely way to symbolize the blending of two families and their traditions.

    •For anniversaries, present the cookbook at the anniversary party, allowing the couple to reminisce about all the meals that have shaped their relationship.

    Step 10: Make It a Tradition

    Once you’ve created your first family cookbook, you might find that this becomes a tradition for other family events. A family cookbook can be a meaningful gift for other special occasions, such as milestone birthdays, holiday gatherings, or even future anniversaries.

    By preserving recipes and stories in a family cookbook, you’re creating a lasting legacy that will be cherished for generations. With each new edition, you can continue to build on the traditions and memories that have shaped your family’s culinary journey.

    Creating a family cookbook for weddings and anniversaries is a truly unique and meaningful gift that goes beyond material possessions. It celebrates love, family, and tradition in a way that will last for years to come. By using FamilyCookbookProject.com’s easy-to-use platform, you can gather recipes, stories, and photos to create a beautiful keepsake that the couple will treasure forever.

    Whether you’re celebrating a new union or honoring decades of marriage, a family cookbook is a heartfelt gift that brings loved ones together around the table—one recipe at a time.

    Bill Rice is Founder and Co-Publisher of the Family Cookbook Project, the leading online cookbook publisher with a website that helps families and individuals collect, preserve and share food memories by creating their own printed custom cookbooks. He is the author of The Wellfleet Oyster Cookbook and the Cape Cod Cocktail Cookbook (Available on Amazon), both created using FamilyCookbookProject.com. He is also editor of the Donovan Family Cookbook, now it’s third printing and is an avid genealogist tracing his family back to the 1600’s.

    Follow Family Cookbook Project on Facebook, Instagram, Twitter TikTok, YouTube and Pinterest!


  • The Importance of Personal Notes in a Family Cookbook

    The Importance of Personal Notes in a Family Cookbook

    In the heart of every family cookbook lies more than just a collection of recipes; it’s a repository of memories, stories, and the essence of familial love shared through food. One of the most cherished elements that elevate a family cookbook from a mere compilation of recipes to a treasured heirloom is the inclusion of personal notes. These handwritten annotations, often scribbled in the margins or alongside ingredients, add a layer of depth and intimacy that transcends the act of cooking itself. Here’s why personal notes are such an important part of a family cookbook, along with ideas on what to include in these heartfelt annotations.

    The Emotional Connection

    Recipes with personal notes evoke a sense of connection and continuity across generations. They are more than just instructions; they carry the essence of the person who penned them. Whether it’s Grandma’s secret ingredient for her famous pie crust or Dad’s tips for achieving the perfect grill marks, these notes encapsulate the wisdom and experience passed down through the years. Each note tells a story, offering a glimpse into the lives and personalities of those who came before, making cooking not just about nourishment but about honoring family traditions and memories.

    Capturing Memories

    A recipe’s personal notes in a family cookbook serve as a time capsule, preserving moments that might otherwise be lost to memory. They capture the joy of a shared meal, the laughter in the kitchen, and the aroma that filled the air during holidays and special occasions. These notes transform recipes into living memories, ensuring that future generations can experience not just the taste but the sentiment behind each dish. As families grow and change, these notes become a link to the past, a reminder of the love and care that went into creating meals that nourished both body and soul.

    Ideas for What to Include in Recipe Notes

    When adding personal notes to recipes in your family cookbook, consider including the following:

    1. Family Stories: Share anecdotes or memories associated with the recipe. For example, recount how Grandma used to bake her famous cookies every Christmas while telling stories of her childhood.
    2. Cooking Tips: Offer practical advice or variations on the recipe. This could include ingredient substitutions, cooking times, or techniques that have been passed down through generations.
    3. Special Occasions: Note when the recipe is traditionally served or its significance during family gatherings. For instance, mention that Aunt Sarah always makes her signature casserole for Thanksgiving dinner.
    4. Recipe Origins: Provide background information on where the recipe originated or how it became a family favorite. This could involve tracing its roots to a specific region, culture, or even a beloved family member’s invention.
    5. Adjustments: Mention any adjustments made to the recipe over time to suit changing tastes or dietary preferences. This could include reducing sugar content, making it gluten-free, or incorporating locally sourced ingredients.
    6. Secret Ingredients: Share any special ingredients that give the dish its unique flavor. This might include a pinch of a particular spice, a dash of a family-made sauce, or a special technique that sets your version of the recipe apart.
    7. Family Traditions: Highlight any rituals or customs associated with preparing or enjoying the dish. This could involve the order of serving, special garnishes, or specific utensils used only for this recipe.
    8. Notes on Presentation: Offer suggestions on how to plate the dish attractively or serve it in a way that enhances its appeal. This might include pairing suggestions with wines or beverages that complement the flavors.
    9. Memorable Moments: Recall fond memories or events that centered around this particular recipe. This could range from birthdays celebrated with a special cake to comforting meals shared during challenging times.
    10. Encouragement and Love: Add personal messages of encouragement or love for those who will be recreating the recipe. This could be a simple note wishing them joy in cooking or expressing hope that they create similar cherished memories with their loved ones.

    Preserving the Legacy

    Incorporating personal notes into your family cookbook is more than just a practical exercise; it’s a labor of love that ensures your family’s culinary heritage endures. These annotations transform recipes into cherished heirlooms, passing down not only flavors but also the stories and traditions that define your family’s unique identity. As you compile your family cookbook, remember that each note is a testament to the bonds that unite us across time and generations, celebrating the joy of sharing meals and creating lasting memories together.

    By infusing your family cookbook with personal notes, you create a living document of your family’s culinary journey, ensuring that future generations can savor not just the taste of your dishes but also the love and history behind them.


    Bill Rice is Founder and Co-Publisher of the Family Cookbook Project, a website that helps families and individuals collect, preserve and share food memories by creating their own printed personal cookbooks. He is the author of The Wellfleet Oyster Cookbook and the Cape Cod Cocktail Cookbook (Available on Amazon), both created using FamilyCookbookProject.com. He is also editor of the Donovan Family Cookbook, now it’s third printing and is an avid genealogist tracing his family back to the 1600’s.

    Follow Family Cookbook Project on Facebook, Instagram, Twitter and Pinterest!


  • Rice 101: Discover the Best Types of Rice for Every Dish

    Rice 101: Discover the Best Types of Rice for Every Dish

    Rice is a pantry staple in many households around the world, and in the United States, it’s no different. However, rice is far from being a one-size-fits-all ingredient. With numerous varieties available, each type of rice offers different textures, flavors, and best cooking methods. Whether you’re making a comforting risotto, serving up a flavorful stir-fry, or simply preparing a side dish, choosing the right type of rice can make all the difference.

    In this article, we’ll explore the most common types of rice found in the United States, how to cook them, and the dishes they are best suited for.

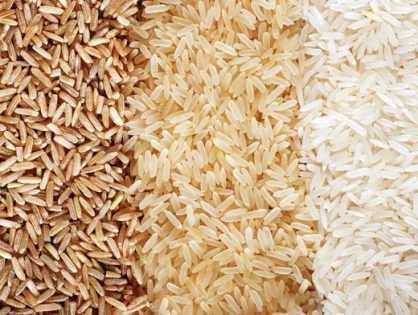
    Long-Grain White Rice

    Long-grain white rice is one of the most popular and versatile varieties in the U.S. It has long, slender grains that remain separate and fluffy when cooked, making it ideal for a wide range of dishes.

    Best Uses : Long-grain white rice is perfect for everyday meals. It’s commonly used as a side dish for stir-fries, roasted meats, or curries. It’s also the go-to rice for dishes like  pilaf ,  fried rice , and  stuffed peppers  because it maintains its shape without becoming sticky or clumpy.

    Cooking Tip : Use a 2:1 water-to-rice ratio. Bring to a boil, then cover and simmer on low heat for 15-20 minutes until the water is absorbed.

    Basmati Rice

    Basmati rice, an aromatic long-grain rice, is known for its fragrant aroma and slightly nutty flavor. It’s commonly used in Indian, Middle Eastern, and South Asian cooking.

    Best Uses : Basmati rice is a must for dishes like  biryani ,  pulao , and  Indian curries . Its light, fluffy texture makes it the perfect accompaniment to saucy dishes, and its subtle fragrance enhances the flavors of spiced meals.

    Cooking Tip : Rinse basmati rice thoroughly before cooking to remove excess starch and help the grains remain separate. For extra flavor, cook it in a mix of water and broth, and consider adding whole spices like cardamom or cinnamon to the pot.

    Jasmine Rice

    Jasmine rice, native to Thailand, is another aromatic long-grain rice. When cooked, it has a slightly sticky texture, and its delicate floral scent makes it a popular choice in Southeast Asian cuisine.

    Best Uses : Jasmine rice pairs beautifully with Thai curries, stir-fries, and grilled meats. It’s also great for dishes like  fried rice  or as a simple side dish for  teriyaki chicken .

    Cooking Tip : Rinse jasmine rice before cooking to prevent it from becoming overly sticky. Use a 1.5:1 water-to-rice ratio for the perfect texture.

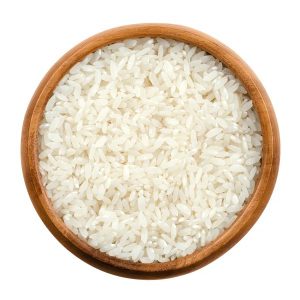
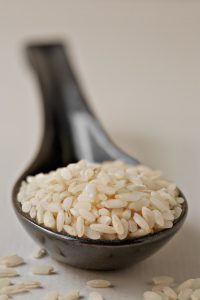
    Short-Grain White Rice (Sushi Rice)

    Short-grain white rice is sticky and plump, making it ideal for dishes that require the rice to hold together. It’s often referred to as “sushi rice” due to its primary use in making sushi, though it’s also used in other Asian dishes.

    Best Uses : Aside from  sushi , this rice is great for making  onigiri  (Japanese rice balls),  kimbap  (Korean seaweed rice rolls), and even  Japanese rice bowls . Its sticky nature makes it a good base for dishes where the rice needs to hold its shape.

    Cooking Tip : Use a 1:1.25 water-to-rice ratio. After cooking, season the rice with a mixture of rice vinegar, sugar, and salt if using it for sushi.

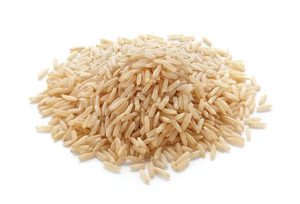
    Brown Rice

    Brown rice is the whole grain version of white rice, meaning it retains the bran layer, giving it a nuttier flavor and a chewier texture. It’s considered more nutritious than white rice because it contains more fiber, vitamins, and minerals.

    Best Uses : Brown rice works well as a healthy side dish for  salads ,  grain bowls , and  stir-fries . Its heartier texture makes it a great choice for stuffing vegetables like  bell peppers  or as a base for  buddha bowls .

    Cooking Tip : Brown rice takes longer to cook than white rice—around 40-50 minutes. Use a 2.5:1 water-to-rice ratio, bring to a boil, then cover and simmer until the water is absorbed.

    Wild Rice

    Wild rice is not technically rice, but a type of aquatic grass seed native to North America. It has a nutty, earthy flavor and a slightly chewy texture that makes it stand out from traditional rice varieties.

    Best Uses : Wild rice is great in  salads,  stuffings, and  soups, and it can also be mixed with other rice varieties to add texture and flavor to your dish. It’s commonly used in  pilafs  and as a base for grain bowls.

    Cooking Tip : Wild rice takes longer to cook, about 40-50 minutes. Use a 3:1 water-to-rice ratio and simmer until the grains are tender and some have burst open.

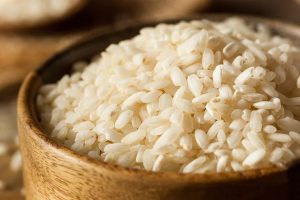
    Arborio Rice

    Arborio rice is a short-grain, starchy rice that’s essential in Italian cooking, particularly for making risotto. When cooked, the high starch content of arborio rice creates a creamy texture.

    Best Uses : Arborio rice is most commonly used for  risotto . The creamy consistency is perfect for soaking up broth and flavors. Arborio is also great for making  rice pudding  or other creamy dishes where a rich texture is desired.

    Cooking Tip : Arborio rice requires constant stirring and gradual addition of liquid when making risotto. Add broth one ladle at a time, stirring continuously, to release the starch and achieve a creamy consistency.

    Carolina Gold Rice

    Carolina Gold is a variety of long-grain rice with a rich history in the southern United States. It’s slightly more aromatic than traditional long-grain white rice, with a subtle nutty flavor.

    Best Uses : This rice is perfect for  pilafs ,  gumbos , and  low-country Southern dishes  like  Hoppin’ John  or  red beans and rice . Its versatility and historical significance make it a beloved choice in Southern cuisine.

    Cooking Tip : Rinse Carolina Gold rice to remove excess starch, then use a 1.5:1 water-to-rice ratio for cooking.

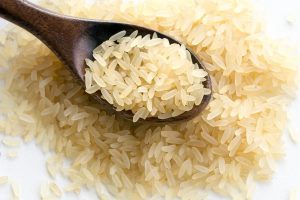
    Parboiled Rice

    Parboiled rice, also known as converted rice, is partially boiled in the husk before processing, giving it a firmer texture and helping it retain more nutrients than white rice.

    Best Uses : Parboiled rice is great for making  rice salads ,  pilafs , or serving alongside grilled meats, as it stays firm and separate when cooked. It’s also less likely to become sticky, making it a good option for batch cooking.

    Cooking Tip : Use a 2:1 water-to-rice ratio and simmer for about 20 minutes until the rice is tender and the water is absorbed.

    Choosing the Right Rice for Your Dishes

    With so many varieties of rice available, there’s a perfect type for every dish and cooking style. Whether you’re preparing a hearty risotto, a light and fluffy side dish, or a creamy bowl of rice pudding, knowing the differences between these rice varieties will help you achieve the best results.

    When experimenting with new recipes or creating a collection of go-to rice dishes, consider using FamilyCookbookProject.com to store and organize your favorite rice recipes. By creating a personal cookbook, you can easily revisit your favorites and share them with family and friends.

    No matter what dish you’re cooking, the right type of rice will enhance your meal and elevate your cooking to the next level.


    Bill Rice is Founder and Co-Publisher of the Great Family Cookbook Project, a website that helps families and individuals collect, preserve and share food memories by creating their own printed personal cookbooks. He is the author of The Wellfleet Oyster Cookbook and the Cape Cod Cocktail Cookbook (Available on Amazon), both created using FamilyCookbookProject.com. He is also editor of the Donovan Family Cookbook, now it’s third printing and is an avid genealogist tracing his family back to the 1600’s.

    Follow Family Cookbook Project on Facebook, Instagram, Twitter TikTok, YouTube and Pinterest!


  • 7 Deadly Sins When Creating A Family Cookbook

    7 Deadly Sins When Creating A Family Cookbook

    Here are some things to consider while creating your own Family Cookbook:

    Sin #1 – Thinking you can do it all yourself.
    Creating a family cookbook is a big project, and it’s easy to underestimate the time and effort it requires. Collaborating with family members not only eases the load but also enriches the content with diverse recipes and stories. Reach out to relatives to contribute their favorite recipes and anecdotes to make the cookbook a collective treasure.

    Sin #2 – Leaving out the simple recipes.
    Every family has those quick, easy dishes that are go-to favorites. Don’t overlook these simpler recipes in favor of more complex ones. Often, it’s these everyday meals that carry the most sentimental value and are the ones family members will likely cook the most.

    Sin #3 – Printing your cookbook at home.
    While printing at home might seem convenient, it usually doesn’t do justice to a family heirloom that should withstand the test of time. Invest in a professional printing service to ensure your cookbook is durable, looks professional, and can be proudly displayed or gifted.

    Sin #4 – Not including photos.
    A picture is worth a thousand words, especially in cookbooks. Include high-quality images of the dishes, but also add photos of family gatherings, individuals cooking in the kitchen, or any relevant historical family photos. These images will bring your recipes to life and add a personal touch that sets your family cookbook apart.

    Sin #5 – Not including the non-cooks.
    Everyone has something to contribute, even those who aren’t usually behind the stove. Encourage every family member to contribute, whether it’s a favorite store-bought sauce with a personal twist or a simple sandwich that’s been a comfort food. This inclusivity strengthens family bonds and ensures everyone sees themselves in the pages.

    Sin #6 – Not sharing your cookbook when you’re done.
    A family cookbook is an ideal gift for current and future generations. It’s also a lovely way to share your family’s culinary heritage with friends and extended family. Don’t keep it to yourself—spread the love and let others enjoy your family’s recipes.

    Sin #7 – Not using FamilyCookbookProject.com to create your family cookbook.
    With our experience and resources, FamilyCookbookProject.com simplifies the process of assembling and publishing your family cookbook. Our tools make it easy to gather recipes, design pages, and organize content, all while having fun. Let us help you preserve your culinary legacy in a beautifully crafted cookbook that can be cherished for generations.

    Avoiding these common pitfalls will help ensure that your family cookbook becomes a cherished collection of recipes and memories that celebrate your family’s unique flavors and stories.


    Bill Rice is Co-Publisher of the Great Family Cookbook Project, a website that helps families and individuals collect, preserve and share food memories by creating their own printed personal cookbooks. He is the author of The Wellfleet Oyster Cookbook (Available on Amazon) and the Cape Cod Cocktail Cookbook, both created using FamilyCookbookProject.com. He is also editor of the Donovan Family Cookbook, now it’s third printing.

    Follow Family Cookbook Project on Facebook, Instagram, Twitter and Pinterest!

  • Pro Tip: Adding a Co-Editor

    Pro Tip: Adding a Co-Editor

    With our system, it’s really best that only one person serve as Editor – “too many cooks spoil the soup” so to speak.  You really need one person with full control or you cannot keep up with what might have been changed.  That said, you have the ability to promote any contributor to the level of Co-Editor.  To do so, go to Communication Center and click on their name in the list.  Check the box next to their user name and update.  The next time they login they will have access to:

    • Editor Activities Menu with all tools
    • Add/Edit any recipe to help with cookbook editing
    • Communication Center – they can promote/demote users as Co-Editors

    We highly recommend allowing only trusted helpers serving as co-editor.

    Here is a quick tutorial video that shows you how:  https://www.youtube.com/watch?v=99NcfrI-PKM


    Bill Rice is Founder and Co-Publisher of the Family Cookbook Project, the leading online cookbook publisher with a website that helps families and individuals collect, preserve and share food memories by creating their own printed custom cookbooks. He is the author of The Wellfleet Oyster Cookbook and the Cape Cod Cocktail Cookbook (Available on Amazon), both created using FamilyCookbookProject.com. He is also editor of the Donovan Family Cookbook, now it’s third printing and is an avid genealogist tracing his family back to the 1600’s.

    Follow Family Cookbook Project on Facebook, Instagram, Twitter TikTok, YouTube and Pinterest!

  • Cooking with Confidence: Creating A Kid-Friendly Cookbook for Budding Chefs

    Cooking with Confidence: Creating A Kid-Friendly Cookbook for Budding Chefs

    Creating a Kid-Friendly Cookbook with Simple Recipes Designed to Help Kids Learn About Recipes and Cooking for Themselves

    Introducing children to the kitchen at an early age not only helps them develop essential life skills but also fosters creativity, independence, and a love for food. A kid-friendly cookbook is a wonderful way to guide children in learning how to cook simple meals while familiarizing themselves with the kitchen. By providing easy-to-follow recipes that cater to their abilities, you empower kids to cook for themselves and build confidence in the process. In this article, we’ll explore how to create a kid-friendly cookbook that encourages children to have fun while learning about food and cooking.

    Why Create a Kid-Friendly Cookbook?

    A kid-friendly cookbook offers several benefits for children and their families:

    •Educational: Cooking teaches kids about math (measuring ingredients), science (how ingredients change when cooked), and following instructions.

    •Healthy Habits: Learning to cook encourages kids to make healthier food choices and understand what goes into their meals.

    •Confidence and Independence: Kids feel proud when they can prepare meals or snacks on their own, boosting their self-esteem.

    •Family Bonding: Cooking together as a family creates memories and fosters teamwork.

    By creating a cookbook tailored to children, you can make the process of learning to cook accessible, engaging, and safe. here is some tips from the leader in custom cookbook creation FamilyCookbookProject.com:

    Choose Simple, Kid-Friendly Recipes
    When selecting recipes for your kid-friendly cookbook, focus on meals that are easy to prepare and don’t require advanced cooking techniques or complicated ingredients. Keep in mind the age range and skill level of the children who will be using the cookbook. Here are some ideas for beginner-friendly recipes:

    Breakfast Recipes

    •Banana Pancakes: Easy-to-mix ingredients, minimal cooking time, and lots of fun flipping pancakes.

    •Yogurt Parfaits: Layering yogurt, granola, and fruit allows kids to create their own healthy breakfast with minimal supervision.

    •Scrambled Eggs: Learning how to scramble eggs is a basic but essential skill for young chefs.

    Lunch and Dinner Recipes

    •Mini Pizzas: Kids can use pre-made dough or English muffins and add their favorite toppings.

    •Grilled Cheese Sandwiches: A simple, classic recipe that teaches kids about using a stove safely.

    •Tacos: Allow kids to build their own tacos by setting out various fillings like cooked meat, beans, cheese, and vegetables.

    Snacks

    •Fruit Kabobs: Skewering different fruits is easy, fun, and colorful for kids.

    •Homemade Trail Mix: Kids can combine nuts, dried fruits, and pretzels for a healthy, customizable snack.

    •Ants on a Log: Celery sticks topped with peanut butter and raisins make a fun and healthy snack.

    Desserts

    •No-Bake Cookies: These are perfect for younger children as they don’t require an oven.

    •Frozen Yogurt Pops: Kids can mix yogurt with fruit or juice, pour it into molds, and freeze them.

    Make the Recipes Fun and Engaging

    To hold kids’ attention and encourage them to cook, it’s important to make the recipes fun and visually appealing. Here’s how to keep young chefs engaged:

    •Use Simple, Clear Instructions: Write recipes using simple, concise language, and break down the steps into small, manageable tasks. Avoid complicated culinary terms and instead use familiar phrases, like “stir,” “mix,” or “scoop.”

    •Incorporate Visual Aids: Include pictures of the finished dish and step-by-step images where possible. This helps children follow along more easily and see what each step should look like.

    •Add Fun Names for Recipes: Give the recipes playful or descriptive names that appeal to kids. For example, “Rainbow Veggie Wraps” or “Superhero Smoothies” can make the process feel more like an adventure.

    •Encourage Creativity: Allow room for kids to personalize recipes by adding their own toppings, changing ingredients, or coming up with new combinations. For example, in a “build-your-own sandwich” recipe, provide options for different spreads, vegetables, and proteins.

    Focus on Safety in the Kitchen

    One of the main concerns when kids are in the kitchen is safety. A kid-friendly cookbook should emphasize safe cooking habits in every recipe and provide guidance on how to handle potential hazards. Here’s how to ensure safety remains a top priority:

    •Include Safety Tips: Add a section on kitchen safety at the beginning of the cookbook. This can include reminders to wash hands, use oven mitts when handling hot items, and ask for adult help when using knives or the stove.

    •Highlight Adult Supervision Points: In each recipe, indicate where adult supervision is needed, such as when using the stove, oven, or sharp utensils. For example, “Have an adult help you slice the vegetables” or “Ask for help when placing the dish in the oven.”

    •Use Safe Cooking Tools: Recommend kid-friendly kitchen tools, such as plastic knives, small whisks, or child-sized measuring cups. These tools are often easier for children to handle and reduce the risk of injury.

    Teach Basic Cooking Skills

    The goal of a kid-friendly cookbook isn’t just to create meals but also to teach children essential cooking skills that they can build on as they grow. Include simple lessons throughout the cookbook, such as:

    •Measuring Ingredients: Explain how to measure wet and dry ingredients, and include visual cues for the correct amounts.

    •Mixing and Stirring: Teach kids how to properly stir and mix ingredients, helping them understand the importance of evenly combining items.

    •Using the Stove and Oven Safely: Include instructions on how to turn the stove on and off, as well as how to set the oven temperature. Make sure to emphasize the need for caution around heat.

    •Timing: Teach kids about using timers, both for baking and for keeping track of how long certain steps take. This can also introduce them to the concept of multitasking in the kitchen.

    Include Nutritional Information and Healthy Tips

    As kids learn to cook, it’s a great opportunity to introduce them to the importance of nutrition and healthy eating habits. Your cookbook can help kids understand how to make balanced meals and encourage them to choose healthy ingredients. Here are some tips for incorporating nutrition education:

    •Talk About Food Groups: Explain the different food groups—vegetables, fruits, proteins, grains, and dairy—and how they contribute to a healthy meal. You can even color-code the recipes based on the food groups involved.

    •Highlight Healthy Ingredients: Whenever possible, incorporate fresh vegetables, whole grains, and lean proteins into the recipes. For example, use whole-wheat bread for sandwiches or add spinach to smoothies.

    •Encourage Portion Control: Teach kids about portion sizes and how to create balanced meals that aren’t too heavy on any one type of food. For example, suggest adding a side salad or fruit to a meal to balance out more indulgent dishes like mac and cheese.

    Make it a Family Activity

    A kid-friendly cookbook can serve as a catalyst for family bonding. Encourage families to cook together by including group-friendly recipes or suggesting ways for parents and children to collaborate in the kitchen. Some ideas for making it a family activity include:

    •Divide Tasks by Age: For families with multiple children, suggest age-appropriate tasks for each child. For example, younger kids can help mix or measure ingredients, while older kids can handle more complex tasks like chopping or cooking.

    •Host a Family Cooking Night: Include a suggestion for a weekly or monthly family cooking night, where everyone works together to prepare a meal from the cookbook.

    •Celebrate Milestones: As kids learn new skills or master different recipes, encourage families to celebrate their progress. This could be as simple as rewarding them with a fun dessert from the cookbook or letting them choose the next recipe.

    Add Personalization and Fun Elements

    To make the cookbook more engaging for kids, add opportunities for personalization. Let children make the cookbook their own by including:

    •A “My Favorite Recipes” Section: Allow space in the back of the cookbook for kids to write down their own favorite recipes or modifications to existing recipes.

    •Stickers and Colorful Illustrations: Add stickers or colorful illustrations throughout the book to make it more interactive and visually appealing.

    •Recipe Rating Pages: Let kids rate each recipe they try using a star system or a “thumbs up/thumbs down” rating system. This makes the process more interactive and helps kids feel involved in evaluating their culinary creations.


    Creating a kid-friendly cookbook is a fantastic way to help children learn valuable cooking skills while making the kitchen a fun and safe space for exploration. By including simple recipes, focusing on safety, and incorporating educational elements like nutrition and basic cooking techniques, you can encourage children to develop a lifelong love of cooking. Best of all, a kid-friendly cookbook offers opportunities for families to bond, create memories, and enjoy the process of preparing meals together. With the right recipes and a dash of creativity, kids will be well on their way to becoming confident, capable young chefs!


    Bill Rice is Founder and Co-Publisher of the Family Cookbook Project, the leading online cookbook publisher with a website that helps families and individuals collect, preserve and share food memories by creating their own printed custom cookbooks. He is the author of The Wellfleet Oyster Cookbook and the Cape Cod Cocktail Cookbook (Available on Amazon), both created using FamilyCookbookProject.com. He is also editor of the Donovan Family Cookbook, now it’s third printing and is an avid genealogist tracing his family back to the 1600’s.

    Follow Family Cookbook Project on Facebook, Instagram, Twitter TikTok, YouTube and Pinterest!

     

  • What To Do Once You’ve Printed Your Family Cookbook

    What To Do Once You’ve Printed Your Family Cookbook

    You’ve done it. You have collected your recipes, got others to contribute their recipes, picked a cover and recipe layouts and used Family Cookbook Project.com to publish your very own cookbook.

    Now what?

    The good news is just because you publish your first cookbook doesn’t mean that you have to be done.

    Here are some ideas on how to continue using your Family Cookbook Project.com account

    Online recipe box – Many people find that they continue adding new recipes to their account even after publishing and printing their personal cookbook. It’s easy to add recipes and it’s convenient to have them all in one place.

    Use the mobile app – Access to your online recipes is only a few clicks away with the award-winning Family Cookbook Project mobile app for both Apple iPhones and android devices.

    Print a second volume for your family cookbook – Often times once a book is printed new people see its value and want to contribute recipes. Creating a second volume for your family cookbook is a great way to get additional people involved and to keep the project alive.

    Create a Best of cookbook – Our family cookbook has over 250 recipes but I personally have about 50 that I like cooking all the time. I created a separate cookbook just of my go to recipes which allows me to find what I’m looking for so much quicker. I printed one copy and keep it right into the kitchen where I can find it quickly.

    Create a personal cookbook – If you have created a family cookbook, you were allowed only to include so many of your recipes in order to give everyone a chance to participate. Consider creating a cookbook with just your recipes which will allow you to enter many more then or in the family cookbook.

    Contribute to someone else’s family cookbook – Share your cookbook with friends and family and let them know you created at FamilyCookbookProject.com and when they ask you to contribute recipes to their cookbook, you can use the handy recipe transfer tool and select which recipes you want to contribute without having to type any of them in a second time!

    Create a fundraising cookbook – Does your church ,school, scout troop or community organization need to raise funds? Suggest a fundraising cookbook and use our system to manage the recipes. Our CookbookFundraiser.com site uses much of the same programming you used and can be a great help to your community group.


    Bill Rice is Founder and Co-Publisher of the Great Family Cookbook Project, a website that helps families and individuals collect, preserve and share food memories by creating their own printed personal cookbooks. He is the author of The Wellfleet Oyster Cookbook (Available on Amazon) and the Cape Cod Cocktail Cookbook, all created using FamilyCookbookProject.com. He is also editor of the Ultimate Donovan Family Cookbook, now it’s third printing and is an avid genealogist tracing his family back to the 1600’s.

    Follow Family Cookbook Project on Facebook, Instagram, Twitter and Pinterest!

  • How to Grow Your Own Mushrooms: What Is Needed and Which Varieties Are the Easiest to Grow

    How to Grow Your Own Mushrooms: What Is Needed and Which Varieties Are the Easiest to Grow

    Mushrooms have become increasingly popular for their unique flavors, health benefits, and versatility in cooking. Growing your own mushrooms at home is not only a rewarding experience but also ensures that you have a fresh supply of these culinary delights right at your fingertips. The process is easier than you might think, and with the right setup, you can grow mushrooms in your own home or garden. This guide will walk you through what you need to get started and highlight the easiest mushroom varieties to grow.

    Why Grow Your Own Mushrooms?

    Before diving into the process, it’s worth considering the many benefits of growing your own mushrooms:

    •Freshness: Homegrown mushrooms are fresher and more flavorful than store-bought varieties.

    •Cost-Effective: While purchasing specialty mushrooms can be expensive, growing your own is a more economical option in the long run.

    •Nutritional Benefits: Mushrooms are packed with nutrients, including protein, vitamins, and antioxidants.

    •Sustainability: Growing mushrooms at home reduces the need for packaging and transportation, making it an environmentally friendly choice.

    What You Need to Get Started

    Growing mushrooms requires a few basic supplies and an understanding of the conditions they need to thrive. Here’s what you’ll need to set up your mushroom-growing operation:

    Spores or Spawn

    The first step in growing mushrooms is obtaining mushroom spores or spawn. Spores are the mushroom equivalent of seeds, while spawn is a young fungal network that can be planted. Spawn is typically easier for beginners, as it skips the spore germination stage and ensures faster growth.

    You can purchase mushroom spawn or spore kits online or at specialty garden centers. Make sure to select the spawn of the mushroom variety you want to grow (more on that later).

    Growing Medium (Substrate)

    Mushrooms grow on specific materials called substrates. Different varieties of mushrooms thrive on different substrates, so choosing the right one is key to successful growth. Common substrates include:

    •Straw: Ideal for growing oyster mushrooms.

    •Hardwood Sawdust or Chips: Great for shiitake and other wood-loving mushrooms.

    •Compost or Manure: Perfect for button mushrooms and portobellos.

    •Coffee Grounds: A sustainable option for growing oyster mushrooms.

    You can either prepare your own substrate or buy pre-sterilized substrate from a supplier to make the process easier.

    Growing Containers

    You’ll need a container to hold the substrate and spawn. Containers can range from plastic bags to specialized mushroom-growing boxes. Some mushrooms, like oyster varieties, do well in large plastic buckets or even repurposed plastic bottles. If you’re growing mushrooms indoors, you may need trays or bags to house the growing medium.

    Humidity and Temperature Control

    Mushrooms thrive in humid environments with specific temperature ranges. Depending on the variety, you’ll need to monitor and adjust both humidity and temperature to provide the best growing conditions:

    •Humidity: Mushrooms require high humidity, typically between 80-90%. You can increase humidity by misting your growing area with water or using a humidifier if growing indoors.

    •Temperature: Different varieties of mushrooms have different temperature needs. Most prefer a range between 55°F and 75°F, though some, like shiitakes, may require cooler conditions for fruiting.

    Lighting

    While mushrooms don’t need sunlight to grow, they do benefit from indirect light or minimal artificial lighting. Avoid direct sunlight, as it can dry out the substrate and harm the mycelium (the network of fungal threads that produce mushrooms).

    Sterile Environment

    Mushrooms are sensitive to contamination from bacteria and mold. It’s crucial to maintain a clean and sterile growing environment. When handling spawn or substrate, always wash your hands and use clean equipment to minimize the risk of contamination.

    Step-by-Step Process for Growing Mushrooms

    Once you have your supplies ready, follow these steps to grow your mushrooms:

    1.Prepare the Substrate: Sterilize the substrate (if necessary) to kill off any competing organisms. This can be done by heating the substrate in a pressure cooker or steaming it in a large pot. If you’re using a pre-sterilized substrate, skip this step.

    2.Inoculate the Substrate: Mix the mushroom spawn into the prepared substrate. Ensure that the spawn is evenly distributed throughout the substrate for optimal growth.

    3.Incubate the Spawn: Place the inoculated substrate in your growing container and store it in a dark, warm environment. The mycelium will begin to colonize the substrate during this incubation phase, which can take anywhere from a few weeks to a couple of months, depending on the mushroom variety.

    4.Fruiting Stage: Once the mycelium has fully colonized the substrate, move the container to a location with indirect light and increased humidity. Lower the temperature slightly (depending on the variety) to encourage fruiting. Continue misting the substrate regularly to maintain humidity.

    5.Harvest Your Mushrooms: Mushrooms will begin to form and grow over the course of several days or weeks. Harvest them when they reach the desired size, usually when the caps open up. Gently twist or cut them off at the base.

    Easiest Mushroom Varieties to Grow

    If you’re new to mushroom cultivation, it’s best to start with easy-to-grow varieties. Here are some popular options for beginners:

    Oyster Mushrooms

    Oyster mushrooms are one of the easiest and most forgiving varieties for beginners. They grow quickly and can thrive on a wide range of substrates, including straw, coffee grounds, and sawdust. Oyster mushrooms are known for their delicate flavor and meaty texture, making them a favorite in many dishes.

    •Growing Conditions: Oyster mushrooms prefer temperatures between 55°F and 65°F with high humidity.

    •Substrate: Straw, coffee grounds, or hardwood sawdust.

    •Time to Harvest: Typically 3 to 4 weeks after inoculation.

    Button Mushrooms (Agaricus bisporus)

    Button mushrooms, along with their mature forms, cremini and portobello mushrooms, are widely consumed and relatively easy to grow. They thrive in composted manure and are well-suited for indoor growing.

    •Growing Conditions: Button mushrooms prefer cooler temperatures, around 55°F to 65°F.

    •Substrate: Composted manure or enriched soil.

    •Time to Harvest: Around 3 to 4 weeks.

    Shiitake Mushrooms

    Shiitake mushrooms are a bit more challenging but can be highly rewarding to grow. They typically grow on hardwood logs or sawdust blocks. Shiitakes have a robust, earthy flavor and are packed with health benefits.

    •Growing Conditions: Shiitake mushrooms prefer temperatures between 50°F and 70°F. They can tolerate slightly lower humidity levels than other varieties.

    •Substrate: Hardwood logs or sawdust.

    •Time to Harvest: It can take several months for shiitakes to fruit, but once established, they can continue producing for years.

    Lion’s Mane Mushrooms

    Lion’s Mane mushrooms are known for their unique appearance and lobster-like flavor. They grow well indoors and require little maintenance, making them a great choice for beginners.

    •Growing Conditions: Lion’s Mane thrives in temperatures around 65°F to 75°F and requires high humidity.

    •Substrate: Hardwood sawdust or a blend of hardwood and other organic materials.

    •Time to Harvest: Around 3 to 4 weeks.


    Growing your own mushrooms is a rewarding project that provides fresh, flavorful produce while allowing you to learn about the fascinating world of fungi. Whether you’re growing oyster mushrooms in coffee grounds or shiitakes on logs, the process is relatively simple once you understand the basic requirements of each variety. With the right conditions, you can enjoy fresh mushrooms year-round and add a delicious homegrown touch to your favorite recipes.

    Bill Rice is Founder and Co-Publisher of the Family Cookbook Project, the leading online cookbook publisher with a website that helps families and individuals collect, preserve and share food memories by creating their own printed custom cookbooks. He is the author of The Wellfleet Oyster Cookbook and the Cape Cod Cocktail Cookbook (Available on Amazon), both created using FamilyCookbookProject.com. He is also editor of the Donovan Family Cookbook, now it’s third printing and is an avid genealogist tracing his family back to the 1600’s.

    Follow Family Cookbook Project on Facebook, Instagram, Twitter TikTok, YouTube and Pinterest!